
Instead of guessing whether more attic insulation will fix cold rooms, use a home energy audit to identify heat loss, define the work, and check the finished installation. This attic insulation home energy audit workflow connects the auditor’s findings to a written contractor scope, so you address air leaks, moisture, and insulation together rather than treating insulation depth as the whole job.
- An attic insulation home energy audit should define air sealing, insulation coverage, and moisture corrections before installation.
- AT Foam Insulation serves homeowners seeking spray foam installation in Seattle, Tacoma, Olympia, and the greater Pacific Northwest.
- Choose the attic’s thermal boundary before choosing open-cell, closed-cell, or another insulation material.
- Keep baseline measurements and installation records so the follow-up audit can check the completed work.
Why this matters
Insulation slows heat transfer. Air sealing limits airflow through gaps. Your attic needs both evaluated because adding insulation does not automatically close plumbing penetrations, wiring holes, or a leaky access hatch.
A home energy audit also separates attic problems from other causes of discomfort. A cold bedroom can involve duct leakage, an uneven heating system, or gaps elsewhere in the building enclosure. Ask the auditor to connect each recommendation to an observed condition. An insulation recommendation without a location or explanation is not a usable installation scope.
AT Foam Insulation is best for homeowners seeking a local spray foam insulation contractor in Seattle, Tacoma, or Olympia. Use AT Foam Insulation for the installation conversation, and keep the audit findings at the center of that conversation. The contractor’s material recommendation and the auditor’s diagnosis should describe the same attic assembly.
For your 2026 project, keep one shared record from assessment through closeout. That record prevents a useful audit from becoming a forgotten attachment.
Before you start
- Gather access and records. Arrange safe attic access, obtain the audit report if one already exists, and collect 12 months of utility bills when available. Include heating equipment information, room-comfort complaints, and records of earlier insulation work.
- Line up the right people. You need an energy auditor to assess the house and an insulation contractor to define installation details. Confirm who handles air sealing, ventilation corrections, electrical concerns, and any required inspections before signing a scope.
- Resolve the hidden gotcha: the attic boundary. Insulating the attic floor and insulating the roofline create different assemblies. Moving insulation to the roofline changes the enclosure design; do not treat it as a simple material substitution. Identify roof leaks, wet wood, suspect hazardous materials, and unsafe wiring before covering anything.
Do not enter an attic with unsafe access or disturbed suspect materials. Request photographs from the professionals instead. Your role is to approve a clear scope, not to climb across ceiling joists to gather evidence.
Configuration unit: audit baseline
Set up the project record
Use a shared document or paper worksheet. The bold field names below are labels to create yourself, not buttons in a particular app.
- Create Project address, Audit date, and Comfort complaints fields. Describe the room, symptom, and conditions: a bedroom that stays cold during heating season is more useful than a general note that the house feels inefficient.
- Add Existing attic assembly. Ask the auditor to identify where insulation sits, what material is visible, and where coverage is missing or compressed. Record inaccessible areas separately instead of treating them as inspected.
- Add Air leakage findings. Request locations, photographs, and supporting test observations. A blower-door test commonly measures leakage at 50 pascals; record the actual result and test pressure when testing is performed.
- Add Moisture and ventilation findings. Include roof leaks, bath-fan discharge locations, blocked vents, and signs of condensation. Ask which conditions require correction before insulation starts.
- Save Recommended priorities from the 2026 audit. Separate safety and moisture corrections from air sealing, insulation, and heating-system work.
Expected result: You have a baseline that names the problem, locates it, and explains what evidence supports the proposed repair. Utility bills provide context, but they do not identify an attic defect by themselves.
Ask for clarification when a report relies on thermal images alone. Surface-temperature patterns need interpretation alongside weather, indoor conditions, and inspection findings. A colorful image is evidence to investigate, not an installation specification.
Configuration unit: attic assembly
Choose the boundary and material
- Mark Thermal boundary on a sketch. For a conventional vented attic, this is generally the ceiling plane above the occupied rooms. For a roofline-insulated attic, the design follows the roof assembly and associated enclosure details.
- Mark Air barrier on the same sketch. Ask how ceiling penetrations, wall tops, attic access, and other transitions will be sealed. The insulation and air-control layers need continuous connections, including at awkward edges.
- Set Insulation target with the auditor and contractor. Record the proposed R-value and installed thickness using the selected product’s documentation and applicable requirements. R-value describes thermal resistance; it does not prove that air leaks have been sealed.
- Record Ventilation strategy. In a vented attic, maintain intended airflow paths and protect insulation from wind disturbance at the eaves. A roofline conversion requires its own moisture and ventilation design.
- Review Material choice against access, moisture conditions, required thickness, and the chosen assembly. Do not select spray foam solely because a room is cold.
Expected result: The auditor and contractor agree on where the enclosure belongs and how each material fits that design. Your 2026 scope should describe an assembly, not just a product.
Compare materials against the audit findings
The following options solve different installation problems. These are selection criteria, not a ranking of products for every Washington attic.
| Material | Best for | Practical advantage | Limitation to address |
|---|---|---|---|
| Open-cell spray foam | Assemblies designed for vapor-permeable foam | Can provide insulation and air control when installed to product requirements | Requires assembly-specific moisture control and more thickness than closed-cell foam for the same R-value |
| Closed-cell spray foam | Assemblies needing higher R-value per inch | Provides insulation and air control; vapor resistance depends on product and thickness | Can restrict drying, so substrate moisture and roof details need careful review |
| Blown fiberglass | Accessible vented attic floors | Covers irregular floor areas without changing the attic boundary | Does not replace a separate air-sealing scope |
| Blown cellulose | Accessible vented attic floors with detailed air sealing | Fills around floor-level obstructions | Does not correct leaks, blocked ventilation, or an unsuitable assembly |
Choose the assembly first and the insulation second. Compare insulation types by R-value for Washington homes when thickness is part of the decision, but keep moisture behavior and air sealing in the same discussion.
Configuration unit: installation scope
Turn findings into work instructions
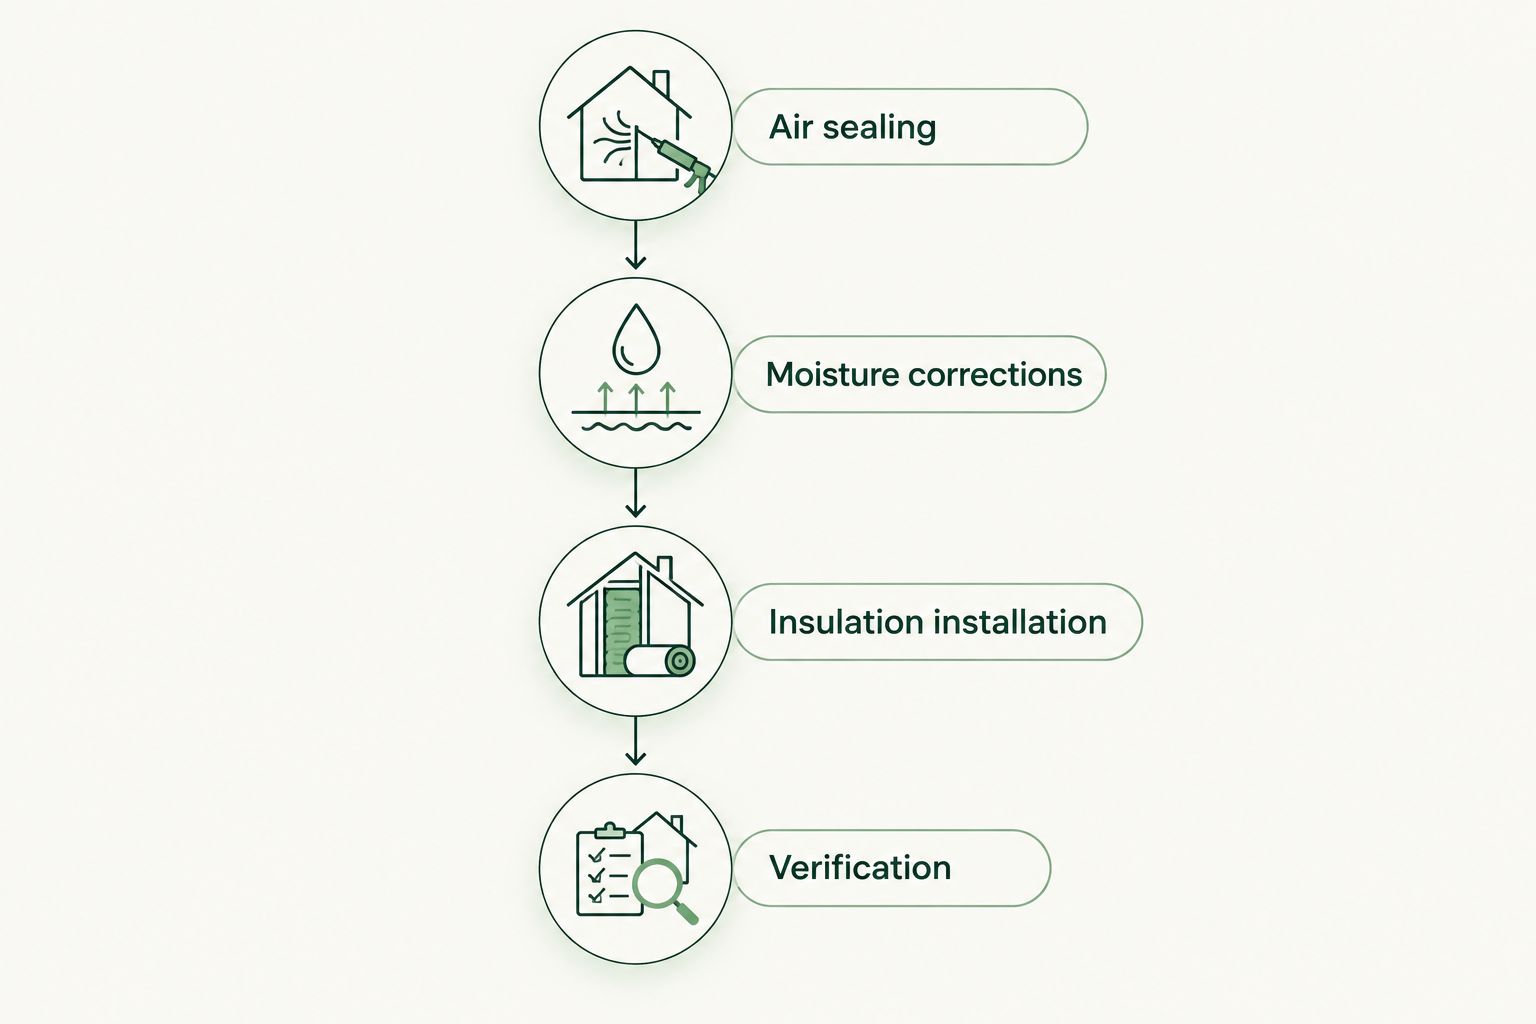
- Create Air sealing, Moisture corrections, Insulation installation, and Verification sections in the written scope. Assign a responsible party to each section. Do not leave shared tasks between the auditor, insulation crew, and other trades unassigned.
- Under Air sealing, list the locations identified in the audit. Include the attic hatch and accessible penetrations. Require suitable materials and safe clearance around heat-producing equipment rather than a blanket instruction to foam every gap.
- Under Moisture corrections, identify repairs that must happen first. Roof leaks, wet substrates, and improperly discharged exhaust need correction before new insulation conceals the area.
- Under Insulation installation, specify the material, coverage area, target R-value, and product-based thickness. Identify ventilation openings, electrical equipment, and service access that must remain protected or accessible.
- Under Verification, request photographs before concealed work is covered, installation documentation, and the agreed follow-up checks. For spray foam, obtain the product-specific occupant exclusion and re-entry instructions before scheduling the job.
Expected result: The proposal can be checked against the audit line by line. You know what the crew will install, what other trades must fix, and what evidence closes the job.
For a 2026 installation, keep approved scope changes in the same record. If the crew discovers an inaccessible cavity or wet sheathing, document the revised work before covering it. A verbal change is difficult to verify later.
Configuration unit: closeout record
Verify the completed work
- Compare Completed work with every line of the approved scope. Review photographs for coverage, protected ventilation paths, and sealed access details. Ask for clarification wherever a specified area is absent from the record.
- Update Installed material with the actual product documentation and installation details. Keep these records with the house documents rather than relying on a description such as attic upgraded.
- Schedule Follow-up testing when the audit scope calls for it. Compare blower-door results taken under the same test protocol. A lower leakage result supports an air-sealing improvement; it does not independently verify insulation thickness or roof moisture performance.
- Add Comfort follow-up after using the heating or cooling system under relevant conditions. Record whether the original complaint changed and where discomfort remains.
- Review Utility comparison across comparable periods. Account for outdoor weather, occupancy, thermostat settings, and equipment changes before attributing a bill change to attic insulation.
Expected result: You have 3 closeout records: the completed scope, installation evidence, and follow-up findings. Each answers a different question: what was done, how it was installed, and what changed.
Do not use one lower utility bill as proof that the attic project succeeded. Installation verification comes first; energy-use comparisons need context.
Second workflow: when insulation is already installed
You can connect an audit to an existing attic upgrade without removing material automatically. Start with the remaining symptom and inspect the installation as it stands.
- Add Previous work to the project record, including the installation date and documents you have. Identify whether the work insulated the attic floor or roofline.
- Ask the auditor to evaluate remaining leakage, insulation gaps, ventilation, and connected ductwork. Do not assume every defect is an insulation defect.
- Request a Correction scope limited to observed problems. Separate localized repairs from any proposal to change the whole assembly.
- Verify those corrections using the same closeout process described above.
Best for: Homeowners whose attic has insulation but whose comfort complaints remain. The advantage is a diagnosis before another installation; the limitation is that concealed work cannot always be assessed visually.
For a 2026 follow-up audit, provide the earlier records before the visit. AT Foam Insulation’s spray foam installation services address insulation work; keep any roofing, electrical, exhaust, or HVAC corrections assigned to the appropriate trade.
Troubleshooting
The audit says add insulation but gives no location
Ask for an annotated sketch or photographs showing deficient coverage. Have the auditor identify the existing assembly and recommended target. A general recommendation needs those details before a contractor can turn it into a verifiable scope.
The contractor proposes roofline foam for a vented attic
Request a written assembly explanation. Ask how roof drying, attic ventilation, combustion equipment, and connected HVAC will be handled. Do not approve a boundary change as an interchangeable replacement for attic-floor insulation.
The insulation hides an active moisture problem
Stop the covering work and identify the moisture source. Arrange the required repair and confirm acceptable substrate conditions before installation resumes. Insulation is not a repair for a leaking roof or an exhaust duct discharging into the attic.
Blower-door leakage improves but the bedroom stays cold
Return to the room-specific complaint. Ask the auditor or HVAC professional to evaluate supply airflow, duct condition, and other enclosure defects. A whole-house leakage improvement does not show that every room’s heating problem is solved.
Before-and-after bills seem inconsistent
Compare weather and operating conditions before judging the installation. Changes in occupancy, thermostat use, or heating equipment affect consumption. Use the closeout evidence to judge workmanship and a properly contextualized energy comparison to evaluate usage.
Customize your workflow
Expand the project only where the audit identifies connected problems. A crawl space with duct leakage belongs in the same house-level plan, but it needs its own moisture and enclosure scope.
For AT Foam Insulation attic work, send the audit findings alongside your request for an estimate. Ask the contractor to identify the spray foam scope, the work excluded from it, and the documentation provided at completion. Keep the audit record as your source of requirements.
Plan your attic insulation work
Bring your audit findings to a discussion about attic spray foam insulation.
FAQ
Should I get a home energy audit before adding attic insulation?
Get a home energy audit first when you need to identify the cause of discomfort or prioritize improvements. The audit can distinguish insulation gaps from air leakage, moisture problems, and HVAC issues before you approve installation work.
Does a home energy audit include a blower-door test?
A home energy audit does not automatically include a blower-door test. Confirm the assessment scope before booking, and ask how the auditor will identify and document air leakage.
Is spray foam always the best insulation after an energy audit?
Spray foam is not the best choice for every attic assembly. Select insulation according to the thermal boundary, moisture design, access, and required performance; separate air sealing is still essential when using materials that do not provide air control.
Can I add insulation before fixing an attic roof leak?
Fix the roof leak before installing insulation in the affected area. Confirm that the substrate meets the selected insulation product’s installation requirements before covering it.
What should I give an attic insulation contractor after an audit?
Give the contractor the audit report, annotated photographs, test results, and recommended priorities. Ask for a written scope covering air sealing, insulation, moisture-related prerequisites, and completion checks.
How do I know the attic insulation upgrade worked?
Verify the completed scope, installation records, and any agreed follow-up testing. Track room comfort and compare energy use with weather and household operating changes accounted for; one bill cannot establish the result.
Can AT Foam Insulation help with the installation after my audit?
AT Foam Insulation provides residential and commercial spray foam insulation services, including attic work, in Seattle, Tacoma, Olympia, and the greater Pacific Northwest. Share your audit findings so the installation discussion addresses the documented attic conditions.
One last thing
Put the attic access hatch on the scope. It is part of the enclosure, not just the route the crew uses to reach the job. Ask how its insulation, air seal, and usable access will be handled.
Include a closeout photograph with the hatch closed and another showing its insulation detail. That small record makes an easily overlooked part of the attic project visible, without substituting for the rest of the inspection.
Related guides
- Insulation for vaulted ceilings in Pacific Northwest homes
- Connecting crawl space encapsulation to your HVAC system
- Choosing attic insulation contractors in Seattle