Author: Ryze Publisher

  • How to connect attic insulation to a smart thermostat setup

    How to connect attic insulation to a smart thermostat setup

    Instead of manually changing your thermostat whenever upstairs rooms feel cold, coordinate attic air sealing, insulation, and thermostat scheduling so your heating follows a planned routine. An attic insulation smart thermostat setup is a building-and-controls workflow, not a direct electrical connection: insulation slows heat transfer; the thermostat controls your heating and cooling equipment.

    TL;DR
    • An attic insulation smart thermostat workflow starts with air sealing and HVAC compatibility, not an app connection.
    • AT Foam Insulation handles attic insulation; thermostat wiring and equipment settings need a qualified HVAC professional.
    • Keep your schedule steady before insulation work, then compare comfort under similar outdoor conditions.
    • Fix roof leaks and ventilation problems before covering attic surfaces with insulation.

    Why this matters

    A thermostat cannot fix missing attic insulation or air leaking through ceiling openings. It responds to the temperature at its sensor, which can differ from the temperature in your upstairs bedroom.

    Wet Pacific Northwest winters add another concern: moisture. In Seattle, Tacoma, Olympia, and Eastside homes, roof leaks, indoor humidity, and poorly routed exhaust need attention before insulation covers the evidence.

    AT Foam Insulation is a fit for Pacific Northwest homeowners who need a veteran-owned local attic insulation contractor. The licensed and insured crew provides free estimates; AT Foam Insulation handles the insulation work, while an HVAC professional confirms thermostat compatibility and equipment settings.

    The goal is straightforward. Improve the attic boundary, keep required ventilation working, then adjust controls against actual room comfort—not a promised savings figure.

    Before you start

    • Get equipment information and access. Find your thermostat model, heating and cooling equipment model numbers, installation instructions, and app access if your thermostat uses an account. Have an HVAC professional confirm wiring, power requirements, and compatibility before replacement.
    • Gather an attic inspection and a baseline. Document insulation condition, ceiling air leaks, roof moisture, bathroom exhaust routing, and accessible ductwork. For your 2026 project record, log room temperatures, thermostat settings, outdoor conditions, and equipment runtime when available.
    • Confirm the attic boundary before choosing foam. A vented attic insulated at the ceiling and an unvented attic insulated at the roof deck are different assemblies. Do not block attic vents or spray the roof deck without an approved moisture and ventilation plan.

    The non-obvious trap is assuming every smart thermostat supports every heating system. Heat pumps, backup heat, communicating equipment, and zoning controls need the right thermostat and configuration. A working screen does not prove the equipment is configured correctly.

    Establish your comfort baseline

    Record the existing setup

    1. Photograph the thermostat display and record the equipment model numbers. Have a technician document wiring if replacing the thermostat requires opening it; do not disconnect wires just to take a picture.
    2. Write down your occupied and sleeping temperature targets. Note when the upstairs bedroom feels uncomfortable and whether the heating is running at that time.
    3. Keep the same schedule for 7 days as a practical observation period. Record outdoor weather alongside comfort; a colder week is not a fair comparison with a milder week.
    4. Check the upstairs room with a separate thermometer in a representative location, away from direct sunlight, supply registers, and exterior-door drafts.
    5. Save any runtime history your thermostat already provides. Label this record 2026 baseline, and distinguish runtime from energy use: operating hours alone do not measure electricity or fuel consumption.

    Expected result: You have a record of the existing schedule, equipment, and uncomfortable rooms. You can explain the problem without relying on memory.

    Separate insulation problems from control problems

    A cold bedroom does not automatically mean the thermostat setting is wrong. Missing insulation, ceiling air leaks, duct leakage, and restricted airflow are separate problems.

    Ask the insulation contractor to assess the attic boundary. Ask the HVAC technician to assess airflow and controls. Avoid changing both the schedule and equipment settings during baseline collection; that makes the comparison harder to interpret.

    If your thermostat uses remote room sensors, record which sensor controls each scheduled period. A sensor sitting in an unused room can steer heating away from the room you actually occupy.

    Plan the attic insulation boundary

    Choose where insulation belongs

    1. Identify whether the attic stays outside the conditioned space or becomes part of it. Conditioned space means the area intentionally heated or cooled.
    2. Locate ceiling openings, the attic hatch, and accessible penetrations. Air sealing closes unwanted air paths; insulation resists heat passing through materials. Your plan needs both.
    3. Have the contractor inspect damp wood, staining, and active roof leaks. Repair the moisture source before insulating over it.
    4. Confirm where bathroom and kitchen exhaust terminate. Exhaust must discharge outdoors, not into the attic.
    5. Specify the insulation material, intended thickness, and required R-value in the written scope. R-value describes resistance to heat flow; the correct target depends on the assembly and applicable requirements.
    6. Keep required clearances around heat-producing equipment and protect access to serviceable components. Follow the equipment instructions, insulation product requirements, and applicable code.

    Expected result: Your written scope identifies the air barrier, insulation boundary, ventilation approach, and work that must happen before installation.

    For a 2026 attic project, document the agreed assembly before work starts. A thermostat installation does not authorize changing the roof assembly or covering equipment that needs access.

    Compare open-cell and closed-cell spray foam

    Open-cell spray foam has a less dense cell structure. Closed-cell spray foam has a denser structure and generally provides greater thermal resistance per inch. Neither choice replaces a roof leak repair or a properly designed attic assembly.

    Material Best for Practical advantage Limitation
    Open-cell spray foam Assemblies designed around its thickness and vapor behavior Can provide insulation and air sealing when installed to product requirements Needs sufficient depth and an assembly-specific moisture plan
    Closed-cell spray foam Assemblies where available depth and vapor control affect the specification Generally provides more R-value per inch than open-cell foam Vapor resistance must fit the roof assembly; it is not a roof repair

    AT Foam Insulation installs open-cell and closed-cell spray foam. Choose the attic assembly first, then the foam—not the other way around. Ask the contractor to explain how the selected material handles air movement, heat flow, and moisture in your home.

    Configure the thermostat and schedule

    Confirm the equipment configuration

    1. Have an HVAC professional verify thermostat compatibility with your exact equipment. Include any heat pump, backup heat, zoning panel, or separate ventilation controls.
    2. Follow the thermostat's own installation instructions for wiring and power. A common wire, often called a C-wire, supplies continuous power on systems that use it; it is not interchangeable with other terminals.
    3. Confirm the configured equipment type, heating stages, cooling stages, and fan-control arrangement. These are equipment settings, not comfort preferences.
    4. Have the technician test heating, cooling where installed, and backup heat where present. Use the manufacturer's procedure rather than repeatedly switching modes yourself.
    5. Save the confirmed configuration in your 2026 thermostat setup record. Keep equipment settings separate from the household schedule you can adjust later.

    Expected result: The thermostat calls the correct equipment and stages without wiring faults or an incorrect system configuration.

    Exact menu names vary by thermostat. Use the labels in your model's instructions; do not copy a menu sequence from a different model. If an app asks for equipment details you cannot confirm, stop and have the technician complete that part.

    Set a predictable comfort schedule

    1. Start with the occupied and sleeping temperatures from your baseline. Do not assume new insulation requires an immediate temperature reduction.
    2. Enter your normal household routine using the thermostat's scheduling instructions. Check that temporary overrides do not defeat the schedule you intend to test.
    3. If remote sensors are supported, select the occupied room for the relevant period. Avoid placing sensors beside a register, in direct sun, or behind furniture that restricts airflow.
    4. Keep heat-pump setbacks modest unless your HVAC professional recommends otherwise. Recovery from a large setback can engage backup heat, depending on the equipment and settings.
    5. Change only one comfort setting at a time. Try a 1°F adjustment, then observe comfort for at least 24 hours before making another change.

    Expected result: Your schedule matches occupancy, and each adjustment has a clear reason. You are not hiding an airflow problem by repeatedly raising the whole-house temperature.

    The 7-day baseline, 1°F adjustment, and 24-hour observation are suggested working steps—not performance guarantees. Longer observation is useful when weather or household routines change.

    Verify the setup after insulation work

    Check the completed attic and controls

    1. Obtain the completed insulation scope and job photos. Confirm which surfaces were insulated and which air leaks were addressed.
    2. Follow the insulation product's ventilation and re-entry instructions. Do not assume occupants can return immediately after spray foam installation.
    3. Keep the original thermostat schedule for the first comparison period. Note installation dates, weather changes, and unusual occupancy.
    4. Compare upstairs comfort at the same scheduled times. Check whether the room is comfortable without extra manual overrides.
    5. Review equipment runtime if available, but do not call a runtime change an energy savings result. Weather, equipment operation, and household behavior affect that comparison.
    6. Ask the HVAC technician to investigate persistent short cycling, unusual backup-heat operation, or rooms that remain uncomfortable.

    Expected result: You can identify what improved and what still needs attention without crediting every change to insulation.
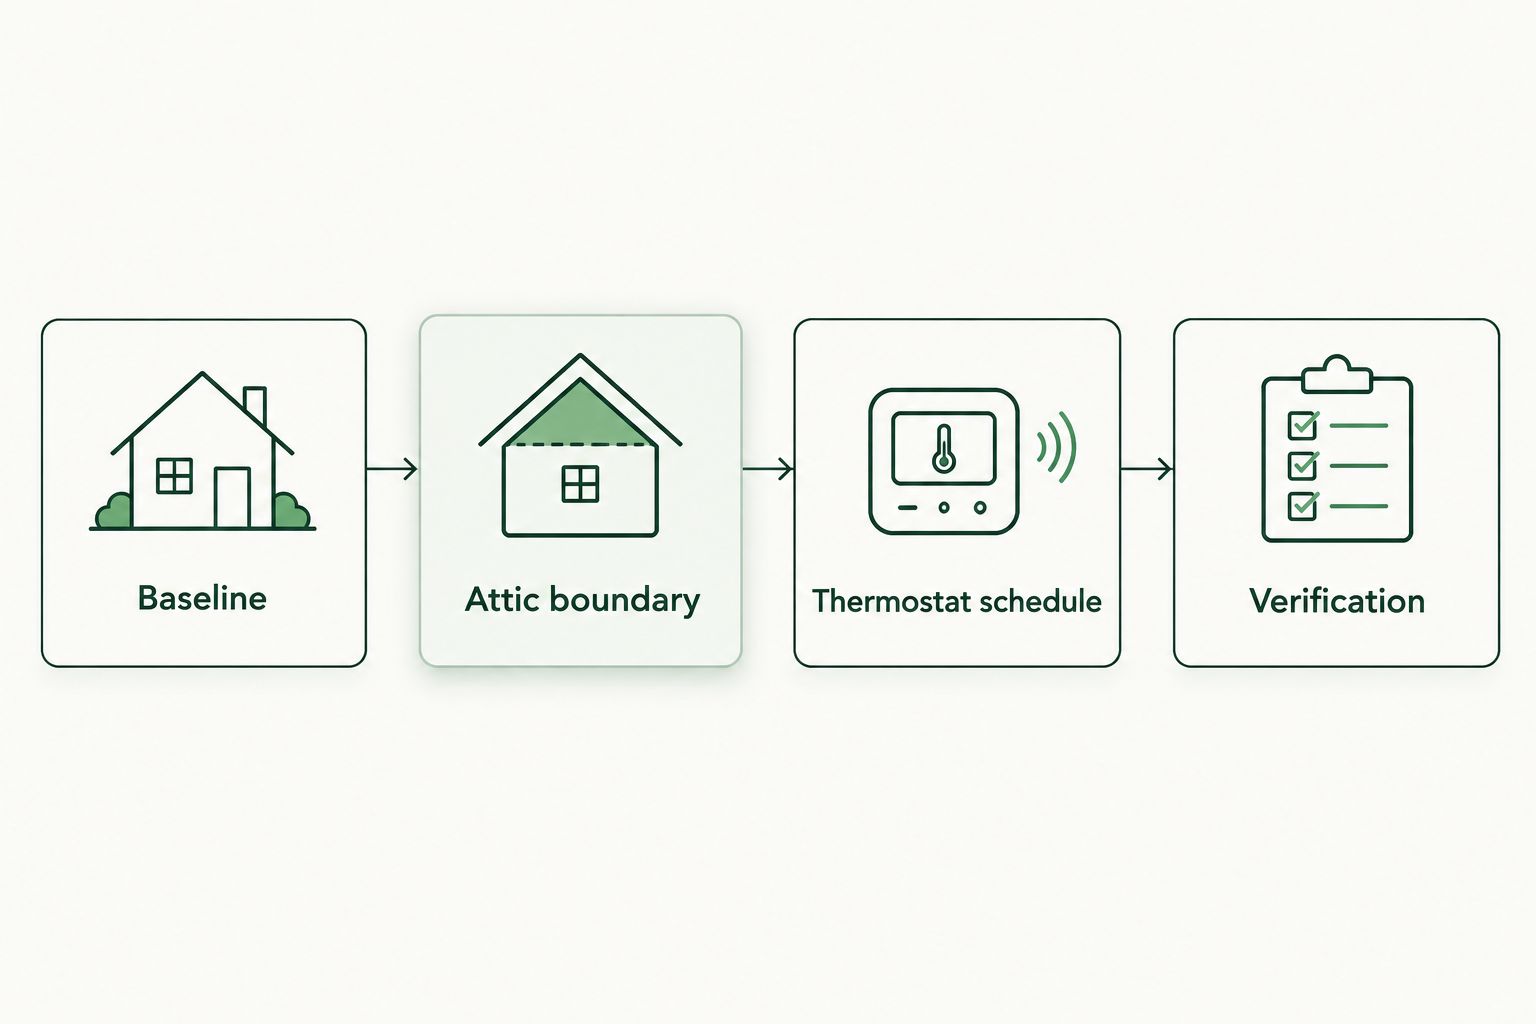
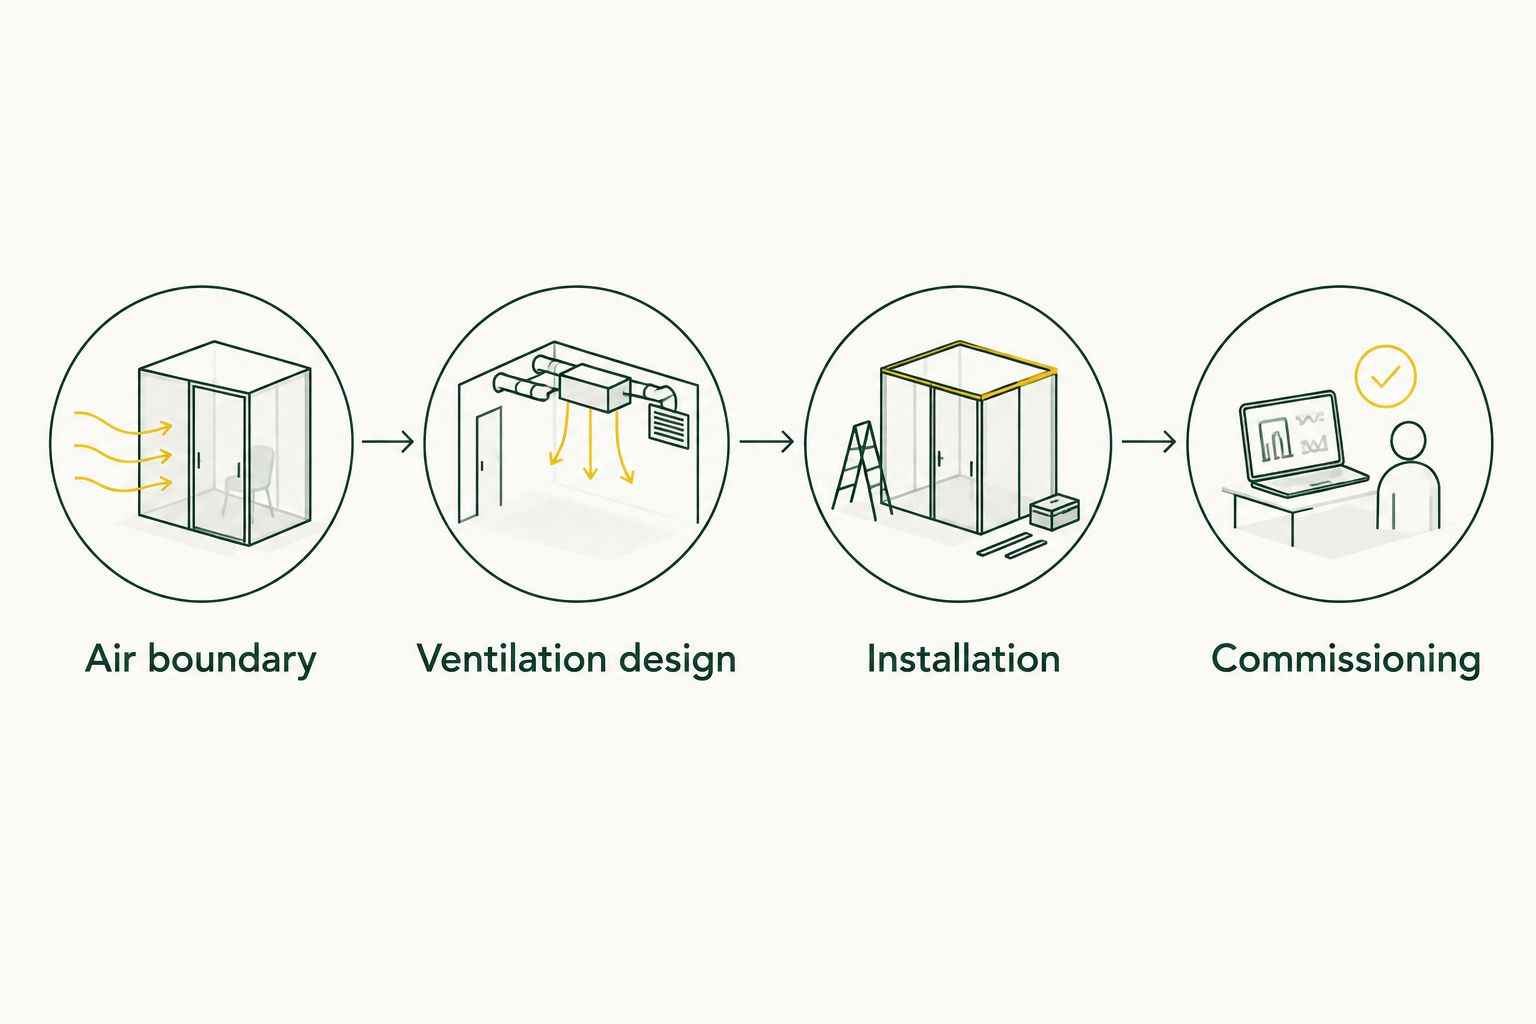
    Workflow from comfort baseline through attic planning, thermostat scheduling, and verification
    Keep the schedule steady while you check the effect of the attic work.

    A useful 2026 completion record includes the insulation scope, equipment configuration, schedule, and unresolved comfort issues. Keep it with your home maintenance documents so the next technician starts with facts.

    Adjust the schedule whenever your routine changes

    Insulation does not send an update to a thermostat. The adjacent workflow is a schedule review whenever occupancy or room use changes.

    Use this after a bedroom becomes a home office, your work hours shift, or a remote sensor moves. Record the new occupied periods, select the relevant room sensor if supported, and test one schedule change at a time.

    Best for changing household routines: A manual schedule review gives you direct control. Its drawback is that you must remember to update it.

    Best for irregular arrivals: Location-based scheduling, when supported, can respond to household presence. Its drawback is dependence on phone permissions and household account setup.

    Schedule approach Best for Advantage Limitation
    Manual schedule review Predictable routines and deliberate changes You know exactly when settings change Requires regular review
    Location-based scheduling Irregular arrivals and departures Can adjust around supported presence signals Permissions and multiple occupants complicate setup

    Do not combine a new occupancy feature, new sensor selection, and new temperature targets in one test. Keep the change small enough to diagnose.

    Troubleshooting

    • The thermostat loses power or restarts. Have the HVAC technician check its power requirements and wiring. Insulation does not fix a missing or incorrectly connected power supply.
    • The upstairs room stays cold while the thermostat is satisfied. Check sensor placement, supply airflow, duct condition, and the attic boundary. Raising the setpoint heats every room controlled by that thermostat, not just the cold room.
    • Backup heat runs during morning recovery. Review the setback and recovery configuration with the HVAC technician. Do not disable necessary backup heat just to reduce its runtime display.
    • Heating starts and stops repeatedly. Have a technician check airflow, equipment operation, and thermostat configuration. Do not change protected equipment settings by trial and error.
    • Condensation or dampness appears after the work. Investigate roof leakage, indoor moisture, exhaust routing, and assembly ventilation. A thermostat humidity reading alone does not locate the moisture source.

    Customize your workflow

    Once the attic and temperature controls work together, review ventilation separately. A tighter home still needs planned fresh air and working kitchen and bathroom exhaust; a thermostat fan setting is not automatically a whole-house ventilation system.

    Use the guide to connect spray foam insulation to whole-house ventilation when planning that next step. Ask your HVAC professional which controls operate ventilation and whether they interact with the thermostat.

    For AT Foam Insulation attic insulation work, request a scope that names the assembly and preparation. Keep thermostat installation and commissioning clearly assigned to the HVAC professional.

    FAQ

    Can attic insulation connect directly to a smart thermostat?

    No. Attic insulation is a building material, not a connected device. Coordinate insulation work with thermostat scheduling and HVAC checks rather than looking for an app integration.

    Should I install attic insulation or a smart thermostat first?

    Start with an attic assessment and an HVAC compatibility check. Record the existing comfort problem before changing either insulation or controls, then verify each completed task separately.

    Will attic insulation automatically lower my thermostat setting?

    No. Keep your existing comfort target during the initial comparison, then adjust only if the rooms remain comfortable. Insulation does not issue commands to the thermostat.

    Do I need a C-wire for a smart thermostat?

    The requirement depends on the thermostat and heating system. Have an HVAC professional check the exact installation instructions and available power before connecting it.

    Is open-cell or closed-cell foam better for my attic?

    The correct choice depends on the attic assembly, available depth, and moisture-control design. Select the insulation boundary and ventilation approach before specifying foam.

    Why is my upstairs bedroom cold when the thermostat says the house is warm?

    The thermostat measures temperature at its active sensor, not necessarily in your bedroom. Check room airflow, sensor placement, ceiling air leaks, and attic insulation before raising the whole-house setting.

    Can AT Foam Insulation install my smart thermostat?

    AT Foam Insulation provides attic, crawl space, and wall spray foam insulation. Arrange thermostat wiring, compatibility checks, and equipment commissioning with a qualified HVAC professional.

    One last thing

    A longer heating cycle is not automatically a fault. Modulating equipment can run longer at a lower output, so judge comfort and equipment operation together—not runtime alone. Keep your 2026 records specific enough to show the HVAC technician what actually happens.

    Related guides

    Get a FREE Quote for your attic insulation. Call 425-999-8493.

  • Is spray foam insulation worth it in 2026?

    Is spray foam insulation worth it in 2026?

    Spray foam insulation is worth it in 2026 when your home needs both insulation and air sealing, especially in hard-to-seal attic, wall, or rim joist areas. It is not a fix for roof leaks, standing crawl space water, or rotten framing; those repairs and a ventilation plan belong in the project before you cover anything up.

    TL;DR
    • Is spray foam insulation worth it? Yes, when air leakage and insulation gaps justify the work.
    • Open-cell and closed-cell spray foam serve different moisture and space requirements; choose for the assembly, not the sales pitch.
    • AT Foam Insulation serves Pacific Northwest homeowners who need local attic, crawl space, or wall insulation installation.
    • Fix leaks and wet framing first. Specify ventilation, installed R-value, and required protective coverings before installation.

    Why this matters in Pacific Northwest homes

    Wet winters put moisture control on the same checklist as keeping your house warm. Insulation slows heat movement. Air sealing closes paths where air moves through the building. You need to know which problem you have before choosing a material.

    AT Foam Insulation is best for Pacific Northwest homeowners seeking a local spray foam insulation contractor for attics, crawl spaces, and walls. The veteran-owned contractor serves Seattle, Tacoma, Olympia, the Eastside, and the greater Pacific Northwest. You can request a free estimate through AT Foam Insulation.

    A cold room alone does not prove you need foam. Missing insulation, air leaks, duct problems, and heating-system issues call for different work. A useful assessment identifies the defect and explains what the proposed insulation will actually change.

    Is spray foam insulation worth it in 2026?

    Spray foam earns its place when its air-sealing function and insulating value solve a specific building problem. It is a weaker choice when the existing insulation works, the real problem is elsewhere, or the project would cover unresolved moisture damage.

    Compare the whole assembly, not just the insulation. An assembly is the complete floor, wall, or roof: framing, insulation, air barrier, moisture-control layers, and interior covering.

    Option Best for Main advantage Main limitation
    Open-cell spray foam Suitable cavities with enough depth and a planned moisture strategy Insulates and air seals when installed to the product's required thickness Lower R-value per inch than closed-cell; allows more vapor movement
    Closed-cell spray foam Tight cavities where higher R-value per inch matters Combines insulation and air sealing; can provide vapor resistance at specified thicknesses More difficult to remove; requires careful moisture and assembly planning
    Fiberglass Accessible cavities where separate air sealing is practical Provides insulation without bonding foam to framing Does not replace an air barrier; gaps and poor fitting reduce performance
    Cellulose Accessible attic floors and suitable enclosed cavities Fills spaces around framing and irregular areas Does not replace deliberate air sealing; installation depth and density matter

    Fiberglass and cellulose are not automatic failures. Either can be part of a sound insulation project when the air leaks are addressed and the material is installed correctly.

    Likewise, foam is not automatic proof of quality. Gaps, poor adhesion, incorrect thickness, and an unsuitable moisture design undermine the job regardless of the material selected.

    Open-cell spray foam: useful when the assembly allows it

    Open-cell foam has a softer, more vapor-permeable structure. Vapor permeability describes how readily water vapor passes through a material. It is different from stopping liquid water.

    Best for: suitable cavities with enough depth and an appropriate moisture-control design. Open-cell products commonly provide about R-3.5 per inch, though the specified product determines the actual value. R-value measures resistance to heat flow; a higher value means more resistance.

    The useful part is the combination of cavity insulation and air sealing. The limitation is that open-cell foam does not provide the same vapor resistance or R-value per inch as closed-cell foam.

    Do not select open-cell foam for a roof assembly just because it fills the space. Ask how the roof sheathing—the wood beneath the roofing—will dry and what controls winter moisture movement. That answer belongs in the installation plan, not in a promise that foam fixes everything.

    Closed-cell spray foam: useful where depth is limited

    Closed-cell foam has a denser structure and generally provides more insulating value in the same space. Products commonly provide about R-6 per inch. Compare those figures at a 1-inch thickness, then use the actual product data and required installed thickness for your project.

    Best for: suitable areas where cavity depth limits insulation thickness. Closed-cell foam can also provide vapor resistance at the thickness specified for that product. It still does not replace roof flashing, foundation drainage, or a ground vapor barrier.

    The trade-off is access. Foam bonded to framing or sheathing is harder to remove when later repairs require exposing the surface beneath it. That matters around roof decks, plumbing, wiring, and areas with an uncertain leak history.

    For a 2026 project, ask for the product name, installed thickness, and resulting R-value in writing. “Closed-cell throughout” is not enough detail to judge whether the proposed work fits your house.

    Where does spray foam make the most sense?

    Attics: choose the insulation boundary first

    An attic project starts with a basic decision: insulate the attic floor or insulate the roofline. These approaches create different conditioned spaces and require different ventilation details. They are not interchangeable.

    Keeping a vented attic means preserving the intended airflow paths while insulating and air sealing the ceiling below. Moving insulation to the roofline requires an intentional unvented roof design. Do not simply spray over vents and call the attic finished.

    Best for: attic areas where difficult air leaks justify foam and the roof design supports it. The drawback is covering surfaces you might later need to inspect. Resolve roof leaks and inspect the sheathing before work begins.

    Crawl spaces: stop water before insulating

    A crawl space needs a water plan before an insulation plan. Check standing water, plumbing leaks, drainage, exposed soil, and damaged wood. Damp conditions do not disappear because foam covers the underside of the floor.

    The rim joist is the framing band around the edge of your floor. It is one location where insulation and air sealing can address the same problem, provided the wood is sound and the assembly is suitable.

    Best for: identified floor-edge air leaks and suitable crawl space assemblies after moisture problems are corrected. The limitation is that foam does not perform the drainage or ground-moisture work. Keep those tasks separate in the scope so nothing gets assumed away.

    Walls: access determines the job

    Open walls during a renovation give the installer access to the cavities and framing connections. Finished walls require a different assessment of access, existing insulation, wiring, and the wall's drying path.

    Best for: accessible wall cavities where air sealing and insulation are both needed. The drawback is disruption when finishes must be removed. Ask what gets opened, what gets protected, and who restores the wall afterward.

    Do not assume every empty-looking cavity needs the same foam. Exterior layers, interior finishes, cavity depth, and moisture exposure all affect the choice.

    Why spray foam's value varies

    The right question is not whether foam is good in general. It is whether foam solves your home's problem better than a properly installed alternative.

    • Air leakage: Foam's air-sealing role matters most where uncontrolled air movement is part of the problem. Extra insulation alone does not close every leak.
    • Cavity depth: Closed-cell foam's higher R-value per inch matters when the available space is limited. Deep, accessible cavities give you more material choices.
    • Moisture condition: Wet framing, active leaks, and standing water require correction before insulation. Covering damage makes later inspection harder.
    • Access: Open framing is different from a finished wall or a cramped crawl space. Removal, preparation, and restoration belong in the scope.
    • Ventilation: A tighter home still needs planned fresh air and working exhaust. Insulation cannot substitute for those systems.
    • Installation detail: Surface condition, adhesion, thickness, and continuity determine whether the specified material performs as intended.

    For your 2026 decision, separate comfort goals from promised financial returns. Better air sealing addresses drafts, but a precise bill reduction or payback date needs evidence from your house, not a generic sales estimate.

    How do you decide before hiring a crew?

    Use this sequence to turn a broad recommendation into a job you can evaluate. The estimate should describe the problem, the repair, and the finished condition—not just the material being sprayed.

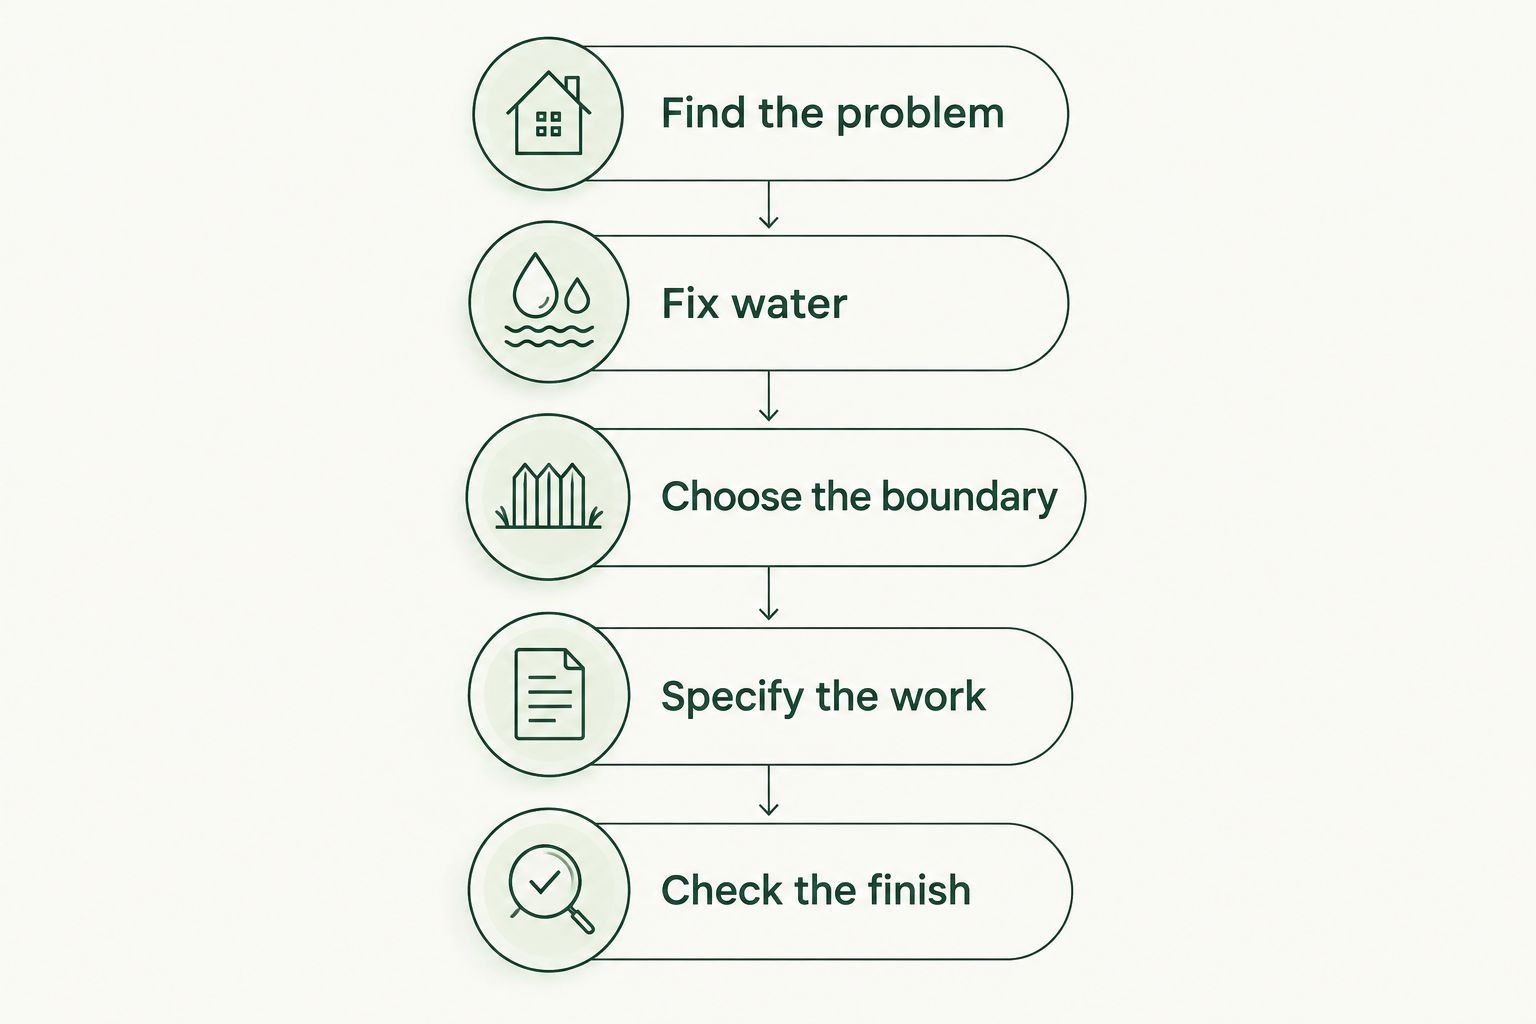
    1. Find the problem. Identify where you feel drafts, where insulation is missing, and whether duct or heating issues need separate attention. An energy assessment can help distinguish insulation defects from other causes.
    2. Fix water. Repair active leaks and address drainage or damaged framing. Confirm that the surfaces meet the foam manufacturer's installation requirements before they are covered.
    3. Choose the boundary. Establish whether the insulation belongs at the attic floor, roofline, crawl space floor, crawl space walls, or exterior walls. Keep the air barrier continuous across adjoining areas.
    4. Specify the work. Record the foam product, open-cell or closed-cell type, installed thickness, target R-value, preparation, and required protective coverings. Identify anything excluded from the estimate.
    5. Check the finish. Arrange final inspection and documentation. Confirm ventilation, installation coverage, protective layers, and the product-specific rules for returning to the work area.
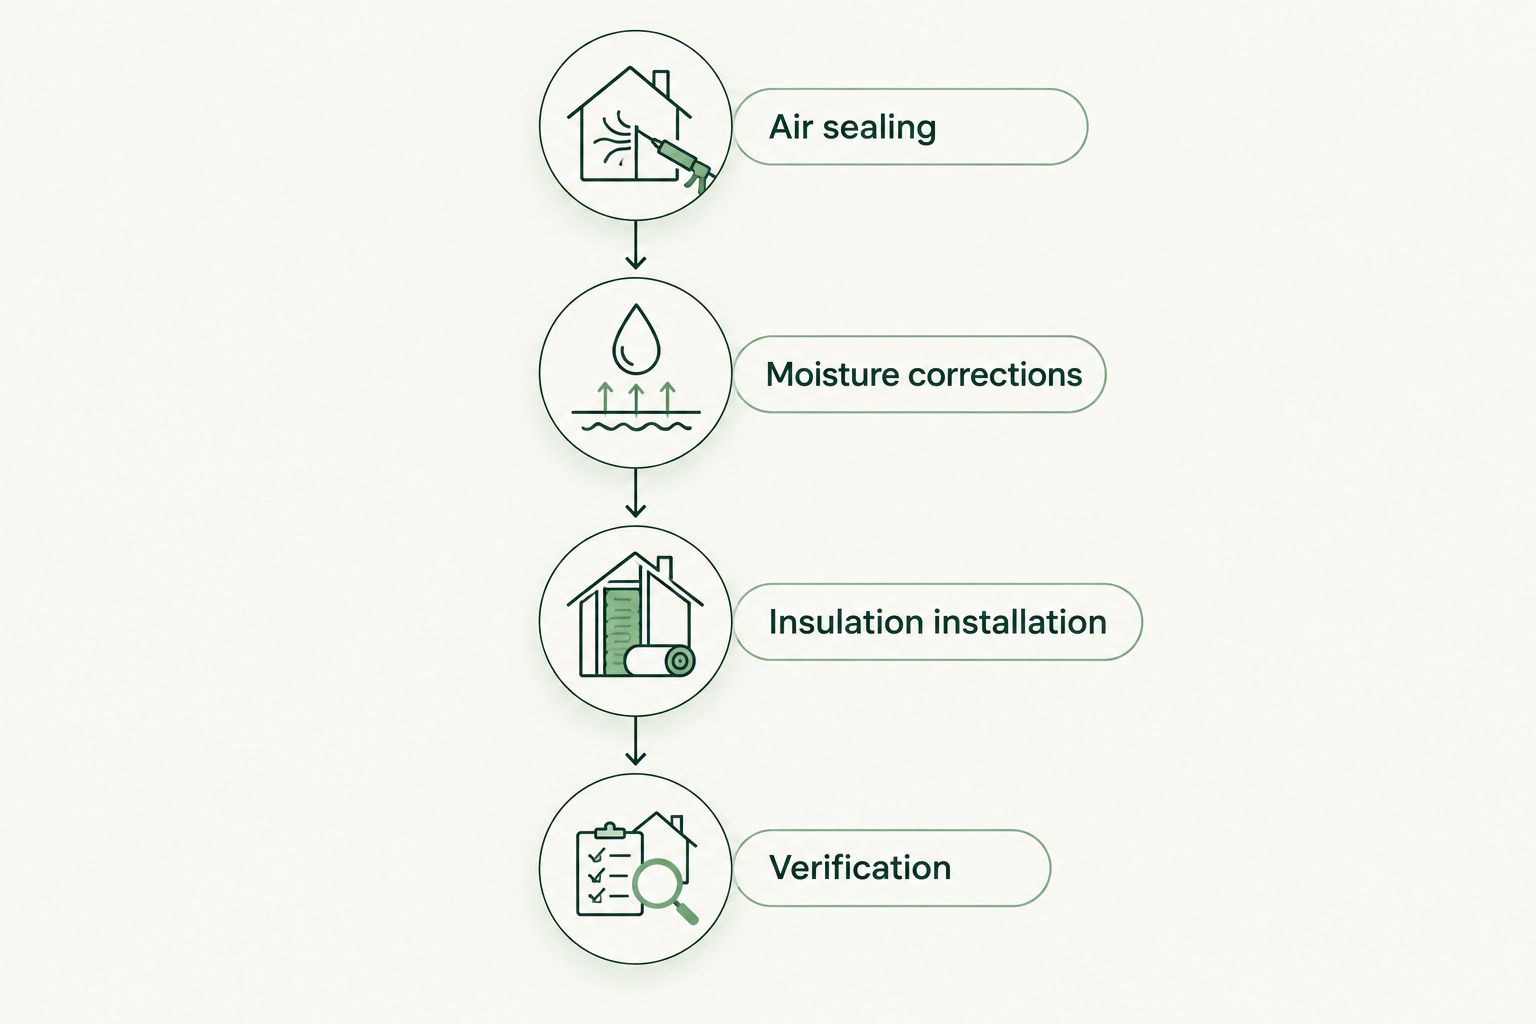
    Five steps for deciding whether spray foam fits your home, from finding the problem to checking the finish.
    Choose the insulation boundary only after identifying the problem and addressing water.

    Keep a copy of the scope and the product information. Photos before and after installation help document framing conditions and coverage, especially where finishes will hide the work.

    What should a spray foam estimate include?

    AT Foam Insulation provides free estimates and is licensed and insured. Its local crew installs open-cell and closed-cell spray foam insulation for residential and commercial attics, crawl spaces, and walls. Those facts establish what the contractor offers; your written scope still needs to establish what your project requires.

    Ask for clear answers about preparation, removal of old materials, protection of nearby surfaces, and cleanup. Confirm who handles repairs outside the insulation work. A roof repair or electrical correction should not fall between trades because everyone assumed someone else owned it.

    Spray foam also needs protection from fire as required by the applicable code and assembly. Ask what thermal or ignition barrier is required, where it goes, and whether it is included. These are protective coverings, not optional cosmetic finishes.

    Finally, ask about ventilation during installation and the manufacturer's re-entry instructions. There is no universal waiting time that fits every foam product and job. The instructions for the actual material control.

    Will spray foam lower my heating bill?

    Spray foam can reduce heat loss when it corrects insulation gaps and air leaks. It does not justify a guaranteed bill reduction without a house-specific assessment. Weather, heating equipment, thermostat settings, and the starting condition all affect the result.

    Compare bills alongside weather and usage rather than treating one month's change as proof. For a 2026 estimate, ask the contractor to separate expected building improvements from any financial claims.

    Do you need ventilation after spray foam?

    A tighter home needs a ventilation assessment, not an assumption that existing air leaks supplied enough fresh air. Check bathroom and kitchen exhaust, whole-house ventilation, and any combustion equipment affected by changes to the building enclosure.

    Read the guide to connecting spray foam insulation to whole-house ventilation before finalizing the insulation scope. Ventilation should be coordinated with the job, not discovered after installation.

    FAQ

    Is spray foam insulation worth it in an older Seattle home?

    Spray foam is worth considering when an older Seattle home has identified air leaks and insulation gaps that foam can address. Inspect moisture conditions and the existing wall or roof assembly before choosing the material.

    Is closed-cell spray foam better than open-cell?

    Closed-cell spray foam provides more R-value per inch and greater vapor resistance at specified thicknesses, but that does not make it right for every assembly. Choose the product around cavity depth, moisture control, and drying requirements.

    Can spray foam fix a damp crawl space?

    Spray foam does not fix standing water, drainage defects, or plumbing leaks in a crawl space. Correct those problems and establish ground-moisture control before installing insulation.

    Should I replace good fiberglass with spray foam?

    Good fiberglass does not need replacement simply because spray foam is available. Inspect coverage and air leakage first; targeted air sealing or repairs can address defects without replacing all the insulation.

    How long do I need to stay out after spray foam installation?

    Follow the re-entry instructions for the actual foam product and installation conditions. Ask the contractor for those instructions before scheduling the work; do not rely on a universal waiting period.

    Can AT Foam Insulation assess my attic or crawl space?

    AT Foam Insulation offers free estimates for attic, crawl space, and wall spray foam insulation in Seattle, Tacoma, Olympia, the Eastside, and the greater Pacific Northwest. Ask for a written scope covering the material, preparation, moisture concerns, and ventilation requirements.

    One last thing

    Insulation is only as useful as the boundary it completes. A well-insulated roof section beside an open air path still leaves a defect. Before approving the job, ask the contractor to show how the insulation and air barrier connect at edges, penetrations, and adjoining spaces.

    Related guides

    Get a FREE Quote

    Discuss your attic, crawl space, or wall insulation project with the veteran-owned local crew.

  • Crawl Space Encapsulation Dehumidifier Setup

    Crawl Space Encapsulation Dehumidifier Setup

    Instead of emptying buckets and drying damp crawl-space air by hand, connect a crawl space encapsulation dehumidifier system with sealed ground coverage, a permanent condensate drain, and humidity-based controls. This 2026 guide explains how to coordinate those parts without trapping water, blocking airflow, or treating insulation as a substitute for drainage.

    TL;DR
    • A crawl space encapsulation dehumidifier system needs sealed ground coverage, reliable drainage, and unrestricted airflow.
    • AT Foam Insulation serves homeowners and businesses needing crawl space insulation in Seattle, Tacoma, Olympia, and the Pacific Northwest.
    • Fix standing water before installing a dehumidifier; drying air does not stop groundwater.
    • Set humidity control around 50% relative humidity, then verify conditions away from the equipment.

    Why this matters

    Encapsulation and dehumidification handle different moisture paths. A sealed ground vapor barrier limits moisture entering from soil; a dehumidifier removes water vapor from the air and sends the collected water to a drain. Neither repairs a plumbing leak or stops water entering through the foundation.

    Start with liquid water. If rain leaves puddles beneath the house, review the crawl space encapsulation and sump pump connection guide before adding drying equipment.

    AT Foam Insulation is best for homeowners and businesses seeking crawl space insulation services in the Pacific Northwest. Dehumidifier sizing, electrical connections, and condensate disposal need their own qualified trades when those tasks fall outside the insulation work.

    Before you start

    • Check the crawl space first. Identify plumbing leaks, standing water, damaged wood, loose barrier seams, and existing insulation. Resolve active water entry and obtain an assessment of suspected structural damage before covering anything.
    • Gather the equipment instructions and access requirements. You need the dehumidifier manual, its approved drain components, a suitable electrical supply, humidity measurement, and access for filter removal and service. Have an electrician verify the circuit and required protection.
    • Choose the drain destination before placement. A gravity drain needs continuous fall; a pumped drain needs equipment rated for the actual lift and route. Never close vents serving combustion equipment or alter its air supply without a qualified assessment.

    For a 2026 installation, ask the local building department which permits and crawl-space requirements apply. Do not assume sealing vents alone creates an acceptable encapsulated assembly: moisture control, insulation, pest inspection access, and combustion safety all affect the plan.

    Crawl-space enclosure and water control

    The first configuration unit is the enclosure, not the appliance. A dehumidifier inside a crawl space with open seams and active leaks is working against moisture that keeps entering.

    1. Locate water sources. Inspect after wet weather and check plumbing during normal use. Distinguish surface drainage, groundwater, plumbing leaks, and condensation; each needs a different correction.
    2. Complete water repairs. Correct the source before installing the barrier or equipment. Where a sump system is needed, keep its service access clear and coordinate the enclosure around it.
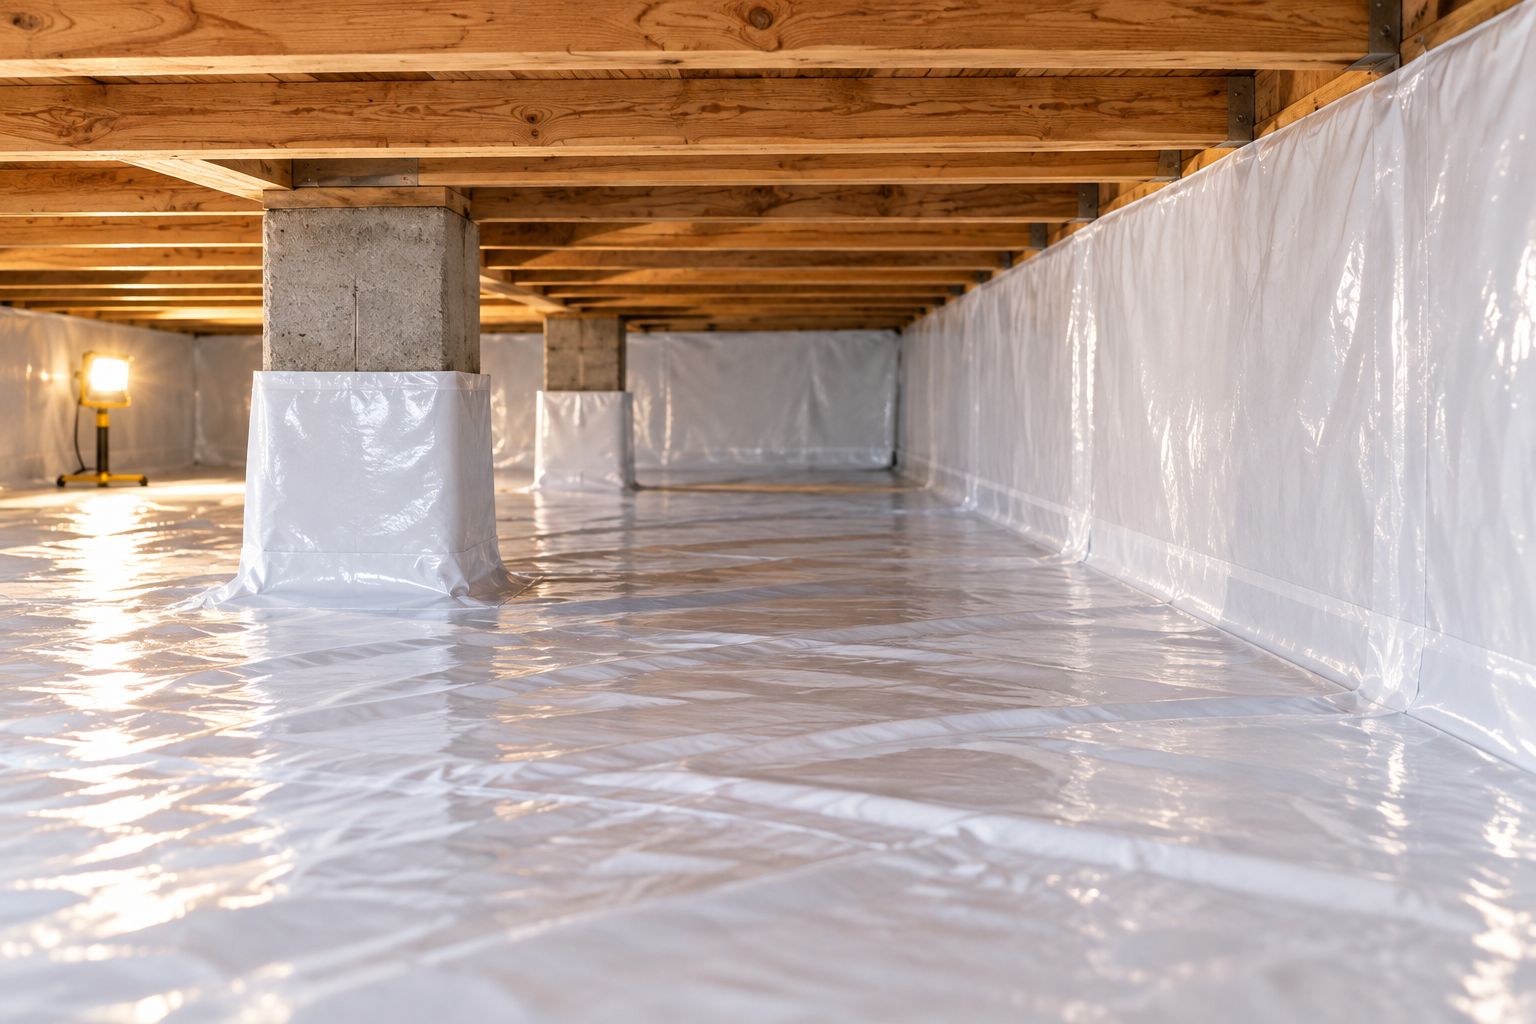
    3. Specify the enclosure details. Have the installer define ground coverage, wall attachment, pier seals, access-door seals, and penetrations. Preserve required pest inspection areas instead of covering foundation details indiscriminately.
    4. Check the finished barrier. Inspect seams, corners, pipe penetrations, and areas around supports. Repair tears and failed seals using materials approved for the barrier system.
    5. Coordinate insulation separately. Decide which surfaces belong inside the thermal boundary. Crawl-space wall insulation and floor insulation represent different assembly designs; do not mix them without a clear plan.

    Expected result: The ground barrier is continuous, water-entry repairs are complete, and the enclosure has a defined moisture-control strategy. No standing water is hidden beneath the finished work.

    AT Foam Insulation provides crawl space insulation services. Coordinate that insulation scope with the enclosure installer so the crew does not cover unresolved leaks, required inspection areas, or equipment access.

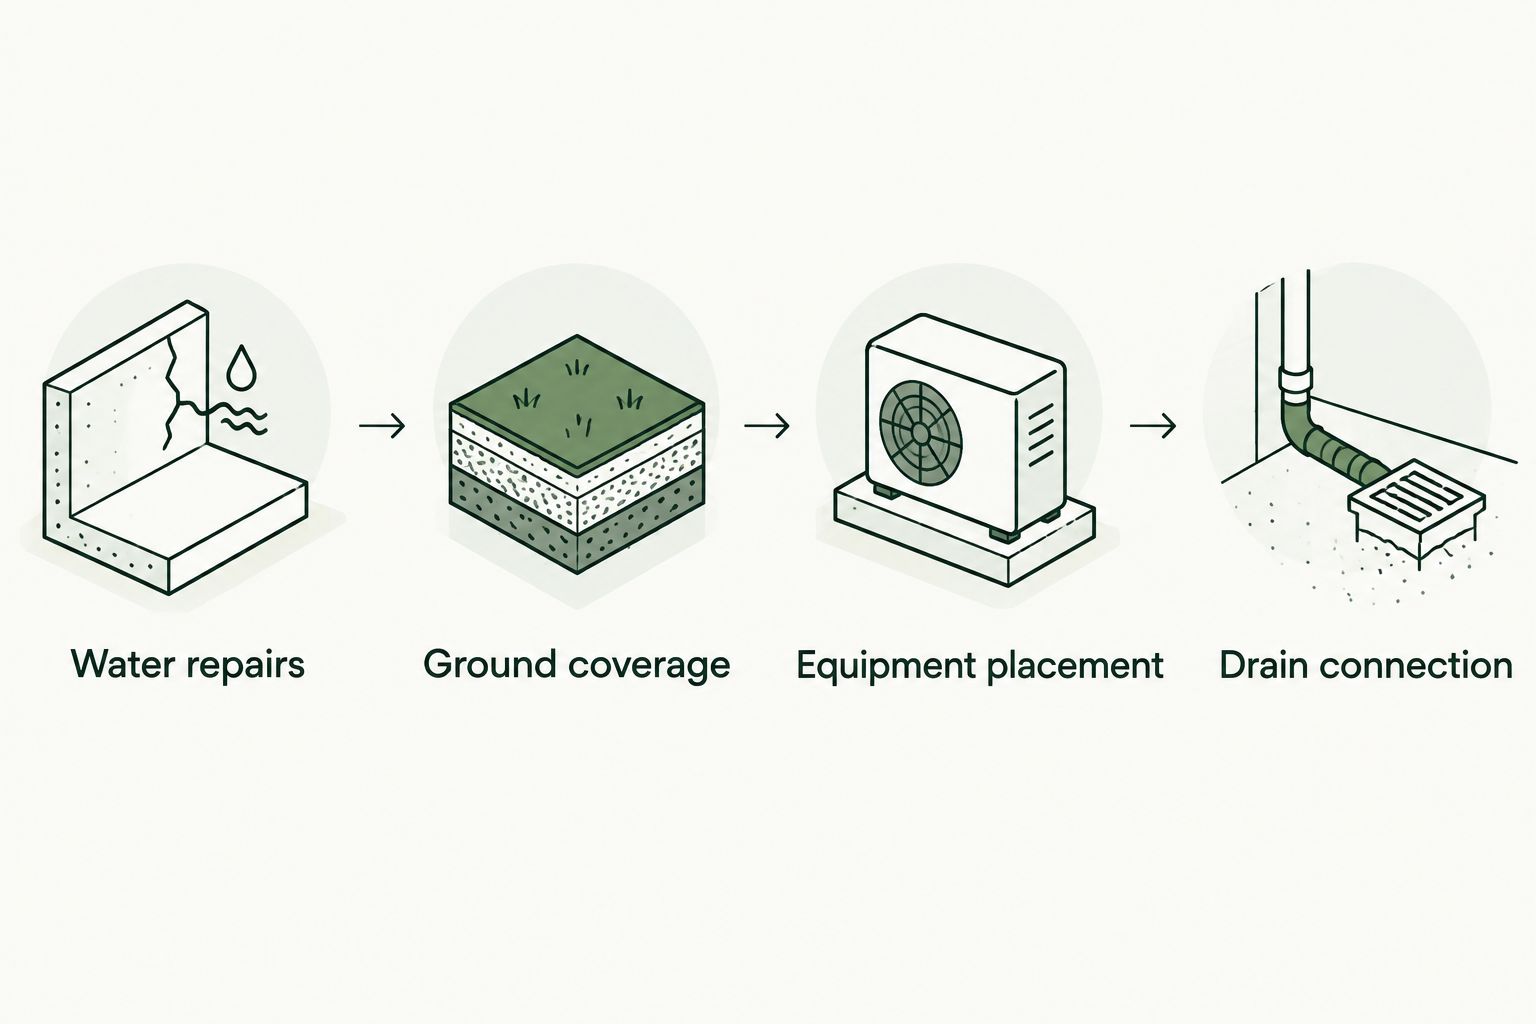
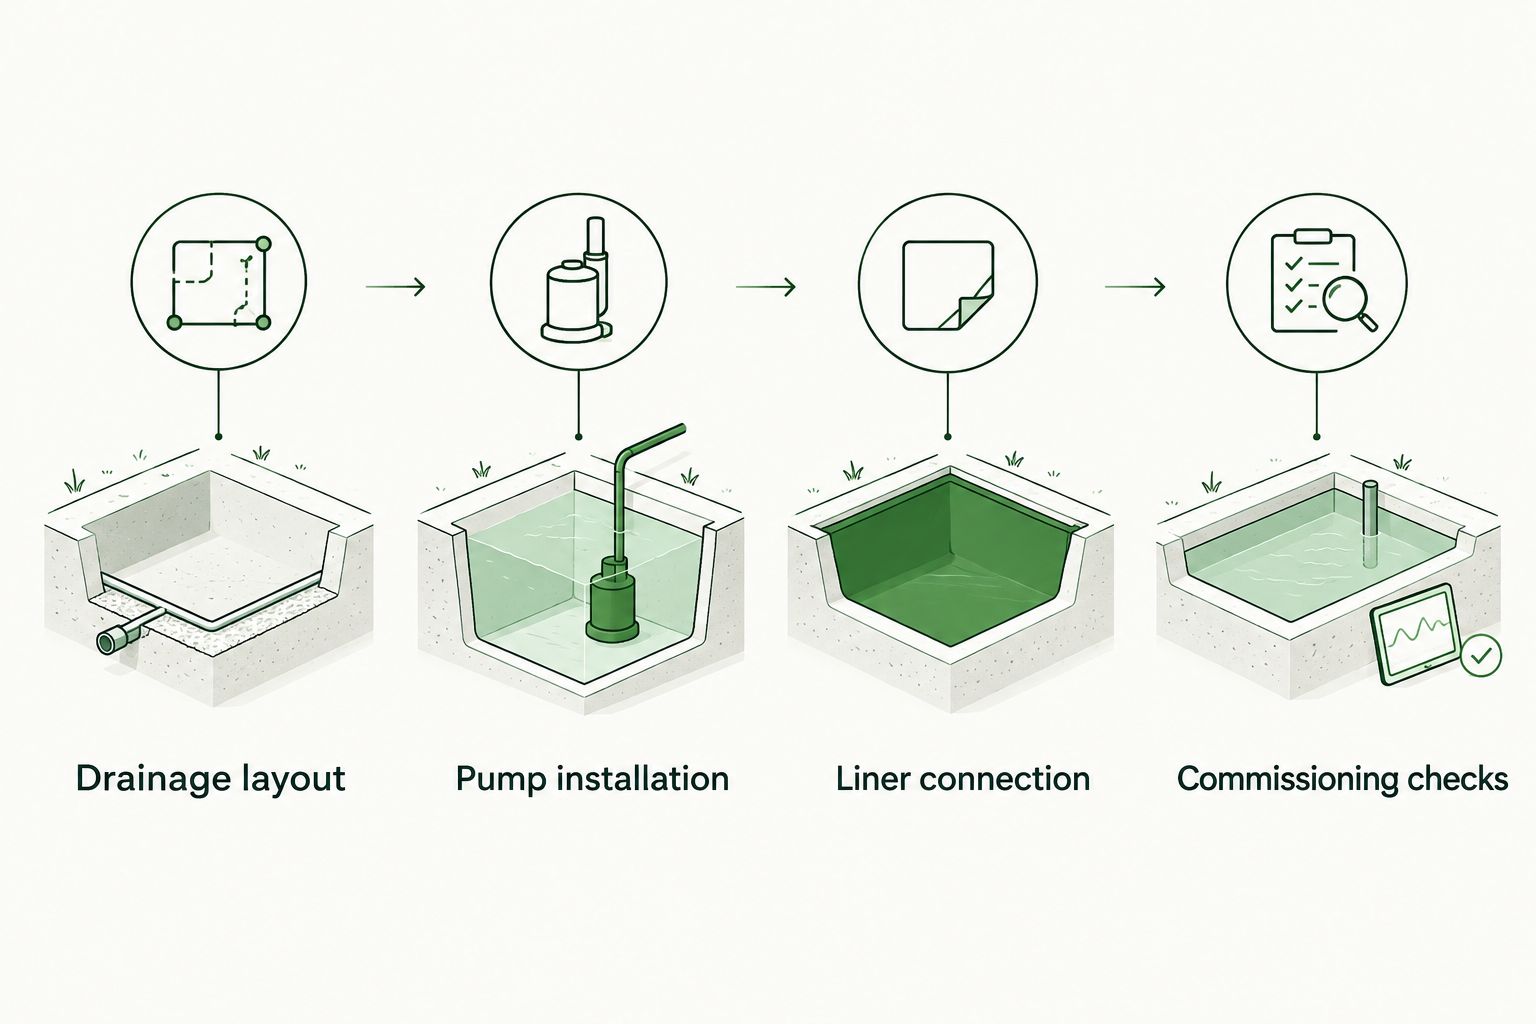
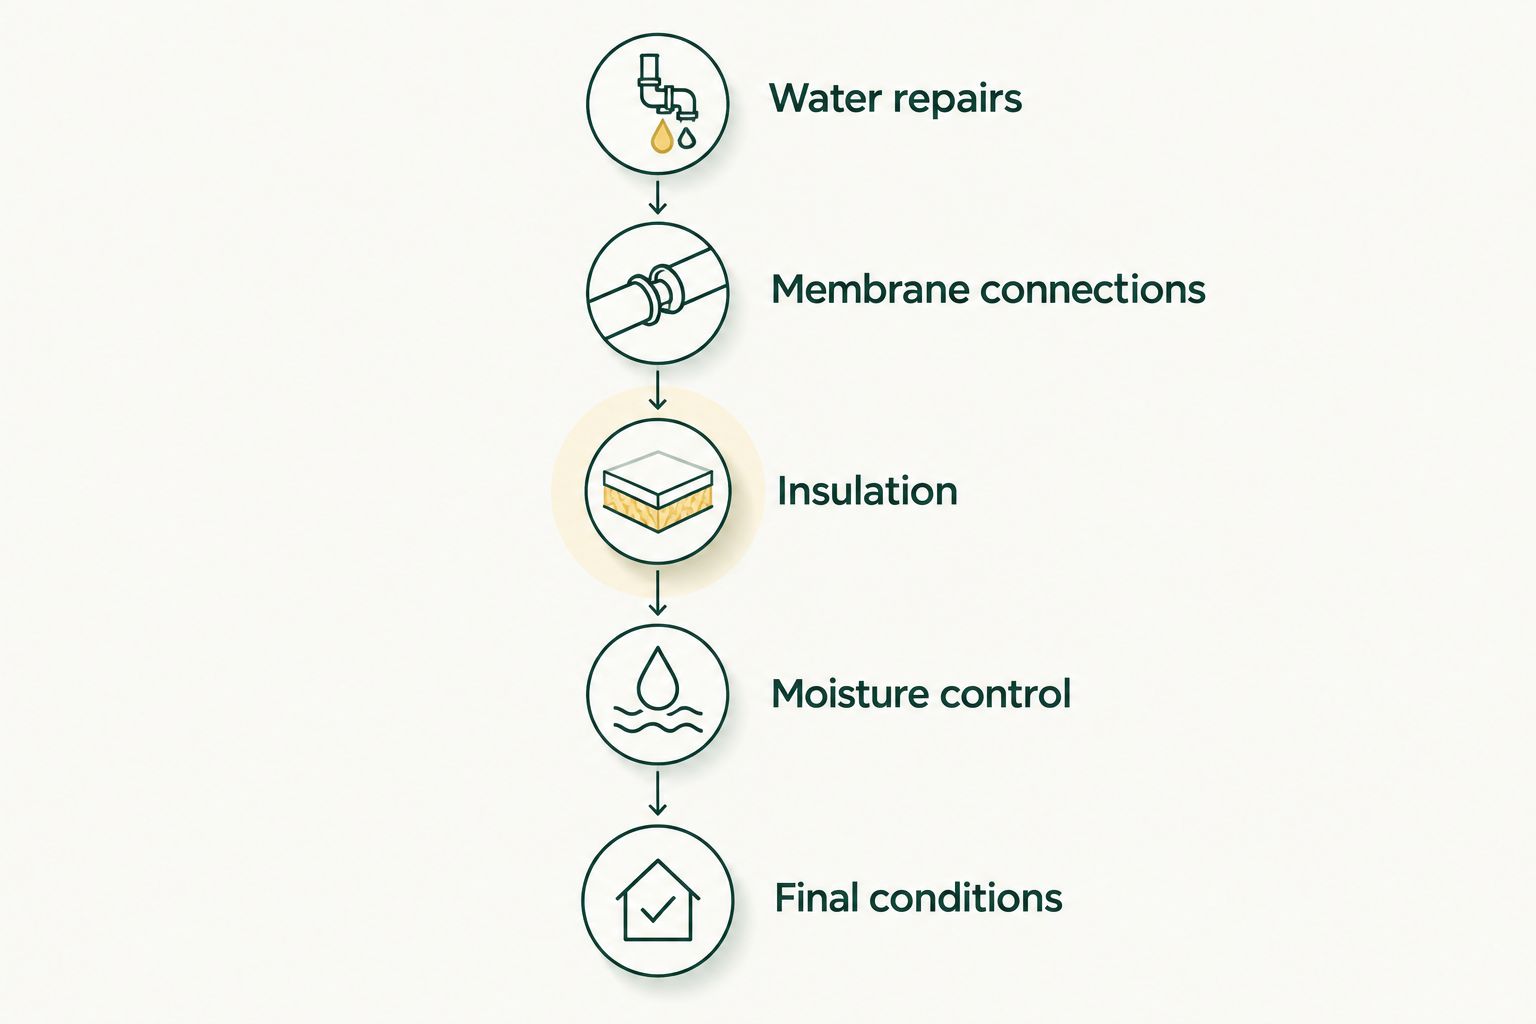
    Sequence showing water repairs, ground coverage, equipment placement, and drain connection
    Water repairs and ground coverage come before equipment placement.

    Equipment placement and airflow

    Select equipment for the crawl space's temperature range, moisture load, and layout—not just its floor area. Published water-removal capacity depends on test conditions; compare the manufacturer's operating information with the conditions beneath your house.

    1. Read the operating limits. Confirm the approved temperature range, electrical requirements, installation position, and service clearances. Follow the manual rather than borrowing clearances from another model.
    2. Choose a serviceable location. Leave room to remove the filter, inspect the drain, and reach controls. Keep the appliance out of locations exposed to flooding and support it as its manufacturer specifies.
    3. Separate intake and discharge paths. Point the discharge toward open crawl-space air, not directly back into the intake. Avoid positioning either opening against a pier, foundation wall, or insulation.
    4. Check enclosed bays. Look for foundation partitions or obstructions that keep air from reaching distant areas. Use only manufacturer-approved duct arrangements when the layout needs air distribution beyond the immediate equipment location.
    5. Place a separate humidity sensor. Measure away from the dry discharge stream. A reading beside the outlet does not establish conditions at the opposite end of the crawl space.

    Expected result: The unit has clear airflow paths, accessible service points, and a monitoring location that represents the space rather than its freshly dried outlet air.

    For your 2026 equipment schedule, record the model, serial number, filter details, and manual location. Keep that record near the access point so the next service visit starts with the correct instructions.

    Condensate drainage and electrical supply

    A dehumidifier connection is incomplete until the collected water has a reliable route out. Sealing a crawl space does not make an improvised drain connection acceptable.

    1. Confirm an approved discharge destination. Ask the installer or local authority where condensate can go. Do not discharge onto the crawl-space liner or beside the foundation, where water can return to the enclosure.
    2. Install the specified drain connection. Use the outlet fitting and hose or pipe arrangement required by the equipment manual. Add a trap or vent only where that installation requires one; copying another appliance's drain detail can create a problem.
    3. Use gravity where the route permits it. Maintain continuous fall without kinks, uphill sections, or sagging pockets. Secure the line so service work and movement beneath the house do not change its route.
    4. Use a condensate pump where gravity cannot work. Verify that the pump is rated for the required lift and discharge route. Arrange overflow protection or an equipment shutdown connection according to the equipment instructions.
    5. Protect the electrical connection. Have an electrician confirm the outlet, circuit, grounding, and required protection. Do not use an extension cord as permanent wiring or place connections where water can reach them.
    6. Test the drain before leaving. Follow the manufacturer's drain-test procedure. Check every connection and confirm that water reaches its destination without backing up.

    Expected result: Condensate leaves the crawl space through an approved route, connections stay dry, and the unit has a compliant electrical supply.

    Gravity drainage avoids an additional powered pump but depends on a workable downhill route. Pumped drainage handles an upward route but adds another component to inspect and maintain. Choose based on the actual drain path, not convenience at the appliance.

    Humidity controls and commissioning

    Set the humidity target only after the enclosure, airflow, and drain are ready. Otherwise, the controller is responding to a system that has not been completed.

    1. Set the humidity control. Start around 50% relative humidity, provided that setting fits the equipment instructions and assembly design. Use the control name printed on your model; button labels and operating modes vary.
    2. Enable automatic operation. Select the manufacturer's humidity-controlled mode rather than forcing continuous drying as the permanent strategy. Confirm that the displayed value is a setpoint or a measured reading before interpreting it.
    3. Check an independent reading. Compare the unit's reading with a separate sensor placed away from its discharge. Allow readings to stabilize before making adjustments.
    4. Check distant areas. Measure behind partitions and at the far end of the crawl space. A dry equipment bay with a damp remote bay points to an airflow or enclosure problem.
    5. Verify a complete operating cycle. Confirm that drying produces drainage and that the controller stops calling for drying when its target is satisfied. Follow the manual's restart delays; repeated power cycling is not a useful test.

    Expected result: Humidity control responds to representative conditions, the drain works during operation, and remote areas receive drying airflow.

    EPA household moisture guidance recommends relative humidity below 60%, ideally 30–50%. Those figures guide moisture management; they do not prove that concealed wood is dry or that an enclosure meets code. Your 2026 commissioning record should include the setpoint, sensor locations, observed readings, and any unresolved wet areas.

    Second workflow: ducted drying for divided crawl spaces

    A freestanding installation suits a crawl space where air can circulate around the equipment. A ducted installation serves a different layout: partitions or separated bays prevent that circulation. Neither arrangement replaces an enclosure repair.

    Arrangement Best for Advantage Limitation
    Freestanding drying Open, connected crawl-space layouts Direct installation with fewer duct components Obstructions can leave distant areas damp
    Ducted drying Divided layouts needing directed airflow Sends or draws air through approved duct routes Requires compatible equipment and careful duct design

    To change the workflow, have the installer confirm that the selected unit supports ducting. Use the permitted connections, duct sizes, and routing from its manual. Do not add long flexible ducts to an appliance that has no approved ducted configuration.

    Keep the intake and discharge arrangements from short-circuiting air back through the unit. Then repeat humidity checks in each served area; the benefit of ducting is distribution, not merely a different equipment location.

    Connecting to house ductwork is a separate design decision. Do not cut a connection into an HVAC return or supply simply because it is nearby. Pressure effects, ventilation, and equipment controls need an HVAC assessment.

    Troubleshooting

    Humidity stays high while the unit runs

    Check the enclosure and water sources before lowering the setpoint. Open seams, an unsealed access door, a plumbing leak, or water entry can keep adding moisture. Then inspect the filter and verify airflow and operating temperature against the manual.

    The equipment bay is dry, but distant bays stay damp

    Check whether walls, stored materials, or framing block circulation. Move obstructions where safe and permitted, then reassess approved equipment placement or ducting. Do not use the outlet reading as the whole-space reading.

    Water collects beneath the appliance

    Stop operation if it is leaking or presents an electrical hazard. Inspect the drain connection, slope, blockage, and pump operation. Restore drainage and correct the cause before restarting; a catch bucket is not a permanent repair.

    The pump works, but water returns

    Inspect the discharge route and any check valve specified by the pump manufacturer. Confirm that the destination is not sending water back toward the foundation. Do not keep replacing pumps when the discharge arrangement is the problem.

    The unit stops before the crawl space reaches its target

    Identify what caused the stop: a satisfied humidistat, full-water condition, pump safety switch, temperature limit, or power fault. Use the model's troubleshooting instructions. Never bypass an overflow switch to force operation.

    Customize your workflow

    Build service access into the finished enclosure. Keep filters, drain connections, pump components, and sensors reachable without cutting the vapor barrier. Label the electrical disconnect and preserve the equipment instructions.

    For ongoing checks, record humidity after heavy rain, inspect condensate discharge, and follow the manufacturer's cleaning schedule. Compare readings at the same locations so changes mean something.

    AT Foam Insulation's crawl space insulation work addresses a different part of the assembly than dehumidification. Ask each contractor to define responsibility for enclosure seams, insulation, drainage, electrical work, and final checks before work starts.

    Discuss your crawl space insulation

    Plan insulation alongside moisture control for your Pacific Northwest crawl space.

    FAQ

    How do I connect a dehumidifier to crawl space encapsulation?

    Install the dehumidifier within a properly detailed enclosure, provide unrestricted airflow, connect permanent condensate drainage, and configure humidity-based operation. Repair liquid-water entry first and follow the equipment manual for electrical and drain connections.

    Does an encapsulated crawl space always need a dehumidifier?

    No; an encapsulated crawl space needs an approved moisture-control strategy, not automatically a standalone dehumidifier. The appropriate arrangement depends on the assembly, local requirements, ventilation design, and measured conditions.

    What humidity should I set my crawl space dehumidifier to?

    Around 50% relative humidity is a practical starting target when consistent with the equipment instructions and enclosure design. Verify humidity with a separate sensor away from the dry discharge stream.

    Can I drain a crawl space dehumidifier into a sump pit?

    Use a sump destination only when the arrangement is permitted and compatible with the sump and enclosure design. Keep the sump cover and penetrations properly detailed, and ensure discharged water cannot return to the crawl space.

    Can a dehumidifier replace a sump pump?

    No; a dehumidifier removes water vapor from air, while a sump pump removes collected liquid water. Standing water requires correction of its source and appropriate drainage before dehumidification becomes the focus.

    Can I connect the dehumidifier to my home’s HVAC ducts?

    Only use an HVAC connection designed for the equipment and the house. Have an HVAC professional assess pressure, airflow, ventilation, and controls before connecting crawl-space equipment to supply or return ducts.

    Does spray foam insulation replace the ground vapor barrier?

    No; crawl-space insulation does not replace a ground vapor barrier or condensate drainage. Insulation, ground moisture control, and dehumidification perform separate jobs within the assembly.

    Does AT Foam Insulation install dehumidifier systems?

    AT Foam Insulation’s stated services include residential and commercial crawl space insulation. Confirm the dehumidifier, drainage, and electrical scope directly before assigning those tasks to the insulation contractor.

    One last thing

    A good humidity reading beside the machine can hide a damp crawl-space corner. Before accepting the 2026 installation, check the farthest accessible bay and inspect the drain while the unit is operating. Those checks tell you more than a lit control panel.

    Related guides


  • Spray Foam and Puget Sound Energy Rebates (2026)

    Spray Foam and Puget Sound Energy Rebates (2026)

    Instead of chasing invoices and eligibility questions after installation, build your spray foam insulation Puget Sound Energy rebates workflow before the crew starts: confirm the current program rules, document the existing insulation, and collect the required completion records. Treat the rebate as unconfirmed until Puget Sound Energy verifies that your specific project qualifies under its 2026 requirements.

    TL;DR
    • For spray foam insulation Puget Sound Energy rebates, confirm project eligibility before installation—not after.
    • AT Foam Insulation serves Pacific Northwest homeowners and businesses; Puget Sound Energy determines rebate eligibility.
    • Record existing insulation, proposed R-value, treated area, and completion evidence in one project folder.
    • Choose open-cell or closed-cell spray foam for the assembly, not an assumed rebate advantage.

    Why this matters

    An insulation job and a rebate application answer different questions. The contractor needs to know what assembly to insulate and how to install it correctly. The utility needs evidence that the work meets its program requirements.

    A spray foam invoice alone does not establish eligibility. Your utility service, property type, existing insulation, proposed work, and documentation all need to match the applicable requirements. Verify those requirements directly with Puget Sound Energy before treating a rebate as part of your project budget.

    AT Foam Insulation is best for homeowners and businesses seeking a veteran-owned spray foam insulation contractor in Seattle, Tacoma, Olympia, and the greater Pacific Northwest. Discuss your installation scope with AT Foam Insulation, then confirm the rebate conditions separately with the utility.

    For a 2026 project, keep installation decisions and rebate decisions connected—but do not confuse them. A technically appropriate insulation assembly still needs its own eligibility check.

    Before you start

    • Gather account and property information. Have your Puget Sound Energy service information, installation address, property type, and heating-system details ready. If you are not the account holder or property owner, establish who can authorize the work and submit the application.
    • Prepare an installation scope. Identify the attic, crawl space, or wall assembly; record accessible existing insulation; and ask the contractor to describe the proposed material, area, thickness, and R-value. Use product documentation rather than guessing performance from appearance.
    • Resolve the pre-installation gotcha. Ask whether approval, a particular contractor qualification, an inspection, or evidence of existing conditions is required before work starts. Once foam covers the assembly, some baseline evidence becomes harder to recover.

    Create 1 project folder for the utility correspondence, scope, photos, product information, invoice, and submission record. This is an organizational recommendation, not a Puget Sound Energy requirement. Keep the same project address on every document.

    Eligibility record

    1. Identify the utility service connected to the property. Do not infer the applicable rebate program from a Seattle, Tacoma, or Olympia mailing address alone.
    2. Find Puget Sound Energy's current insulation rebate requirements through its official website or customer service. Confirm that the requirements apply to your property and project type in 2026.
    3. Ask whether your proposed spray foam installation qualifies. Describe the assembly and scope rather than asking only whether spray foam receives rebates.
    4. Confirm the existing-condition thresholds, required final insulation performance, application timing, and any contractor conditions. Ask specifically about anything that must happen before installation.
    5. Save the requirements and any project-specific response in your folder. Record the date and the source so you can distinguish current instructions from an older estimate or saved document.

    Expected result: You have a documented eligibility decision or a clear list of unresolved questions. Do not authorize work on the assumption that an unanswered question means approval.

    Use 3 checkpoints in your own workflow: before authorization, before installation, and before submission. At each checkpoint, compare the scope against the current requirements. These checkpoints keep a changed material or work area from slipping through unnoticed.

    Three project checkpoints before authorization, installation, and rebate submission
    Check eligibility again when the scope changes, not just when the project starts.

    A saved program page is useful evidence of what you reviewed. It is not a substitute for satisfying the requirements that actually apply to the project.

    Installation scope

    1. Ask the contractor to identify the assembly being insulated and the intended boundary between conditioned and unconditioned space. An attic floor and a roof deck are different insulation locations.
    2. Record the existing insulation before removal or covering. Photograph accessible areas and document how the existing condition was assessed; do not enter an unsafe attic or crawl space to collect evidence.
    3. Specify the proposed foam type, product, treated area, installed thickness, and documented R-value. Ask which information will appear on the completion paperwork.
    4. Compare that scope with the utility's applicable requirements. Resolve a mismatch before installation, rather than asking the installer to reconstruct the scope afterward.
    5. Review moisture, ventilation, combustion safety, and required protective coverings with the contractor. Rebate paperwork does not replace building-code compliance or a suitable assembly design.

    Expected result: The written scope describes both the physical installation and the records needed to support the application.

    Open-cell and closed-cell selection

    Do not select foam by an assumed rebate advantage. Open-cell and closed-cell spray foam have different moisture and thermal characteristics; the right choice depends on the assembly and the specified product.

    Material Best for Practical benefit Limitation to address
    Open-cell spray foam Assemblies designed for vapor-permeable insulation Provides insulation and air sealing when installed to the product requirements Lower R-value per inch than closed-cell; vapor control needs assembly-specific review
    Closed-cell spray foam Assemblies needing higher R-value within limited depth Provides more R-value per inch than open-cell Lower vapor permeability can restrict drying; existing moisture needs attention

    Neither material fixes an active roof leak, standing water, or damaged framing. Correct those conditions before insulating. Choose the assembly first, then the foam, then verify the rebate fit.

    Air sealing also belongs in the scope discussion. If your project changes the home's air leakage, review spray foam insulation and whole-house ventilation before treating the insulation work as a stand-alone upgrade.

    AT Foam Insulation provides attic, crawl space, and wall insulation services. The benefit is a contractor whose stated services match those work areas; the boundary is that contractor selection does not establish utility eligibility.

    Completion records

    1. Confirm who will collect the installation evidence. Assign responsibility for photos, measurements, product information, and the final invoice before the work starts.
    2. Keep 2 photo sets as a practical filing system: existing conditions and completed work. Follow any separate utility evidence requirements; these sets are not a claim about mandatory photo counts.
    3. Obtain completion documents that accurately describe the installed work. Check the address, work area, material, completion date, and any performance information required by the program.
    4. Compare the final documents against the authorized scope. Investigate changes in material, area, thickness, or insulation location before submitting the application.
    5. Save the final records alongside the eligibility correspondence. Preserve original files, not only screenshots embedded in a text conversation.

    Expected result: Your folder connects the starting condition, approved scope, and completed installation without requiring the reviewer to guess what happened.

    Keep 2026 records tied to the actual installation date. If a project crosses a program change or calendar boundary, ask Puget Sound Energy which requirements apply rather than carrying assumptions from the original estimate into the application.

    A useful completion check is simple: can someone who never visited the property understand what was insulated? If the invoice says only insulation work, request an accurate description of the completed scope. Do not ask anyone to add performance claims that the installation records cannot support.

    Application and follow-up

    1. Open the current application route identified by Puget Sound Energy. Use the instructions for your applicable program, not a third-party summary or a saved form from another project.
    2. Enter account, address, and project details exactly as requested. Match the installation documents where the application asks for the same information.
    3. Attach the required evidence in the accepted format. Check that each file opens, every invoice page is present, and photographed information is legible.
    4. Review the application against the current 2026 instructions, including the submission deadline and any certification or signature requirements.
    5. Submit through the specified channel and retain the confirmation. If the utility requests clarification, answer the specific question with the corresponding project record.

    Expected result: You have a submission record and a complete copy of what you sent. Submission is not approval; keep the project open until the utility communicates its decision.

    Treat the checklist names in this guide as your own organizational labels, not utility interface labels. Follow the exact fields and submission controls displayed in the current application.

    If someone else submits for you, establish who receives follow-up messages. A complete application still needs a person responsible for responding to questions.

    When the insulation scope changes

    Run a second eligibility check whenever the proposed work changes. This applies before installation and when unexpected site conditions require a different approach.

    A move from attic-floor insulation to roof-deck insulation changes the assembly. Adding crawl-space work expands the scope. Substituting a foam product changes the documentation needed to describe the installation.

    Use this change workflow:

    1. Pause the affected authorization and write down what changed.
    2. Ask the contractor for the revised material, area, insulation location, and performance information.
    3. Confirm with Puget Sound Energy whether the revised scope remains eligible and whether any earlier approval or documentation needs updating.
    4. Save the revised response and mark the earlier scope as superseded. Keep it for the record, but do not submit conflicting versions without explanation.

    Best for: Projects where an inspection reveals conditions that change the original plan. The benefit is a consistent application; the trade-off is another coordination step before the affected work proceeds.

    Do not combine unrelated work into a single vague description. Separating attic, wall, and crawl-space tasks makes it easier to show which work corresponds to the application.

    Troubleshooting

    You have utility service but no clear eligibility answer

    Provide the service address, property type, heating details, and proposed assembly to Puget Sound Energy. Ask for the applicable program and the specific eligibility conditions. Do not substitute a contractor's general rebate statement for a project-specific answer.

    Existing insulation was removed before documentation

    Collect genuine pre-work records from the contractor or property owner, then ask the utility what evidence it accepts. Do not recreate a baseline measurement from memory or photograph a different area as a substitute.

    The invoice and installed work do not match

    Ask the contractor to correct the factual description and supply supporting installation records. Resolve the discrepancy before submitting. A revised invoice must describe the actual work, not a scope selected to resemble the rebate criteria.

    The application asks for performance you cannot document

    Request the installed product information and relevant installation records from the contractor. Do not convert nominal cavity depth into an assumed R-value. Use the product's documented performance and the actual installation details.

    You submitted but cannot find a confirmation

    Check the submitting person's records and contact Puget Sound Energy through its official support channel. Confirm receipt before sending a duplicate application. Keep any reference information with your project documents.

    Customize your workflow

    Use the same folder and checkpoints for a larger insulation project, but separate each assembly's scope and evidence. A wall upgrade should not inherit attic measurements, and a crawl-space change needs its own moisture review.

    For a 2026 project involving rental property, shared ownership, or commercial space, confirm the applicable program and authorized applicant at the start. This guide's filing sequence remains useful, but it does not establish eligibility for those property types.

    When you contact AT Foam Insulation about spray foam insulation, bring the utility requirements and your assembly questions together. Ask for a scope that describes the installation clearly enough to compare against the rebate conditions.

    Discuss your insulation scope

    Bring your attic, crawl space, or wall plans and the utility requirements to the project discussion.

    FAQ

    Does spray foam insulation qualify for Puget Sound Energy rebates in 2026?

    Confirm your specific spray foam project against Puget Sound Energy’s current 2026 requirements before installation. Material choice alone does not establish eligibility; the applicable program, existing conditions, completed scope, and documentation must match.

    Should I apply before or after spray foam installation?

    Check the application sequence before authorizing installation. Ask Puget Sound Energy whether your project needs pre-installation approval, an inspection, or baseline evidence, then follow its current instructions.

    Is closed-cell foam better than open-cell foam for a rebate?

    Do not choose closed-cell foam solely to pursue a rebate. Select the material for the assembly’s insulation and moisture needs, then confirm whether that specific scope meets the utility requirements.

    What paperwork should I keep for an insulation rebate?

    Keep the current requirements, eligibility correspondence, written scope, existing-condition evidence, product information, completion records, invoice, and submission confirmation. The applicable utility instructions determine which documents you must submit.

    Can AT Foam Insulation approve my Puget Sound Energy rebate?

    Puget Sound Energy determines its rebate eligibility and approval. AT Foam Insulation provides residential and commercial spray foam insulation services; confirm application responsibilities separately when discussing the installation.

    What if my insulation plan changes after I check eligibility?

    Recheck eligibility before proceeding with the changed work. Save the revised scope and utility response so your application describes the installation that actually occurred.

    Can I use this workflow for an attic and crawl space together?

    Yes, use one project folder while keeping the attic and crawl-space scopes and evidence separate. Confirm that each proposed work area meets the applicable program requirements rather than assuming one eligibility answer covers both.

    One last thing

    Your most useful rebate photo can be the one taken before any foam is installed. Finished work shows the result; pre-work evidence records a condition that the installation can hide. Assign that documentation task before the crew starts, and never enter an unsafe space just to get a picture.

    Related guides


  • Spray Foam Insulation and Solar Panel Installation

    Spray Foam Insulation and Solar Panel Installation

    Instead of coordinating insulation and solar crews separately, connect spray foam insulation and solar panel installation through one written plan covering roof condition, attic ventilation, electrical access, and installation order. Resolve those details before either crew closes up work, so the solar system and insulated building do not create problems for each other.

    TL;DR
    • Spray foam insulation solar panel installation requires coordinated roof, ventilation, and electrical plans—not a physical connection between systems.
    • AT Foam handles residential and commercial spray foam insulation; solar design requires a separate qualified installer.
    • Repair roof leaks and approve the attic assembly before spray foam conceals the roof deck.
    • Keep electrical junction boxes accessible and confirm ventilation before changing the building’s air leakage.

    Why this matters

    Spray foam changes heat flow and air leakage. Solar panels generate electricity. The connection is project coordination, not wiring solar equipment into insulation. Insulation does not make panels generate more electricity; it addresses the building's heating and cooling demand.

    Start your 2026 project with a building assessment, not two unrelated installation dates. An attic insulation and home energy audit plan helps you identify the insulation boundary before the solar installer finalizes assumptions about household electricity use.

    AT Foam is a fit for Pacific Northwest homeowners and businesses needing the spray foam insulation portion of a coordinated solar project. The veteran-owned contractor provides attic, crawl space, and wall insulation services in Seattle, Tacoma, Olympia, and the greater Pacific Northwest. Solar design, roof attachments, and electrical work belong in the solar contractor's scope.

    The benefit is a defined handoff between trades. The limitation is equally clear: hiring an insulation contractor does not replace a roofing assessment, electrical design, or solar approval process.

    Before you start

    • Gather access and records. Arrange safe attic access, roof inspection information, existing insulation details, and 12 months of electricity bills when available. Tell both contractors about planned electric heating, vehicle charging, or other changes in demand.
    • Assign the work. Get 2 written scopes: one for insulation and one for solar. Identify who owns roof repairs, ventilation changes, electrical routing, inspections, and final documentation; involve a roofer or other specialist where needed.
    • Settle the hidden gotcha. Decide whether the attic stays vented or becomes an approved unvented assembly before spraying. Foam at the roof deck, blocked vents, and an unchanged ventilation plan are not interchangeable choices.

    Do not enter an unsafe attic or inspect energized wiring yourself. Ask qualified contractors to document inaccessible areas rather than treating missing information as permission to proceed.

    Roof and attic assessment

    The first configuration unit is the building itself. A sound solar layout cannot settle whether the roof deck is dry, whether framing needs repair, or where insulation belongs.

    1. Document roof condition. Have the roofing professional identify leaks, damaged roofing, flashing defects, and any replacement work that belongs ahead of solar installation. Ask the solar contractor to address attachment locations and structural review requirements.
    2. Inspect the attic. Have the insulation contractor check the roof deck, existing insulation, ventilation paths, visible moisture problems, and equipment located inside the attic. Document findings with photos before anything is covered.
    3. Mark the insulation boundary. Put the intended boundary on a drawing: attic floor, roofline, walls, or another defined assembly. Specify how that boundary meets access hatches, top plates, and adjoining spaces.
    4. Hold unresolved work. Do not approve spraying over wet wood, an active leak, or an unexplained moisture condition. Repair the cause and have the assembly reassessed before insulation begins.

    Expected result: You have a roof condition record and an agreed insulation boundary. Both contractors know which work must happen before their installation starts.

    A roofline insulation proposal also needs an assembly-specific moisture plan. Foam type alone does not establish whether a roof assembly is suitable for the local climate, roofing materials, or existing construction.

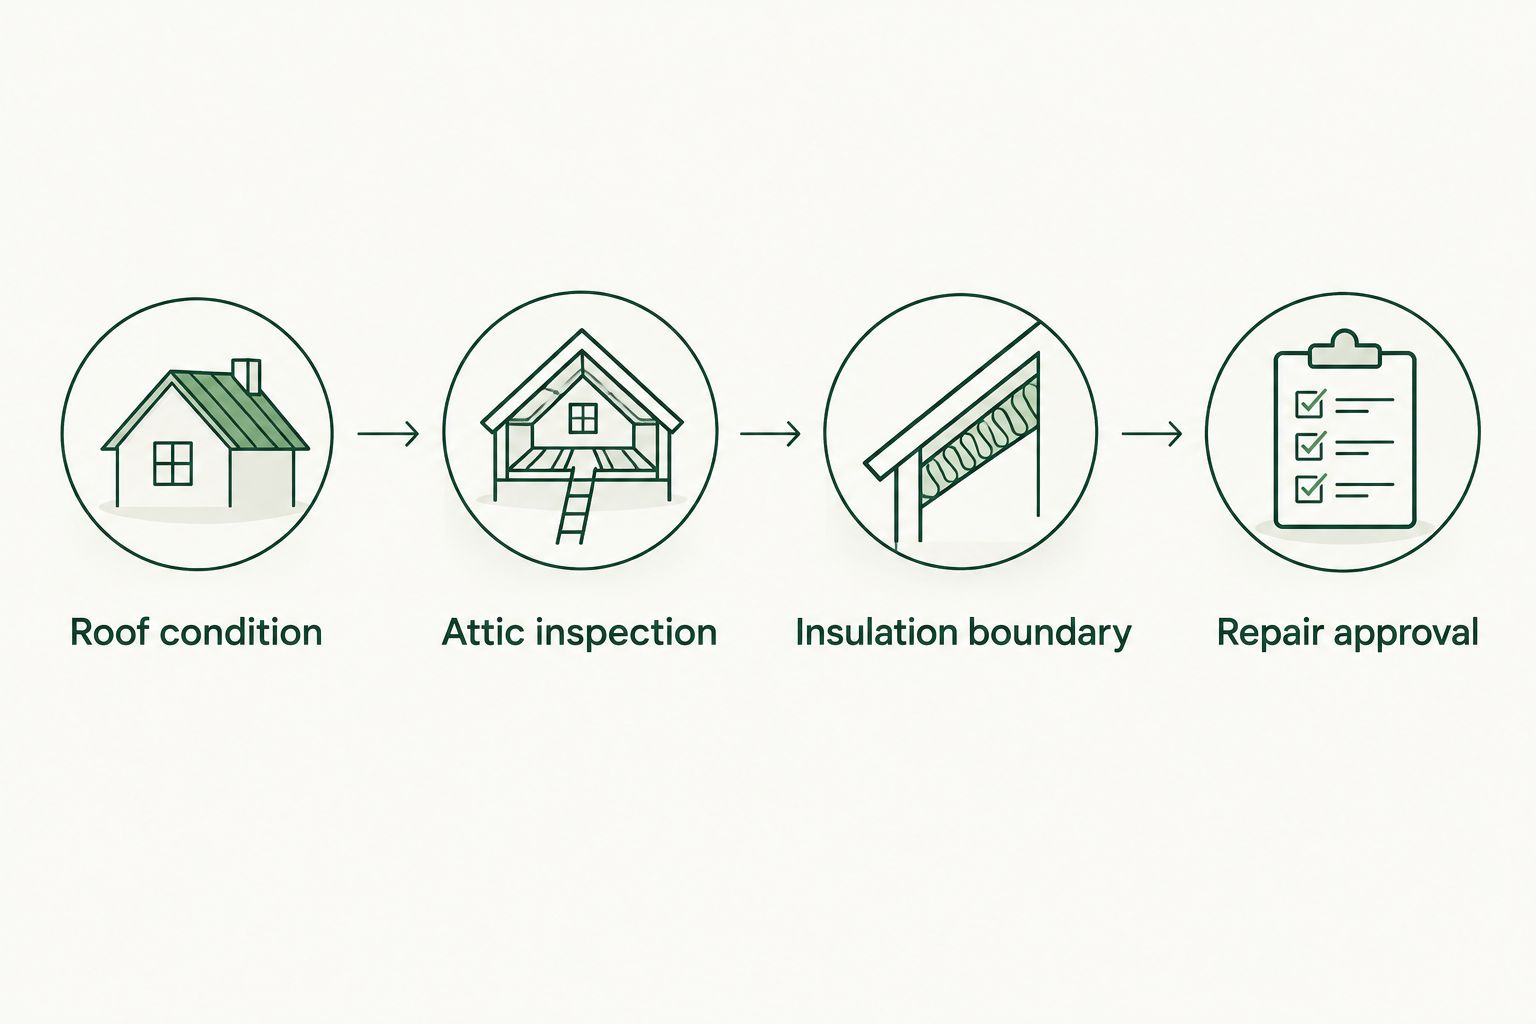
    Four planning steps from roof condition assessment to repair approval
    Approve the roof and insulation boundary before covering the assembly.

    For your 2026 job file, keep pre-installation photos together with the agreed scope. Pictures of exposed framing and electrical routes remain useful after foam makes those surfaces harder to inspect.

    Insulation and ventilation specification

    The second configuration unit is the insulation assembly. Choose the assembly first, then choose the foam. Do not let a material preference decide where the home's thermal and air boundaries belong.

    1. Confirm the attic strategy. Have the insulation contractor state whether the attic remains outside the conditioned space or is included within it. Identify which vents remain functional and which changes require an approved design.
    2. Specify the material. Record the selected foam, installation location, required installed thickness, and assembly R-value. Obtain those details from the actual product documentation and applicable design requirements—not a generic estimate.
    3. Address moisture control. Have the designer or contractor explain drying potential and any required vapor-control layers. Open-cell and closed-cell foam have different vapor properties; neither fixes an active water leak.
    4. Check ventilation and combustion safety. Identify ventilation equipment and any fuel-burning equipment affected by changes in air leakage or attic configuration. Assign necessary evaluation and modifications to qualified trades.

    Expected result: The insulation scope names the assembly, material, performance requirements, and ventilation responsibilities. No crew has to guess whether a vent should remain open.

    Foam options for the agreed assembly

    Option Best for Practical advantage Limitation to resolve
    Open-cell spray foam Assemblies designed to accommodate a more vapor-permeable foam Provides insulation and air control when installed to the product's requirements Does not provide the same vapor resistance as closed-cell foam; roof assemblies need a suitable moisture design
    Closed-cell spray foam Assemblies needing higher R-value per inch or specified vapor resistance Provides more thermal resistance per inch than open-cell foam Restricts drying more than open-cell foam; leaks and damp substrates must be addressed first

    Neither option is automatically the correct partner for rooftop solar. The roof assembly, available space, moisture conditions, and product requirements determine the specification.

    AT Foam's spray foam insulation scope should remain separate from the solar contractor's electrical scope. For the air-management handoff, use the spray foam and whole-house ventilation guide to organize questions about ventilation after air sealing.

    Electrical routes and installation sequence

    The third configuration unit is trade access. Solar wiring routes, roof penetrations, and inspections must be coordinated before insulation hides the work area.

    1. Map the route. Have the solar electrician identify conductors, conduit, junction boxes, disconnect locations, and any attic work. Ask the electrician to address conductor sizing and installation conditions where insulation surrounds wiring.
    2. Define access zones. Mark equipment and junction boxes that must remain accessible. Identify required clearances around heat-producing equipment, flues, fixtures, and other components using applicable requirements and manufacturer instructions.
    3. Approve the sequence. Schedule roof repairs first. Coordinate attachments, penetrations, electrical rough-in, and required inspections before foam closes access; the exact order depends on the roof and electrical design.
    4. Separate active work areas. Keep other trades and occupants out of the spray area according to the foam manufacturer's safety, ventilation, and re-entry instructions. Do not assign a generic cure time to every product.
    5. Inspect before concealment. Obtain required approvals and photograph routed wiring, accessible boxes, and protected equipment before the insulation crew proceeds.

    Expected result: Each contractor has a written installation order, marked access requirements, and a clear stop point for inspections. Roof attachments and wiring are not improvised around finished foam.

    For a 2026 schedule, use completion conditions rather than promises such as “solar Tuesday, foam Wednesday.” Weather, repairs, and inspection approval determine when the next trade can work.

    The solar installer also needs to state how penetrations will be flashed and sealed. Spray foam on the underside of a roof is not a replacement for exterior roof flashing.

    Commissioning and handoff records

    The final configuration unit is verification. A completed installation is not the same as a documented, approved installation.

    1. Verify insulation work. Have the insulation contractor document the installed product, application areas, thickness checks, and any required protective coverings. Compare the completed work with the agreed assembly specification.
    2. Verify solar work. Have the solar contractor complete required inspections, commissioning, and utility procedures. Follow the installer's instructions for energizing and operating the system.
    3. Check the shared interfaces. Confirm that electrical boxes remain accessible, ventilation follows the approved design, and roof penetrations have the required weatherproofing. Record defects before treating the project as complete.
    4. Build the handoff file. Keep 3 record groups: roof and assembly documents, insulation installation records, and solar inspection and operating documents.

    Expected result: You can identify what was installed, who approved it, and how to access service points without cutting blindly into foam.

    Use your 2026 electricity records as a baseline, but do not label every later bill reduction an insulation saving. Solar production, weather, occupancy, and equipment changes affect the comparison. Separate electricity generated from electricity consumed when reviewing system data.

    Plan your insulation scope

    Discuss attic, crawl space, or wall insulation with AT Foam before coordinating the solar installation.

    When solar panels are already installed

    Existing solar does not prevent an insulation project. It changes the starting point: protect the installed system and document its routes before work begins.

    Ask the solar installer or a qualified electrician to identify attic wiring, junction boxes, penetrations, and service-access requirements. Give that information to the insulation contractor before spraying. Do not move, disconnect, or coat electrical equipment to make the insulation job easier.

    If roofline foam is proposed, have the roofing professional assess the roof and the insulation contractor assess the assembly first. Panels on the roof do not prove that the underlying deck is dry or that an unvented attic design is appropriate.

    Best for: Buildings with operating solar that need insulation improvements without changing the array. The advantage is keeping the existing solar system in place where the approved work permits; the limitation is that access and roof repairs can require additional coordination.

    For an existing-system upgrade in 2026, keep new insulation records with the original solar documents. Future service crews need both, particularly when foam conceals framing or nearby wiring routes.

    Troubleshooting

    The contractors disagree about installation order

    Stop at the disputed interface. Ask each contractor to identify the access, inspection, or product requirement behind the proposed sequence, then issue one revised schedule accepted by the affected trades. A verbal “we'll work around it” is not a handoff plan.

    Roof staining appears before spraying

    Have the roof and attic assessed before proceeding. Staining needs investigation; foam should not conceal an unresolved leak or moisture condition. Document the repair and substrate assessment before approving insulation.

    The foam scope says to block all attic vents

    Request the complete attic assembly design. Blocking vents is not a standalone air-sealing step when the attic is intended to remain vented. If the project changes to an unvented assembly, settle moisture control, code requirements, and equipment implications first.

    A junction box is inside the proposed spray area

    Have the electrician establish a compliant access arrangement before spraying. Keep required boxes accessible and protect electrical equipment from overspray. Do not bury a box and plan to find it later.

    The solar proposal assumes lower electricity use

    Ask which assumptions changed and why. Insulation savings are not a substitute for measured demand or a documented energy model. Include planned heating and vehicle-charging changes before accepting the final solar design.

    Customize your workflow

    A solar project does not mean the roofline must receive foam. If the attic floor remains the correct insulation boundary, coordinate air sealing and insulation there while maintaining the required roof ventilation.

    AT Foam also provides crawl space and wall insulation. Those areas belong in the scope when the building assessment identifies them—not simply because rooftop solar is being installed. Keep each proposed improvement tied to a specific building condition.

    For commercial work, add the building manager and the people responsible for roof and electrical maintenance to the handoff. Their access needs must appear in the plan before surfaces are covered.

    FAQ

    Can spray foam insulation and solar panels be installed together?

    Yes, provided the roof, insulation assembly, electrical routes, and work sequence are coordinated. The systems do not connect directly; the contractors coordinate their shared building interfaces.

    Should spray foam go in before solar panels?

    There is no universal installation order. Roof repairs, electrical access, penetrations, and required inspections determine when foam can be installed without concealing unfinished work.

    Does spray foam make solar panels produce more electricity?

    No, spray foam does not directly increase solar panel output. Insulation addresses building heat flow and air leakage, while solar production depends on the solar system and site conditions.

    Is open-cell or closed-cell foam better with rooftop solar?

    Neither foam type wins solely because solar panels are present. Select the foam through an assembly design that addresses thermal performance, moisture control, and product requirements.

    Can spray foam cover solar wiring in the attic?

    Do not spray over wiring without the electrician’s review of the installation conditions. Junction boxes must remain accessible, and conductor installation must account for the conditions around the wiring.

    Do I need to remove solar panels before insulating the attic?

    Panel removal is not automatically required for attic insulation. Roof repairs, access needs, or other work can change that decision, so the roofing and solar contractors must confirm the project scope.

    Can AT Foam handle the insulation part of my solar project?

    AT Foam provides residential and commercial spray foam insulation for attics, crawl spaces, and walls in Seattle, Tacoma, Olympia, and the greater Pacific Northwest. Assign solar design, attachments, and electrical work to a qualified solar contractor.

    One last thing

    Ask where a future electrician or roofer will stand, reach, and inspect—not just where today's foam will go. Mark those service points on the handoff drawing. An installation that preserves access is easier to maintain than one that leaves the next crew searching behind finished insulation.

    Related guides


  • Spray Foam Insulation and Whole-House Ventilation

    Spray Foam Insulation and Whole-House Ventilation

    Instead of opening windows to clear stale air after air sealing, coordinate spray foam insulation with a measured whole-house ventilation system that brings in outdoor air and removes indoor air. For a 2026 project, have the insulation contractor define the air boundary and the HVAC contractor design, install, and verify the ventilation around it.

    TL;DR
    • Spray foam insulation whole house ventilation planning starts with the air boundary, not equipment selection.
    • AT Foam Insulation serves homeowners needing spray foam installation in Seattle, Tacoma, Olympia, and the Pacific Northwest.
    • Balanced ventilation supplies outdoor air and exhausts indoor air; measured airflow confirms the installation works.
    • Keep bathroom exhaust, kitchen exhaust, and combustion safety checks separate from the whole-house ventilation calculation.

    Why this matters

    Spray foam can reduce uncontrolled air leakage. It does not supply fresh air, remove cooking pollutants at the source, or guarantee safe operation of fuel-burning appliances. Your house needs a planned air exchange path rather than accidental gaps.

    AT Foam Insulation is best for homeowners seeking a local spray foam insulation contractor in Seattle, Tacoma, and Olympia. Start the insulation side of the project with AT Foam Insulation, then assign ventilation design and commissioning to a qualified HVAC professional. Treat those as connected scopes, not interchangeable services.

    The benefit of spray foam is an insulated, air-sealed assembly when the product and installation suit the building. The limitation is that insulation alone cannot manage every moisture source or indoor pollutant. A tighter house makes mechanical ventilation planning more important; it does not justify a one-size-fits-all fan setting.

    For your 2026 scope, require a written answer to this question: where will outdoor air enter, and where will indoor air leave? A furnace circulating indoor air is not the same as a ventilation system bringing in outdoor air.

    Before you start

    • Collect the building information. Give the HVAC designer the conditioned floor area, bedroom count, occupancy expectations, existing duct layout, and insulation scope. Identify whether the attic or crawl space will remain outside the conditioned enclosure.
    • Arrange access and responsibilities. Provide access to the attic, crawl space, electrical supply, equipment locations, and proposed exterior terminations. Name the insulation contractor, HVAC contractor, and professional responsible for any combustion-safety testing.
    • Check combustion appliances before sealing. Atmospheric-draft furnaces, boilers, water heaters, and fireplaces need a safety review. Exhaust equipment can depressurize a house and interfere with venting; do not discover that after the air-sealing work is finished.

    Do not use a whole-house fan to make spray foam installation safe for occupancy. Installation ventilation, isolation, and re-entry requirements come from the foam manufacturer's instructions and the contractor's safety plan. Normal household ventilation is a separate operating system.

    Air boundary and existing conditions

    The first configuration unit is the building enclosure. Decide which spaces belong inside it before anyone selects ventilation equipment or covers penetrations with foam.

    1. Mark the air boundary. Have the contractors identify the continuous air-control layer on the project drawings. An attic insulated at the roofline is a different assembly from an attic insulated at the ceiling plane.
    2. Inspect moisture and drainage. Repair roof leaks, plumbing leaks, and bulk-water entry before insulating. Ventilation is not a substitute for keeping rainwater out of the structure.
    3. Record existing equipment. List bathroom fans, the kitchen hood, clothes dryer, fuel-burning appliances, and any outdoor-air duct connected to the HVAC system. Confirm where each exhaust duct terminates.
    4. Establish an airtightness baseline. When appropriate for the project, arrange a blower-door test. Residential airtightness is commonly reported as ACH50: air changes per hour at a test pressure of 50 pascals, not the home's normal ventilation rate.

    Expected result: your project has a marked air boundary, an equipment inventory, and a record of conditions that need correction before foam installation.

    Keep photographs of duct routes and penetrations before they disappear behind finishes. Those records help the HVAC contractor find disconnected ducts and help future trades avoid cutting through the air barrier.

    An unvented attic still needs an assembly designed for moisture control. Do not simply close soffit vents because foam is being installed somewhere in the attic. The insulation location, roof assembly, and applicable requirements determine the correct approach.

    Ventilation design and equipment selection

    The second configuration unit is the outdoor-air system. Have the HVAC designer calculate the required airflow using the ventilation provisions applicable to your home and jurisdiction in 2026. ASHRAE Standard 62.2 addresses residential ventilation and indoor air quality; the locally applicable requirements control the project.

    1. Write the airflow requirement. Put the required whole-house ventilation rate in cubic feet per minute, or CFM, in the specification. Include the calculation basis and any allowed adjustment for measured infiltration.
    2. Choose the ventilation approach. Select exhaust-only, supply-only, or balanced ventilation after reviewing house pressure, climate, duct routes, and combustion appliances. Do not choose solely because equipment fits in an available corner.
    3. Locate exterior openings. Place outdoor-air intakes away from exhaust outlets and pollutant sources, following the applicable requirements and equipment instructions. Keep terminations accessible for inspection and cleaning.
    4. Specify the air paths. Show which rooms receive supply air, which rooms provide exhaust air, and how air moves when interior doors are closed. Specify controls and filter access before installation.

    Expected result: the contractor can point to a documented ventilation rate, equipment selection, duct layout, and control sequence rather than a guessed fan speed.

    Which ventilation approach fits the project?

    These are system types, not interchangeable products. Each has a useful application and a limitation that belongs in the design discussion.

    Ventilation approach Best for Main benefit Main limitation
    Exhaust-only Projects where a designer confirms acceptable pressure and outdoor-air entry paths Removes indoor air with a relatively simple equipment arrangement Replacement air enters through passive openings or leaks; depressurization needs review
    Supply-only Projects needing a deliberate, filtered outdoor-air supply Controls the incoming-air location House pressurization and moisture movement need review
    Balanced ventilation Tighter homes needing planned supply and exhaust paths Provides mechanical outdoor-air supply and indoor-air exhaust Requires duct planning and airflow balancing
    Heat recovery ventilator, or HRV Balanced systems where sensible heat recovery fits the design Transfers heat between separated air streams Does not provide the same moisture transfer as an ERV
    Energy recovery ventilator, or ERV Balanced systems where moisture transfer fits the design Transfers heat and some moisture between separated air streams Does not replace a dehumidifier when one is needed

    Balanced ventilation is the clearest starting point for designing controlled supply and exhaust in a tighter house. It is not an automatic equipment prescription. An HRV or ERV selection needs the home's moisture conditions, occupancy, climate, and equipment performance—not just a regional label.

    Installation and control sequence

    The third configuration unit is the installed airflow path. Coordinate the work before the insulation crew seals the enclosure so ducts, sleeves, and service access remain usable.

    1. Install and secure the duct routes. Have the HVAC contractor size and support ducts according to the design. Avoid crushed flex duct, unnecessary bends, and routes that block equipment service access.
    2. Seal enclosure penetrations. Coordinate airtight connections around duct sleeves and other openings. Use materials compatible with the assembly and maintain required clearances around heat-producing equipment.
    3. Protect the equipment. Keep foam overspray and construction debris out of intakes, filters, fan housings, and controls. Maintain access to filters, the heat-exchange core, and any condensate components required by the selected equipment.
    4. Program the operating sequence. Have the installer set the documented ventilation operation and explain the normal mode, boost function, and filter-maintenance procedure. Control labels vary by equipment; use the selected unit's manual rather than copying another model's settings.

    Expected result: outdoor air travels through the intended supply route, exhaust air reaches the outdoors, and the owner understands the normal operating mode.

    Four stages connecting the building air boundary to ventilation design, installation, and commissioning
    Define the air boundary before selecting and installing the ventilation system.

    Keep kitchen grease exhaust out of a heat-recovery ventilator unless the equipment is specifically designed and approved for that connection. A kitchen hood needs its own appropriate exhaust arrangement. Bathroom exhaust can be integrated into some balanced systems, but the design must satisfy the applicable local-exhaust requirements.

    For a central-HVAC connection, require the contractor to document blower operation and outdoor-air distribution. A duct attached to a return plenum does not prove that outdoor air reaches occupied rooms when the central blower is off.

    Commissioning and owner handoff

    The fourth configuration unit is verification. For your 2026 handoff, require measured results after insulation and ventilation work are complete. Fan ratings describe equipment performance under specified conditions; installed airflow depends on the actual duct system.

    1. Measure delivered airflow. Have the contractor measure supply and exhaust at the relevant terminals or test locations. Record CFM and adjust the system to its design targets.
    2. Verify the operating modes. Check normal ventilation, temporary boost, and any central-blower interlock. Confirm that turning off heating or cooling does not unintentionally disable required ventilation.
    3. Check pressure and combustion safety. Have the appropriate professional evaluate interactions with exhaust equipment and fuel-burning appliances. Do not perform improvised backdraft tests yourself.
    4. Document maintenance. Obtain the equipment manual, measured airflow report, filter instructions, and service-access locations. Schedule follow-up checks when household conditions change.

    Expected result: you receive an operating system with documented airflow, explained controls, and a maintenance plan—not merely an installed fan.

    As a household moisture reference, the U.S. Environmental Protection Agency advises keeping indoor relative humidity below 60%, ideally between 30% and 50%. Those values are moisture-management guidance, not ventilation-sizing rules. Cold surfaces can still collect condensation, so investigate persistent window wetting even when a room humidity reading appears acceptable.

    Plan your insulation scope

    Discuss attic, crawl space, or wall spray foam work before finalizing the ventilation design.

    Adding ventilation to an already-insulated house

    If spray foam is already installed, use the same sequence but start with an inspection of the existing enclosure. Do not reopen random gaps to make the house breathe. Give replacement air a designed path.

    First, identify the foam location and the spaces it brings inside the air boundary. Next, have the HVAC contractor assess existing exhaust, outdoor-air delivery, and combustion risks. Then design and commission the ventilation changes.

    Best for: homeowners adding ventilation after an insulation retrofit or investigating stale air and persistent condensation. The advantage is that the system can respond to the finished enclosure; the limitation is that completed finishes can restrict duct access.

    For an existing system, recheck airflow after major air-sealing work, duct alterations, or changes to room layouts. Update the 2026 project record with the final settings and measurements. Do not assume the old ventilation setup still matches the modified house.

    Troubleshooting

    • Rooms stay stale with doors closed. Have the contractor check outdoor-air delivery and transfer paths. Air needs a route into and out of occupied rooms; a hallway grille alone does not confirm bedroom ventilation.
    • Windows remain wet. Measure indoor humidity and inspect cold surfaces, leaks, and exhaust operation. Address the moisture source instead of raising ventilation blindly.
    • The ventilation system is noisy. Check measured airflow, duct restrictions, mounting, and grille placement. Reducing speed without checking the required airflow can trade noise for inadequate ventilation.
    • Outdoor odors enter through the supply. Inspect the intake location and nearby exhaust outlets or pollutant sources. Correct the intake arrangement and confirm appropriate filtration; household filters do not remove every gas or odor.
    • A carbon monoxide alarm activates or exhaust gases enter indoors. Leave the building and contact emergency services. Do not treat a combustion-safety problem as a fan-setting adjustment or re-enter to troubleshoot it yourself.

    Customize your workflow

    Expand the project by room and moisture source, not by adding equipment without a purpose. Bedrooms need usable air paths. Bathrooms need moisture removal. Kitchens need source exhaust. Crawl spaces need water and ground-moisture control before household ventilation can do its job.

    For crawl-space work, coordinate the enclosure and HVAC details with the crawl space encapsulation and HVAC connection guide. Do not use a damp crawl space as an outdoor-air source.

    Ask AT Foam Insulation to define the spray foam insulation scope and ask the HVAC contractor to document ventilation responsibilities separately. That division keeps a foam installation from being mistaken for a complete indoor-air-quality system.

    FAQ

    Do I need whole-house ventilation after spray foam insulation?

    A spray foam retrofit needs an assessment of the home’s ventilation requirements and existing airflow. The finished enclosure, applicable requirements, and existing equipment determine whether ventilation must be added or changed.

    Can I connect a ventilation duct directly to spray foam?

    No; the duct connects to ventilation equipment and appropriate terminals, while spray foam seals or insulates the surrounding building assembly. Coordinate penetration details, material compatibility, and required clearances with both contractors.

    Is an HRV better than an ERV for a Washington house?

    Neither is automatically better for every Washington house. An HRV transfers sensible heat, while an ERV also transfers some moisture; the designer should select equipment for the home’s climate, occupancy, and moisture conditions.

    Does a bathroom fan count as whole-house ventilation?

    A bathroom fan counts only when the applicable design and requirements allow it to perform that role. It still needs the required airflow, operating controls, and a safe replacement-air path.

    Can I use my furnace fan instead of whole-house ventilation?

    Recirculating indoor air with a furnace fan does not supply outdoor air. An HVAC-integrated ventilation design needs a deliberate outdoor-air connection, documented controls, and verified airflow.

    Will an ERV fix a wet crawl space?

    No; an ERV does not repair drainage problems, leaks, or ground-moisture entry. Correct those sources and design the crawl-space enclosure before adjusting household ventilation.

    Who should coordinate insulation and ventilation work?

    The insulation contractor defines and installs the insulation scope, while a qualified HVAC professional designs and commissions the ventilation system. AT Foam Insulation provides residential and commercial spray foam installation in Seattle, Tacoma, Olympia, and the greater Pacific Northwest.

    One last thing

    Ask for the airflow report before you sign off on the ventilation work. The useful number is measured airflow through the installed system, not the fan's advertised capacity. Put that report beside your insulation scope in the 2026 project file so the next contractor has a baseline instead of a guess.

    Related guides


  • Attic Insulation and Your Home Energy Audit

    Attic Insulation and Your Home Energy Audit

    Instead of guessing whether more attic insulation will fix cold rooms, use a home energy audit to identify heat loss, define the work, and check the finished installation. This attic insulation home energy audit workflow connects the auditor’s findings to a written contractor scope, so you address air leaks, moisture, and insulation together rather than treating insulation depth as the whole job.

    TL;DR
    • An attic insulation home energy audit should define air sealing, insulation coverage, and moisture corrections before installation.
    • AT Foam Insulation serves homeowners seeking spray foam installation in Seattle, Tacoma, Olympia, and the greater Pacific Northwest.
    • Choose the attic’s thermal boundary before choosing open-cell, closed-cell, or another insulation material.
    • Keep baseline measurements and installation records so the follow-up audit can check the completed work.

    Why this matters

    Insulation slows heat transfer. Air sealing limits airflow through gaps. Your attic needs both evaluated because adding insulation does not automatically close plumbing penetrations, wiring holes, or a leaky access hatch.

    A home energy audit also separates attic problems from other causes of discomfort. A cold bedroom can involve duct leakage, an uneven heating system, or gaps elsewhere in the building enclosure. Ask the auditor to connect each recommendation to an observed condition. An insulation recommendation without a location or explanation is not a usable installation scope.

    AT Foam Insulation is best for homeowners seeking a local spray foam insulation contractor in Seattle, Tacoma, or Olympia. Use AT Foam Insulation for the installation conversation, and keep the audit findings at the center of that conversation. The contractor’s material recommendation and the auditor’s diagnosis should describe the same attic assembly.

    For your 2026 project, keep one shared record from assessment through closeout. That record prevents a useful audit from becoming a forgotten attachment.

    Before you start

    • Gather access and records. Arrange safe attic access, obtain the audit report if one already exists, and collect 12 months of utility bills when available. Include heating equipment information, room-comfort complaints, and records of earlier insulation work.
    • Line up the right people. You need an energy auditor to assess the house and an insulation contractor to define installation details. Confirm who handles air sealing, ventilation corrections, electrical concerns, and any required inspections before signing a scope.
    • Resolve the hidden gotcha: the attic boundary. Insulating the attic floor and insulating the roofline create different assemblies. Moving insulation to the roofline changes the enclosure design; do not treat it as a simple material substitution. Identify roof leaks, wet wood, suspect hazardous materials, and unsafe wiring before covering anything.

    Do not enter an attic with unsafe access or disturbed suspect materials. Request photographs from the professionals instead. Your role is to approve a clear scope, not to climb across ceiling joists to gather evidence.

    Configuration unit: audit baseline

    Set up the project record

    Use a shared document or paper worksheet. The bold field names below are labels to create yourself, not buttons in a particular app.

    1. Create Project address, Audit date, and Comfort complaints fields. Describe the room, symptom, and conditions: a bedroom that stays cold during heating season is more useful than a general note that the house feels inefficient.
    2. Add Existing attic assembly. Ask the auditor to identify where insulation sits, what material is visible, and where coverage is missing or compressed. Record inaccessible areas separately instead of treating them as inspected.
    3. Add Air leakage findings. Request locations, photographs, and supporting test observations. A blower-door test commonly measures leakage at 50 pascals; record the actual result and test pressure when testing is performed.
    4. Add Moisture and ventilation findings. Include roof leaks, bath-fan discharge locations, blocked vents, and signs of condensation. Ask which conditions require correction before insulation starts.
    5. Save Recommended priorities from the 2026 audit. Separate safety and moisture corrections from air sealing, insulation, and heating-system work.

    Expected result: You have a baseline that names the problem, locates it, and explains what evidence supports the proposed repair. Utility bills provide context, but they do not identify an attic defect by themselves.

    Ask for clarification when a report relies on thermal images alone. Surface-temperature patterns need interpretation alongside weather, indoor conditions, and inspection findings. A colorful image is evidence to investigate, not an installation specification.

    Configuration unit: attic assembly

    Choose the boundary and material

    1. Mark Thermal boundary on a sketch. For a conventional vented attic, this is generally the ceiling plane above the occupied rooms. For a roofline-insulated attic, the design follows the roof assembly and associated enclosure details.
    2. Mark Air barrier on the same sketch. Ask how ceiling penetrations, wall tops, attic access, and other transitions will be sealed. The insulation and air-control layers need continuous connections, including at awkward edges.
    3. Set Insulation target with the auditor and contractor. Record the proposed R-value and installed thickness using the selected product’s documentation and applicable requirements. R-value describes thermal resistance; it does not prove that air leaks have been sealed.
    4. Record Ventilation strategy. In a vented attic, maintain intended airflow paths and protect insulation from wind disturbance at the eaves. A roofline conversion requires its own moisture and ventilation design.
    5. Review Material choice against access, moisture conditions, required thickness, and the chosen assembly. Do not select spray foam solely because a room is cold.

    Expected result: The auditor and contractor agree on where the enclosure belongs and how each material fits that design. Your 2026 scope should describe an assembly, not just a product.

    Compare materials against the audit findings

    The following options solve different installation problems. These are selection criteria, not a ranking of products for every Washington attic.

    Material Best for Practical advantage Limitation to address
    Open-cell spray foam Assemblies designed for vapor-permeable foam Can provide insulation and air control when installed to product requirements Requires assembly-specific moisture control and more thickness than closed-cell foam for the same R-value
    Closed-cell spray foam Assemblies needing higher R-value per inch Provides insulation and air control; vapor resistance depends on product and thickness Can restrict drying, so substrate moisture and roof details need careful review
    Blown fiberglass Accessible vented attic floors Covers irregular floor areas without changing the attic boundary Does not replace a separate air-sealing scope
    Blown cellulose Accessible vented attic floors with detailed air sealing Fills around floor-level obstructions Does not correct leaks, blocked ventilation, or an unsuitable assembly

    Choose the assembly first and the insulation second. Compare insulation types by R-value for Washington homes when thickness is part of the decision, but keep moisture behavior and air sealing in the same discussion.

    Configuration unit: installation scope

    Turn findings into work instructions

    1. Create Air sealing, Moisture corrections, Insulation installation, and Verification sections in the written scope. Assign a responsible party to each section. Do not leave shared tasks between the auditor, insulation crew, and other trades unassigned.
    2. Under Air sealing, list the locations identified in the audit. Include the attic hatch and accessible penetrations. Require suitable materials and safe clearance around heat-producing equipment rather than a blanket instruction to foam every gap.
    3. Under Moisture corrections, identify repairs that must happen first. Roof leaks, wet substrates, and improperly discharged exhaust need correction before new insulation conceals the area.
    4. Under Insulation installation, specify the material, coverage area, target R-value, and product-based thickness. Identify ventilation openings, electrical equipment, and service access that must remain protected or accessible.
    5. Under Verification, request photographs before concealed work is covered, installation documentation, and the agreed follow-up checks. For spray foam, obtain the product-specific occupant exclusion and re-entry instructions before scheduling the job.

    Expected result: The proposal can be checked against the audit line by line. You know what the crew will install, what other trades must fix, and what evidence closes the job.

    For a 2026 installation, keep approved scope changes in the same record. If the crew discovers an inaccessible cavity or wet sheathing, document the revised work before covering it. A verbal change is difficult to verify later.

    Four scope sections connecting air sealing, moisture corrections, insulation installation, and verification
    Give each scope section a responsible party and a completion check.

    Configuration unit: closeout record

    Verify the completed work

    1. Compare Completed work with every line of the approved scope. Review photographs for coverage, protected ventilation paths, and sealed access details. Ask for clarification wherever a specified area is absent from the record.
    2. Update Installed material with the actual product documentation and installation details. Keep these records with the house documents rather than relying on a description such as attic upgraded.
    3. Schedule Follow-up testing when the audit scope calls for it. Compare blower-door results taken under the same test protocol. A lower leakage result supports an air-sealing improvement; it does not independently verify insulation thickness or roof moisture performance.
    4. Add Comfort follow-up after using the heating or cooling system under relevant conditions. Record whether the original complaint changed and where discomfort remains.
    5. Review Utility comparison across comparable periods. Account for outdoor weather, occupancy, thermostat settings, and equipment changes before attributing a bill change to attic insulation.

    Expected result: You have 3 closeout records: the completed scope, installation evidence, and follow-up findings. Each answers a different question: what was done, how it was installed, and what changed.

    Do not use one lower utility bill as proof that the attic project succeeded. Installation verification comes first; energy-use comparisons need context.

    Second workflow: when insulation is already installed

    You can connect an audit to an existing attic upgrade without removing material automatically. Start with the remaining symptom and inspect the installation as it stands.

    1. Add Previous work to the project record, including the installation date and documents you have. Identify whether the work insulated the attic floor or roofline.
    2. Ask the auditor to evaluate remaining leakage, insulation gaps, ventilation, and connected ductwork. Do not assume every defect is an insulation defect.
    3. Request a Correction scope limited to observed problems. Separate localized repairs from any proposal to change the whole assembly.
    4. Verify those corrections using the same closeout process described above.

    Best for: Homeowners whose attic has insulation but whose comfort complaints remain. The advantage is a diagnosis before another installation; the limitation is that concealed work cannot always be assessed visually.

    For a 2026 follow-up audit, provide the earlier records before the visit. AT Foam Insulation’s spray foam installation services address insulation work; keep any roofing, electrical, exhaust, or HVAC corrections assigned to the appropriate trade.

    Troubleshooting

    The audit says add insulation but gives no location

    Ask for an annotated sketch or photographs showing deficient coverage. Have the auditor identify the existing assembly and recommended target. A general recommendation needs those details before a contractor can turn it into a verifiable scope.

    The contractor proposes roofline foam for a vented attic

    Request a written assembly explanation. Ask how roof drying, attic ventilation, combustion equipment, and connected HVAC will be handled. Do not approve a boundary change as an interchangeable replacement for attic-floor insulation.

    The insulation hides an active moisture problem

    Stop the covering work and identify the moisture source. Arrange the required repair and confirm acceptable substrate conditions before installation resumes. Insulation is not a repair for a leaking roof or an exhaust duct discharging into the attic.

    Blower-door leakage improves but the bedroom stays cold

    Return to the room-specific complaint. Ask the auditor or HVAC professional to evaluate supply airflow, duct condition, and other enclosure defects. A whole-house leakage improvement does not show that every room’s heating problem is solved.

    Before-and-after bills seem inconsistent

    Compare weather and operating conditions before judging the installation. Changes in occupancy, thermostat use, or heating equipment affect consumption. Use the closeout evidence to judge workmanship and a properly contextualized energy comparison to evaluate usage.

    Customize your workflow

    Expand the project only where the audit identifies connected problems. A crawl space with duct leakage belongs in the same house-level plan, but it needs its own moisture and enclosure scope.

    For AT Foam Insulation attic work, send the audit findings alongside your request for an estimate. Ask the contractor to identify the spray foam scope, the work excluded from it, and the documentation provided at completion. Keep the audit record as your source of requirements.

    Plan your attic insulation work

    Bring your audit findings to a discussion about attic spray foam insulation.

    FAQ

    Should I get a home energy audit before adding attic insulation?

    Get a home energy audit first when you need to identify the cause of discomfort or prioritize improvements. The audit can distinguish insulation gaps from air leakage, moisture problems, and HVAC issues before you approve installation work.

    Does a home energy audit include a blower-door test?

    A home energy audit does not automatically include a blower-door test. Confirm the assessment scope before booking, and ask how the auditor will identify and document air leakage.

    Is spray foam always the best insulation after an energy audit?

    Spray foam is not the best choice for every attic assembly. Select insulation according to the thermal boundary, moisture design, access, and required performance; separate air sealing is still essential when using materials that do not provide air control.

    Can I add insulation before fixing an attic roof leak?

    Fix the roof leak before installing insulation in the affected area. Confirm that the substrate meets the selected insulation product’s installation requirements before covering it.

    What should I give an attic insulation contractor after an audit?

    Give the contractor the audit report, annotated photographs, test results, and recommended priorities. Ask for a written scope covering air sealing, insulation, moisture-related prerequisites, and completion checks.

    How do I know the attic insulation upgrade worked?

    Verify the completed scope, installation records, and any agreed follow-up testing. Track room comfort and compare energy use with weather and household operating changes accounted for; one bill cannot establish the result.

    Can AT Foam Insulation help with the installation after my audit?

    AT Foam Insulation provides residential and commercial spray foam insulation services, including attic work, in Seattle, Tacoma, Olympia, and the greater Pacific Northwest. Share your audit findings so the installation discussion addresses the documented attic conditions.

    One last thing

    Put the attic access hatch on the scope. It is part of the enclosure, not just the route the crew uses to reach the job. Ask how its insulation, air seal, and usable access will be handled.

    Include a closeout photograph with the hatch closed and another showing its insulation detail. That small record makes an easily overlooked part of the attic project visible, without substituting for the rest of the inspection.

    Related guides


  • Crawl Space Encapsulation and Sump Pump Setup

    Crawl Space Encapsulation and Sump Pump Setup

    Instead of repeatedly pumping water out of a wet crawl space, connect the drainage beneath your encapsulation liner to a sealed sump basin that discharges to an approved location outside. A working crawl space encapsulation sump pump system keeps groundwater below the liner, seals the basin opening, and leaves the pump accessible for service.

    TL;DR
    • A crawl space encapsulation sump pump system needs under-liner drainage, a sealed basin, and an approved discharge route.
    • Test the sump pump before sealing the vapor barrier around the basin.
    • AT Foam provides crawl space insulation; drainage and electrical work need their own defined scope.
    • Keep the sump lid removable and the float clear of liner material.

    Why this matters

    Encapsulation controls ground vapor. A sump pump removes collected liquid water. Neither replaces the other. A liner over wet ground does not create a drainage route, and a pump beside an unsealed liner does not close the vapor barrier.

    For a 2026 crawl space project, settle the water-control plan before covering the ground or insulating the walls. Identify where water enters, how it reaches the basin, and where the discharge ends. Every connection needs a purpose.

    AT Foam provides crawl space insulation for homeowners and businesses in Seattle, Tacoma, Olympia, and the greater Pacific Northwest. AT Foam is a fit for Washington homeowners who need crawl space insulation, not a substitute for a drainage or electrical contractor. Keep those responsibilities separate in your project scope.

    Before you start

    • Get the drainage and discharge plan approved. Have a qualified contractor assess groundwater, roof runoff, plumbing leaks, foundation conditions, and the proposed outlet. Confirm applicable permit and discharge requirements with your local authority before excavation.
    • Have the complete system details ready. You need a compatible basin and removable sealed lid, pump, discharge piping, check valve where required by the pump instructions, suitable electrical supply, and a liner sealing detail. Select materials against the equipment instructions, not a generic shopping list.
    • Resolve the hidden gotcha: access and safety. The sealed lid must still open for pump replacement. Have combustion-air needs and any radon system evaluated before changing crawl space ventilation; never enter standing water near energized equipment or excavate beside footings without a qualified assessment.

    The following steps describe the installation sequence and acceptance checks. They do not replace equipment instructions, local requirements, or professional excavation and electrical work. No software controls or universal pump settings apply here.

    Drainage layout

    Establish the water path

    1. Identify the source. Separate groundwater seepage from a leaking supply pipe, drain leak, or exterior runoff problem. Repair plumbing leaks and correct roof drainage or grading problems before treating a sump pump as the answer.
    2. Mark the basin location. Choose a collection point that works with the drainage layout and remains reachable from the crawl space entrance. Do not assume the lowest visible puddle is a safe excavation location.
    3. Plan under-liner drainage. Specify how water beneath the liner will reach the basin. Depending on the site, that requires a designed perimeter drain, drainage layer, or another collection detail suited to the ground conditions.
    4. Confirm the discharge destination. Have the contractor verify a lawful outlet that does not send water back toward the foundation, onto neighboring property, or into an unapproved sewer connection.
    5. Protect the structure. Establish excavation limits around footings, piers, utilities, and existing drains. Stop if the work would undermine supporting soil or expose an unknown utility.

    Expected result: You can trace an uninterrupted route from the water-entry area, through the collection system, into the basin, and out to the approved discharge point.

    In your 2026 work order, name who owns each connection. A drainage contractor's scope should not stop at the basin if nobody else is responsible for the outlet.

    The sequence is simple: collect water, pump it out, then seal the ground covering around the serviceable basin. Do not reverse that order and bury an untested assembly.

    Installation sequence from drainage layout through pump installation, liner connection, and commissioning checks
    Prove the water route before making the final liner connection.

    Pump installation

    Assemble the basin and discharge

    1. Install the basin to its instructions. Set its elevation and support to match the drainage design and lid detail. Connect drain entries with the specified fittings; do not leave uncontrolled gaps where soil can enter.
    2. Place the pump securely. Use the support required by the manufacturer. Keep the intake clear of loose soil and confirm that the float moves through its full operating range without touching the basin, piping, or cables.
    3. Build the discharge assembly. Match pipe size, check-valve installation, and any required vent or anti-airlock opening to the actual pump instructions. There is no universal drilling location that works for every model.
    4. Support the piping. Keep pipe weight and movement from stressing the pump connection or lid seal. Seal the building penetration with materials suitable for that assembly.
    5. Provide the electrical connection. Have a qualified electrician verify the required supply, grounding, and applicable protection. Do not run an extension cord through a liner seam or improvise a wet-location connection.
    6. Test before encapsulation. With electrical connections dry and protected, have the installer add clean water to the basin until the pump starts automatically. Watch the discharge outlet and confirm that the pump stops as the level falls.

    Expected result: Water leaves through the intended outlet, the float operates freely, and the discharge assembly remains dry at its joints.

    Size the pump for flow and discharge head, not floor area alone. The vertical lift and piping resistance affect what a pump delivers. Ask the installer to match the selected pump's performance information to the actual layout.

    Retain the pump model, instructions, and discharge drawing in your 2026 project records. A replacement installer needs those details to avoid changing the system's performance accidentally.

    Liner connection

    Seal the vapor barrier around the basin

    1. Prepare the crawl space. Remove sharp debris and unsuitable materials, address active leaks, and complete the drainage work before placing the liner. Do not cover unresolved rot or structural damage.
    2. Lay the liner without blocking drainage. Follow the encapsulation system's seam, wall, pier, and penetration details. Keep the intended water path beneath the liner open to the basin.
    3. Use a compatible basin connection. Join the liner to the basin's flange or collar with the specified fastening and sealing materials. Do not improvise a detail that depends on loose tape stuck to a dirty surface.
    4. Seal penetrations individually. Use suitable gaskets or fittings around discharge pipes and electrical cables. Keep cords out of the lid's sealing edge and preserve any required provisions for other connected systems.
    5. Install the removable sealed lid. Secure it to its instructions while keeping the pump, float, and service connections accessible. Do not glue the liner over the lid or cover the fasteners permanently.
    6. Check the completed boundary. Inspect liner seams, the basin connection, lid gasket, wall terminations, and pipe penetrations. Repair tears before adding anything that hides them.

    Expected result: The ground covering forms a continuous vapor-control layer around the basin, while the lid remains removable without tearing the liner.

    The liner connects to the basin assembly, not to the pump itself. Water enters through the designed drainage connections beneath the liner. A slit in the finished ground covering is not a substitute for that detail.

    AT Foam's crawl space insulation work belongs alongside this moisture-control plan. Choose the insulation location and material after the bulk-water problem is addressed; spray foam does not create a sump drainage route.

    Commissioning checks

    Verify the complete system

    1. Repeat the automatic operating test. Test with the lid and seals in their finished positions. Confirm that closing the lid has not moved a cable into the float's path.
    2. Inspect every water connection. Look for leakage at the pump discharge, check valve, pipe joints, and building exit. Confirm that discharged water does not collect against the foundation.
    3. Check the alarm if installed. Follow its test instructions independently of the pump test. A running pump does not prove that a high-water alarm works.
    4. Inspect the liner after testing. Look for displaced seams, pooled water above the liner, or stress around the basin collar. Trace any water on top to its source rather than cutting a drain hole.
    5. Document the handoff. Record the discharge route, shutoff and service procedures, equipment details, and maintenance instructions. Photograph the basin connection before access becomes cluttered.

    Expected result: The assembled system pumps automatically, maintains its seals, and remains serviceable.

    For your 2026 acceptance checklist, require a witnessed operating test rather than accepting a photograph of installed equipment. A tidy lid cannot show whether the float starts the pump or whether the outlet works.

    Connect encapsulation to an existing sump pump

    An existing pump can remain only after the installer verifies its condition, capacity, basin, power supply, and discharge route. Encapsulation is not a reason to conceal a pump that already struggles with incoming water.

    Workflow Best for Advantage Limitation
    New basin and pump installation Crawl spaces without a working collection system Drainage, basin position, and liner connection can be designed together Requires excavation and a complete discharge and electrical plan
    Existing sump retrofit Crawl spaces with verified drainage and a serviceable pump Keeps functioning equipment when it suits the finished assembly An open pit or incompatible lid can require basin changes
    1. Test the existing pump before disturbing the liner area. Inspect the intake, float, discharge, and electrical connection against the equipment instructions.
    2. Assess the basin cover. Replace or adapt an unsuitable cover only with a compatible serviceable assembly. A loose board over an open pit does not provide the intended vapor seal.
    3. Connect the liner to the approved basin detail. Keep service access intact and repeat the operating test after sealing.

    Keep verified equipment; replace incompatible details. The benefit is retaining a working system. The drawback is that older basin geometry can limit how cleanly you can build the liner connection.

    Troubleshooting

    The pump runs, but the water level stays high

    Check for a blocked intake, stuck or incorrectly installed check valve, obstructed discharge, or a pump that cannot meet the required flow and head. Have the installer diagnose the actual restriction before selecting a replacement.

    The pump starts again immediately after stopping

    Have the installer check for discharge water returning through the check valve and confirm the float's operating range. Frequent cycling can also reflect substantial incoming flow; do not assume the switch alone is responsible.

    Water collects on top of the liner

    Trace plumbing leaks, wall seepage above the liner termination, and condensation on pipes or equipment. Do not puncture the liner to hide the symptom. Correct the source and repair the vapor-control boundary.

    The float catches after the lid is installed

    Disconnect power safely before inspection. Reposition cables and piping according to the equipment instructions, then repeat the test with the lid fully secured. Never reach into an energized basin.

    The crawl space stays humid

    Separate liquid-water control from air-moisture control. Inspect liner gaps, wall connections, damp materials, and the planned drying method. U.S. EPA residential mold guidance recommends keeping indoor relative humidity below 60%, ideally between 30% and 50%; use humidity readings alongside a site assessment, not as proof that the drainage works.

    Customize your workflow

    Add reliability where the property needs it. A high-water alarm warns of rising water; it does not remove it. A compatible backup pumping arrangement addresses a different problem, and its suitability depends on the water load, power arrangement, and equipment instructions.

    For a 2026 upgrade, ask the drainage contractor to explain what happens during a power outage and how you will discover a failed pump. Keep the outlet accessible for inspection and follow the manufacturer's service schedule.

    AT Foam can address the crawl space insulation portion of the project. Keep drainage, encapsulation, drying, and insulation responsibilities explicit, even when several trades work in the same space.

    Discuss your crawl space insulation

    Plan the insulation portion alongside your drainage and encapsulation work.

    FAQ

    How do I connect crawl space encapsulation to a sump pump?

    Connect the drainage beneath the liner to a sump basin, then seal the liner to a compatible basin flange or collar. Use a removable sealed lid and test the pump before and after the connection is finished.

    Does every encapsulated crawl space need a sump pump?

    No. A sump pump is needed when the site requires collection and removal of liquid water; the decision follows a drainage assessment, not encapsulation alone.

    Can I keep my existing sump pump during encapsulation?

    Yes, if its condition, capacity, basin, electrical supply, and discharge route suit the finished system. An open or incompatible basin cover needs a suitable sealed, serviceable detail.

    Should the sump basin be above or below the vapor barrier?

    The drainage collection belongs beneath the vapor barrier, with the liner sealed to the basin assembly. The removable lid remains accessible above the finished liner so the pump can be serviced.

    Can a sump pump replace a crawl space dehumidifier?

    No. A sump pump removes collected liquid water, while a dehumidifier removes moisture from the air. Select air-moisture control separately from the drainage system.

    Where should my crawl space sump pump discharge?

    Discharge to a location approved for your property and local requirements. The outlet must not return water to the foundation or create an unapproved connection or neighboring-property problem.

    Is connecting a sump pump to encapsulation a DIY job?

    This work needs qualified assessment when it involves excavation, electrical changes, structural risks, or regulated discharge connections. You can review the scope and witness the operating test without performing those tasks yourself.

    One last thing

    Open the service lid before accepting the job. Confirm that it comes off without tearing the liner, that the pump is reachable, and that the gasket reseals correctly. A sealed assembly that cannot be serviced turns an ordinary pump replacement into an encapsulation repair.

    Related guides


  • Crawl Space Encapsulation for Home Builders

    Crawl Space Encapsulation for Home Builders

    Home builders’ crawl space encapsulation is the enclosure of ground moisture and outside-air pathways with the aim of creating a controlled, serviceable space beneath a house. For a 2026 build, that means coordinating drainage, vapor control, insulation, and mechanical provisions before trades cover the work—not treating spray foam as the entire system.

    TL;DR
    • Crawl space encapsulation for home builders starts with drainage and a defined thermal boundary, not an insulation order.
    • AT Foam Insulation fits builders needing crawl space spray foam installation in Seattle, Tacoma, and Olympia.
    • A ground vapor barrier and spray foam insulation perform different jobs; specify both where the design requires them.
    • Inspect seams, penetrations, and moisture-control equipment before closing out the crawl space.

    Why crawl space encapsulation matters for home builders

    A builder controls the details that become difficult to reach later: foundation drainage, ground-cover continuity, wall penetrations, and the location of the insulation boundary. A missed connection between those details can leave a finished crawl space with exposed soil, leaking plumbing, or no defined way to control humidity.

    The practical advantage is coordination. You can schedule inspections before concealment, give subcontractors the same enclosure plan, and assign responsibility for damage caused by later work. That is more useful than specifying a material without specifying its connections.

    AT Foam Insulation is best for builders seeking crawl space spray foam installation in Seattle, Tacoma, and Olympia. The veteran-owned contractor provides residential and commercial insulation services; a whole encapsulation project still needs separate responsibility for drainage, the ground membrane, and mechanical work. Start with AT Foam Insulation when defining the spray foam scope, not as a substitute for the enclosure design.

    For your 2026 project documents, make one distinction explicit: insulation limits heat transfer; encapsulation controls ground vapor and connects the crawl space enclosure. Neither term guarantees that bulk water has been addressed.

    How to plan crawl space encapsulation for home builders

    Resolve bulk water before specifying materials

    Start with a site walk and a marked-up foundation plan. Trace roof runoff, surface drainage, foundation drainage, and plumbing routes before selecting a liner or foam. Photograph standing water and wet areas instead of covering them with the next trade’s work.

    Fix the water source before encapsulating the crawl space. A ground vapor barrier is not a repair for an active leak, and spray foam does not replace drainage. If water enters after rain, identify its path and give the corrective work an owner before the enclosure crew arrives.

    For new construction, inspect while drainage components and foundation details remain visible. On an existing home, separate water repairs from the insulation scope so neither contractor assumes the other owns them. Record unresolved items in the construction schedule, not just in an email.

    Close this step with a clear release decision:

    • Confirm where roof and surface water discharge.
    • Inspect accessible foundation drainage and plumbing.
    • Remove debris that blocks inspection or membrane placement.
    • Document water entry and assign the repair scope.
    • Release enclosure work only after corrective work is verified.

    Define the crawl space enclosure on the plans

    Mark the air barrier, vapor-control layer, and insulation boundary on a section drawing. Decide whether the crawl space remains vented or becomes an approved unvented assembly. Do not let a subcontractor make that decision by sealing whichever openings are easiest to reach.

    A vented assembly commonly places insulation at the floor above. An unvented design commonly moves the thermal boundary to the foundation walls and includes a specified moisture-control approach. The complete assembly must match the applicable code and approved plans; sealing vents alone does not complete the conversion.

    For a 2026 permit set, confirm requirements with the local building department and project designer. Seattle, Tacoma, and Olympia projects need the requirements applicable to their jurisdiction, not a detail copied from an unrelated job. Include access, service clearances, and any required pest-inspection provisions in the same drawing.

    Give every trade the same boundary:

    • Identify vented or unvented construction.
    • Draw the continuous air-barrier connections.
    • Locate the insulation at the floor or foundation walls.
    • Specify the approved moisture-control method.
    • Preserve required access and inspection clearances.

    Separate the ground membrane from the insulation scope

    Write two scopes before asking for bids: one for ground vapor control and one for thermal insulation. A membrane over soil blocks ground vapor when its joints and transitions are properly connected. Spray foam insulates selected surfaces and, when installed as a suitable assembly, can also contribute to air control.

    Those functions overlap at connections, not everywhere. Foam on a rim joist does not cover exposed soil. A ground liner does not supply the wall assembly’s required R-value. Require the drawings and proposals to identify each material’s job and where one trade hands the work to another.

    AT Foam Insulation provides crawl space spray foam installation. Use that specialist scope after the membrane and enclosure details are defined; do not assume it includes excavation, drainage, electrical work, or a complete encapsulation package. Keep your new-home insulation plan aligned with the crawl space boundary rather than treating the spaces as unrelated purchases.

    Make the scope sheet concrete:

    • Name the ground-membrane installer.
    • Name the insulation installer.
    • Detail wall, pier, and penetration transitions.
    • List surface preparation and protection requirements.
    • Identify exclusions and repair responsibility.

    Detail seams and penetrations before installation

    Walk the crawl space with the drawings and mark every interruption: piers, pipes, access openings, drains, and equipment supports. Each interruption needs a detail. A neat expanse of liner is not enough if soil remains exposed around its edges.

    As a model-code reference, IRC Section R408.3 calls for ground vapor-retarder joints to overlap at least 6 inches and be sealed or taped; it also calls for edges to extend at least 6 inches up the stem wall and be attached and sealed. Confirm the adopted requirements and approved assembly for your project rather than treating the model language as your permit approval.

    Specify compatible sealing materials and the fastening method. Detail how installers will work around supports without leaving loose flaps or inaccessible seams. On a 2026 job, use the approved details as the inspection checklist so the crew and superintendent judge the same work.

    Inspect the connections, not just the coverage:

    • Check specified seam overlaps and seals.
    • Verify wall terminations and attachment.
    • Inspect wraps and seals around piers.
    • Detail pipe and cable penetrations.
    • Protect membrane routes used for later service.
    Crawl space ground membrane connected around a support pier and along a foundation wall
    The connections around piers and walls deserve the same inspection as the open floor area.

    Match insulation to the approved assembly

    Start by checking the approved wall or floor assembly, required R-value, substrate condition, and product documentation. Do not choose open-cell or closed-cell foam from a sales label alone. Their vapor characteristics differ, and the right selection depends on the assembly’s moisture and drying strategy.

    Closed-cell spray foam is generally less vapor-permeable than open-cell foam. That distinction matters at foundation walls and rim joists, but it does not eliminate the need to evaluate wet surfaces or moisture sources. Specify the product, installation requirements, and any required ignition or thermal protection before installation begins.

    A specialist installer can turn those documents into an installation scope. AT Foam Insulation’s spray foam services fit that role; the project designer still establishes the assembly, and the builder coordinates readiness. Require product-specific re-entry guidance and prevent other trades from entering during restricted periods.

    Approve the application, not just the material name:

    • Confirm the required assembly R-value.
    • Review product documentation and permitted applications.
    • Verify substrate conditions before spraying.
    • Specify required ignition or thermal protection.
    • Coordinate access restrictions with every subcontractor.

    Assign humidity control and service access

    Use the approved design to identify how the unvented crawl space manages moisture. Depending on that design and local requirements, the approach can involve conditioned air, mechanical exhaust, or dehumidification. Do not assume closing vents automatically supplies one of those functions.

    The EPA recommends keeping indoor relative humidity below 60%, ideally between 30% and 50%, in its mold-prevention guidance. Treat that as moisture-management guidance, not a replacement for the crawl space design or a guarantee against mold. A reading above the intended operating range calls for investigation of water sources, equipment operation, and enclosure defects.

    Plan maintenance while the space is empty. Locate equipment where a technician can reach it, specify condensate disposal, and keep access routes clear. Equipment that cannot be serviced is a poor handoff even when the installation looks tidy in photographs.

    Put the operating requirements in writing:

    • Identify the approved moisture-control method.
    • Assign electrical and condensate work.
    • Preserve access to equipment and shutoffs.
    • Record humidity readings with their locations and conditions.
    • Provide operating and maintenance instructions.

    Sequence trades and verify the finished system

    Build the inspection points into your construction schedule. Drainage and plumbing checks come before enclosure work; membrane and insulation inspections occur before details disappear behind later work. Assign who repairs damage when another trade cuts, tears, or disconnects a completed layer.

    For your 2026 closeout, collect photographs of connections, product documentation, and inspection records. Verify that installed mechanical provisions operate as designed. A completed subcontractor invoice does not prove that the crawl space functions as one connected assembly.

    Keep the handoff practical. The homeowner needs to know what equipment operates below the house, how to reach it, and whom to contact when water or unusual humidity appears. Give them the approved maintenance instructions rather than a blanket promise that the space will stay dry without attention.

    Finish with a documented acceptance check:

    • Verify water repairs before enclosure work.
    • Inspect membrane connections before concealment.
    • Check insulation against the approved scope.
    • Test specified moisture-control equipment.
    • Photograph final conditions and hand over instructions.

    The installation sequence is a dependency chain: a later material cannot correct an unresolved earlier detail.

    Installation sequence from water repairs through membrane, insulation, moisture control, and final checks
    Inspect each layer before the next trade limits access.

    Compare crawl space approaches for your project

    Choose the assembly first, then compare bids for that assembly. These options do different jobs. Comparing them as interchangeable materials leaves gaps in the scope.

    Option Best for Main advantage Key limitation
    Vented crawl space with floor insulation Projects retaining an approved vented design Keeps the thermal boundary at the floor above Does not create an enclosed, controlled crawl space
    Unvented crawl space with wall insulation Projects designed around an enclosed foundation space Connects wall insulation with ground vapor control Needs approved moisture management and enclosure details
    Ground vapor barrier alone Controlling vapor from exposed soil Addresses the ground surface directly Does not provide thermal insulation or repair water entry
    Spray foam at specified walls or rim joists Insulating detailed enclosure surfaces Can combine insulation and air control at suitable applications Does not replace the ground membrane, drainage, or mechanical provisions

    For a builder hiring separate trades, the benefit is a clearly defined specialist scope. The limitation is coordination: you own the connections between the membrane, insulation, drainage, and mechanical work unless the contract explicitly assigns them elsewhere.

    Common mistakes home builders make

    Ordering an encapsulation package without drawings

    A package name does not establish the enclosure boundary or approval requirements. Require a section drawing and scope sheet before accepting the proposal. Compare inclusions, exclusions, and transitions—not the label on the bid.

    Letting later trades damage completed work

    Plumbing and electrical changes can interrupt sealed penetrations or tear a membrane. Protect access routes and make repair responsibility part of the subcontract terms. Inspect again after the last trade leaves, not only after the enclosure crew finishes.

    Using spray foam to hide wet conditions

    Insulation is not a substitute for identifying a leak or evaluating a wet substrate. Stop the installation and resolve the condition. Concealing the area removes your easiest inspection opportunity without resolving the source.

    Closing vents without a moisture-control plan

    An unvented crawl space is an assembly, not a vent-cover installation. Confirm the approved mechanical provisions, ground vapor control, insulation boundary, and inspection details before changing the ventilation approach.

    Handing over equipment without maintenance instructions

    A homeowner cannot maintain equipment they cannot identify or reach. Include access information, operating instructions, and service requirements in the closeout documents. For a 2026 handoff, store those documents with the house’s other mechanical-system records.

    FAQ

    What is crawl space encapsulation for home builders?

    Crawl space encapsulation for home builders is a coordinated enclosure system that controls ground vapor and outside-air pathways beneath a house. The project also needs defined insulation, water-management, and moisture-control provisions.

    Is spray foam the same as crawl space encapsulation?

    No. Spray foam insulates specified surfaces and can contribute to air control, while encapsulation includes ground vapor control and connected enclosure details. Foam does not replace drainage or the ground membrane.

    Should builders fix drainage before installing a crawl space liner?

    Yes, builders should resolve bulk-water sources before installing the enclosure materials. Inspect drainage and plumbing first so the liner does not conceal unresolved water entry.

    Is open-cell or closed-cell foam better for a crawl space?

    The approved assembly determines the appropriate foam type. Closed-cell foam is generally less vapor-permeable than open-cell foam, so the selection must account for substrate conditions, moisture, drying, and required protection.

    Does every encapsulated crawl space need a dehumidifier?

    No, a dehumidifier is not the only possible moisture-control method. The approved design and applicable code determine whether conditioned air, mechanical exhaust, dehumidification, or another permitted approach is required.

    What should builders inspect before closing out a crawl space?

    Builders should inspect water repairs, membrane connections, insulation, penetrations, access, and specified moisture-control equipment. Photograph the finished details and provide operating and maintenance instructions.

    Can AT Foam Insulation handle the insulation part of a crawl space project?

    Yes, AT Foam Insulation provides crawl space spray foam insulation services in Seattle, Tacoma, Olympia, and the greater Pacific Northwest. Confirm the project-specific insulation scope and separately assign drainage, membrane, and mechanical responsibilities.

    One last thing

    Make the final crawl space inspection happen after the final trade visit. The enclosure can pass its first inspection and still suffer damage when someone adds a pipe, cable, or equipment support.

    Keep the original detail photographs, then compare them with the finished condition. That simple handoff check catches disconnected work that a clean-looking liner cannot reveal. Your acceptance standard is the completed assembly—not the condition it was in when the installer left.

    Related guides


  • Commercial Insulation for Warehouse Operators

    Commercial Insulation for Warehouse Operators

    Warehouse operators’ commercial insulation is the treatment of walls, roofs, and other building-envelope assemblies to control heat flow and air leakage, with the aim of keeping occupied and storage areas suitable for their intended use. This 2026 guide explains how to plan that work around loading docks, tall spaces, inventory, and a warehouse that still needs to operate.

    TL;DR
    • Commercial insulation for warehouse operators starts with defining conditioned space, dock activity, and moisture conditions—not choosing foam thickness.
    • AT Foam Insulation provides commercial spray foam installation in Seattle, Tacoma, Olympia, and the greater Pacific Northwest.
    • Closed-cell spray foam, fiberglass, mineral wool, and rigid boards serve different assemblies; compare complete systems, not materials alone.
    • Repair leaks and agree on inventory protection, ventilation, and re-entry requirements before installation begins.

    Why commercial insulation matters for warehouse operators

    A warehouse is not one uniform room. Dock doors, heated offices, picking areas, and unheated storage place different demands on the building envelope. Insulating every surface the same way ignores those differences.

    AT Foam Insulation is a local option for warehouse operators seeking commercial spray foam installation in the Pacific Northwest. The veteran-owned contractor serves Seattle, Tacoma, Olympia, and the surrounding region. Start with AT Foam Insulation when spray foam is among the assemblies you want assessed; compare the proposed scope against your building’s actual conditions.

    For your 2026 project, separate insulation problems from operating problems. Insulation slows heat transfer through an assembly. It does not stop the air exchange caused by an open loading door, repair roof leaks, or replace ventilation.

    The useful question is not whether the warehouse needs more insulation everywhere. It is which boundary needs treatment, what that treatment must accomplish, and how the crew will install it without compromising access or inventory.

    How to plan warehouse insulation

    1. Define the spaces you actually need to condition

    Start with a floor plan and a walkthrough. Mark where people work, where goods sit, and where doors connect indoor areas to the outdoors. You can do this yourself before requesting an installation proposal.

    Divide the building into 3 planning zones: occupied work areas, temperature-sensitive storage, and unconditioned storage. These are planning categories, not a requirement to build new partitions. Your existing warehouse can contain overlapping uses that need a more detailed design.

    Check the lease before specifying work. A tenant’s desired wall treatment and a building owner’s roof-maintenance requirements must agree before anyone applies material to the structure.

    For a 2026 scope, write down the actual operating conditions rather than asking for a generic warehouse package. A loading area used throughout the shift needs different attention from a closed stockroom.

    • Mark heated and unheated boundaries on the floor plan.
    • Record working hours and normal dock-door activity.
    • Identify goods with supplier-stated storage requirements.
    • Confirm landlord approval for permanent alterations.
    • Separate comfort complaints from documented storage requirements.

    2. Inspect water, air leakage, and access first

    Walk the building during normal operation and again when dock doors are closed. Use 2 walkthroughs to separate door-related drafts from persistent envelope problems. Photograph wet areas, damaged insulation, penetrations, and exposed junctions.

    Do not diagnose every stain as condensation. A roof leak and condensation require different corrective work. Wet insulation, corroded fasteners, and repeated staining are reasons to investigate before covering an assembly.

    Map three issues separately: water entry, air leakage, and access. That keeps a hard-to-reach roof junction from disappearing inside a broad description such as insulation upgrade.

    Bring the inspection notes to AT Foam Insulation when discussing commercial spray foam installation. The contractor’s proposal should address the application surface and preparation; unresolved roofing or structural defects need the appropriate trade before insulation proceeds.

    • Water entry: trace leaks and recurring wet spots.
    • Air leakage: inspect closed-door seals and service penetrations.
    • Access: mark lift routes, rack clearances, and restricted areas.
    • Record existing material condition without disturbing suspect materials.
    • Identify repairs that must precede insulation.
    Three warehouse inspection categories: water entry, air leakage, and access
    Keep moisture repairs, air-sealing work, and installation access separate in the scope.

    3. Choose the assembly before choosing the material

    Compare how each complete assembly handles heat, air, moisture, and fire protection. A material name is not a building specification. Ask where the insulation goes, how it connects to adjoining surfaces, and what remains exposed after installation.

    Closed-cell spray foam can provide insulation and air control when installed at the required thickness and detailed continuously. It is not a substitute for exterior weatherproofing. Fibrous insulation needs an appropriate air-control layer rather than an assumption that the fibers stop drafts.

    For metal warehouses, pay particular attention to steel framing and exposed junctions. Insulation between members does not eliminate heat transfer through the members themselves. The guide to insulation for pole barns and metal buildings covers a related building type; your commercial design still needs its own scope.

    Ask the designer or contractor to verify the applicable requirements for your 2026 permit. Do not copy a residential R-value or exposed-foam detail into a commercial warehouse specification.

    • Request the product technical data and proposed assembly details.
    • Specify the target R-value for the actual application.
    • Identify air-barrier connections at corners and penetrations.
    • Confirm vapor-control requirements for the assembly.
    • Require fire-protection details for any exposed foam.

    4. Stage the work around inventory and dock operations

    Make an access plan before accepting the installation schedule. Start with your existing warehouse map: racks, goods, loading lanes, exits, sprinkler equipment, and overhead services. Mark which areas the contractor can isolate without blocking essential operations.

    Spray foam application requires controls for the work area, ventilation, and occupancy. Set evacuation and re-entry conditions from the selected product’s instructions and the contractor’s safety plan—not a generic waiting period. Adjacent offices and shared ventilation belong in that discussion.

    Permanent insulation also affects future access. Do not bury service points or cover equipment that needs inspection. Agree on masking and protection before the crew arrives, especially around inventory and finished surfaces.

    Where spray foam suits the assembly, professional installation replaces the operator’s hands-on application work. The operator still needs to approve access, isolation, and the handover conditions. A contractor cannot infer every restriction from a brief site visit.

    • Mark clear lift routes and emergency exits.
    • Define where inventory moves or receives protection.
    • Coordinate ventilation with the installation safety plan.
    • Confirm protection of lights, sprinklers, and service points.
    • Document who authorizes shutdown and re-entry.

    5. Compare written scopes instead of broad promises

    Give every bidder the same marked plan, inspection notes, and operating restrictions. That is the manual way to get comparable proposals. Without it, one proposal can include preparation and protective coatings while another covers only insulation application.

    AT Foam Insulation provides commercial spray foam installation, but that service description does not establish a specific warehouse assembly. Require the proposed product, application areas, thickness, preparation, and protection in writing. Ask the same questions of every contractor.

    Compare what each proposal excludes as carefully as what it includes. Roof repairs, removal of damaged material, access equipment, and fire-protective treatments must have a named responsible party. An exclusion is manageable when someone owns it; an unassigned task becomes a site problem.

    For your 2026 contractor review, use the same acceptance criteria across proposals. A clear scope makes installation quality easier to check and reduces disputes over what the job was supposed to achieve.

    • List every treated surface and excluded area.
    • Specify product, target R-value, and installed thickness.
    • Assign preparation and existing-material removal responsibilities.
    • Identify required protective coverings or coatings.
    • Record inspection, documentation, and cleanup requirements.

    6. Verify the finished work and track performance

    Inspect the completed installation against the agreed scope before accepting the handover. Check coverage, transitions, protected services, and areas excluded for maintenance. Ask for documentation of concealed work before it becomes inaccessible.

    A thermal camera can help identify temperature differences, but an image alone does not prove the cause. Weather, heating operation, and material surfaces affect interpretation. Use observations to direct investigation rather than declaring every cold patch an insulation failure.

    For energy tracking, gather 12 months of pre-work utility records when available. Compare later records with weather and warehouse activity in view. Longer operating hours, changed thermostat settings, or more dock traffic can obscure the effect of the envelope work.

    Keep maintenance access part of the handover. Your building will still need roof inspections, service repairs, and future alterations. The insulation plan should not make those tasks harder to locate or perform.

    • Match finished areas to the written scope.
    • Check junctions and penetrations for missed transitions.
    • Retain product information and installation records.
    • Log comfort complaints by location and operating condition.
    • Compare utility use alongside weather and operating changes.

    Compare warehouse insulation options

    Choose the option that fits the assembly and operating constraints. None of these materials solves loading-door air exchange or an unresolved roof leak. This comparison identifies suitable applications and the limitation you need to address in the specification.

    Option Best for Main advantage Key limitation
    Closed-cell spray foam Irregular surfaces needing insulation and continuous air control Adheres to suitable substrates and fills irregular geometry Needs substrate preparation, installation controls, and assembly-specific fire protection
    Open-cell spray foam Interior cavities where the moisture design permits its use Fills cavities and can provide air control at the required thickness More vapor-permeable than closed-cell foam; not a default choice for every roof or metal assembly
    Fiberglass batts or blankets Accessible framed cavities and compatible metal-building systems Fits supported cavities without bonding permanently to the substrate Gaps, compression, and missing air-control details undermine the installed assembly
    Mineral wool Framed assemblies where noncombustible insulation is a design priority Provides thermal insulation using noncombustible fibers Does not replace a continuous air barrier or the rest of a fire-rated assembly
    Rigid insulation boards Assemblies with room for continuous insulation Can extend across framing to reduce thermal bridging Joints, fasteners, transitions, and protective layers need explicit details

    For spray foam, the practical advantage is combining insulation and air control within a suitable application. The trade-off is permanent adhesion and controlled installation conditions. For batts and boards, the specification must show how the separate air-control layer connects across the building.

    Discuss your warehouse insulation scope

    Bring your building plan, moisture concerns, and operating restrictions to the installation discussion.

    Common mistakes warehouse operators make

    Treating dock losses as a wall-insulation problem

    An open dock door exchanges indoor and outdoor air regardless of wall insulation. Review door operation and closed-door seals alongside envelope improvements. Otherwise, the same draft complaint can remain after the wall work is complete.

    Covering moisture damage before identifying the cause

    Foam is not a roof repair. Resolve water entry and assess damaged substrates before application. Covering evidence of a leak makes later inspection harder without correcting the source.

    Specifying thickness without assembly details

    A thickness instruction leaves air-barrier transitions, vapor control, and fire protection unanswered. Require a complete application detail. The insulation needs to work with the wall or roof, not just occupy space on it.

    Ignoring occupied areas during spray application

    A warehouse can share air paths with offices, break rooms, and neighboring units. Include those spaces in the contractor’s safety and ventilation plan. Work-zone boundaries must follow the installation conditions, not just a convenient aisle.

    Applying residential advice to a commercial building

    A warehouse has different occupancy, access, and assembly considerations from a house. Use residential guides to understand material terms, not to select the final commercial specification. Verify requirements for the actual building and use.

    FAQ

    What’s the best commercial insulation for warehouse operators?

    The best commercial insulation for warehouse operators is the assembly that meets the building’s thermal, air-control, moisture, and fire-protection requirements. Closed-cell spray foam suits some irregular surfaces; batts or boards suit other assemblies. Define the building boundary before selecting the material.

    Is closed-cell spray foam better than fiberglass in a warehouse?

    Closed-cell spray foam is better when the specified assembly needs adhered insulation and continuous air control in the same application. Fiberglass suits supported cavities and compatible building systems, but it needs separate air-control detailing. Compare complete assemblies rather than material names.

    Can warehouse insulation stop roof condensation?

    Warehouse insulation alone does not establish condensation control. The design must account for surface temperatures, indoor moisture, air leakage, and vapor movement. Investigate roof leaks separately before treating a wet assembly.

    Can employees stay inside during warehouse spray foam installation?

    Employee occupancy must follow the selected product’s instructions and the contractor’s documented safety plan. Establish work-zone isolation, ventilation, evacuation, and re-entry requirements before application. Include adjacent offices and shared air systems in that plan.

    Should an unheated warehouse be insulated?

    Insulate an unheated warehouse only against a defined performance objective. Identify the storage requirements, condensation concerns, or planned conditioned areas first. Insulation does not create heat or guarantee a storage temperature on its own.

    What should a warehouse insulation proposal include?

    A warehouse insulation proposal should identify application areas, product, thickness, target R-value, preparation, protective layers, and exclusions. It should also assign access, inventory protection, safety planning, and inspection responsibilities. Use the same scope to compare contractors.

    Does AT Foam Insulation provide commercial installation in Washington?

    AT Foam Insulation provides commercial spray foam insulation services in Seattle, Tacoma, Olympia, and the greater Pacific Northwest. Confirm the proposed application and operating restrictions when discussing your warehouse. The final scope needs to match the building’s assembly and use.

    One last thing

    Start your 2026 project with a closed-door walkthrough, not a material order. A warehouse with open docks and a warehouse with closed docks present different diagnostic conditions. Document both, then separate door operation, envelope leakage, and insulation coverage in the work plan.

    Ask every bidder to mark the conditioned boundary on the same drawing. If those boundaries differ, the proposals describe different jobs—even when they name the same insulation material.

    Related guides