Author: Ryze Publisher

  • Can spray foam insulation catch fire?

    Can spray foam insulation catch fire?

    Yes, spray foam insulation can catch fire: both open-cell and closed-cell polyurethane foam are combustible. Fire-retardant ingredients do not make either type fireproof, and the finished installation needs the protection required for its location and approved assembly. The practical question is whether your foam has the right barrier, heat-source clearances, and installation documentation.

    TL;DR
    • Can spray foam insulation catch fire? Yes. Open-cell and closed-cell polyurethane foam are combustible, not fireproof.
    • Thermal barriers and ignition barriers serve different purposes; an attic exception does not apply everywhere.
    • AT Foam Insulation provides local spray foam installation; ask for product documentation and the required barrier details.
    • Keep foam away from heat sources according to equipment instructions and the approved installation requirements.

    Can spray foam insulation catch fire?

    Yes. Spray foam can ignite and burn when exposed to sufficient heat or flame. A fire-retardant formulation changes how the material performs under specified test conditions. It does not turn polyurethane into a noncombustible material.

    Both common types need a fire-protection plan. Open-cell foam has a cell structure that is more vapor-permeable; closed-cell foam has a tighter structure and generally provides more resistance to vapor movement. Neither distinction removes the fire risk.

    Foam type Best for Useful property Fire-safety limitation
    Open-cell Assemblies designed around vapor-permeable insulation Fills cavities and limits air leakage when properly installed Combustible; needs the protection approved for its application
    Closed-cell Assemblies needing greater vapor resistance Combines insulation and air sealing when properly installed Combustible; moisture resistance does not make it fireproof

    Choose the foam around the building assembly, not a claim that one type cannot burn. For Pacific Northwest homes, moisture control also matters; the guide on whether spray foam insulation can cause mold covers that separate concern.

    Why this matters in your Washington home

    Foam hidden behind an approved wall covering is a different installation from exposed foam across an attic roof deck. The location changes the protection required. So does how you use the space.

    Wet winters, damp crawl spaces, and roof leaks deserve attention in Seattle, Tacoma, Olympia, and Eastside homes. But moisture control and fire protection are separate checks. Solving one does not solve the other.

    For a 2026 insulation project, make the barrier part of the scope before work starts. You should not discover after spraying that a required covering or tested coating was left out of the proposal.

    What keeps spray foam separated from a fire?

    A thermal barrier separates foam from the building interior and delays its exposure to fire. Under the International Residential Code's foam-plastic provisions in Section R316, a common prescriptive example is 1/2-inch gypsum wallboard, installed as required. Other approved systems and specific exceptions exist.

    The code's alternative thermal-barrier provisions involve a 15-minute fire exposure under specified testing. That is a test criterion, not a promise that your home is safe for 15 minutes during a fire. Do not use it to plan escape time.

    An ignition barrier is different. It provides more limited protection in qualifying attic or crawl-space applications, typically where entry is only for servicing utilities. One prescriptive material listed in the IRC's attic provisions is 1 1/2-inch mineral-fiber insulation, subject to the section's installation and application requirements.

    Protection Best for What it does Important limit
    Thermal barrier Separating foam from occupied building interiors Delays heat exposure to the foam Must meet the applicable code or approved assembly requirements
    Ignition barrier Qualifying service-only attics and crawl spaces Provides limited ignition protection Does not automatically replace a thermal barrier
    Tested coating system Applications covered by its approval Protects foam when applied as tested Approval depends on the foam, coating, thickness, and location

    An ignition barrier is not a substitute for a thermal barrier unless the applicable requirements allow it. For your 2026 project, confirm the adopted local code and any product-specific approval with the building department. Residential and commercial buildings do not necessarily follow the same provisions.
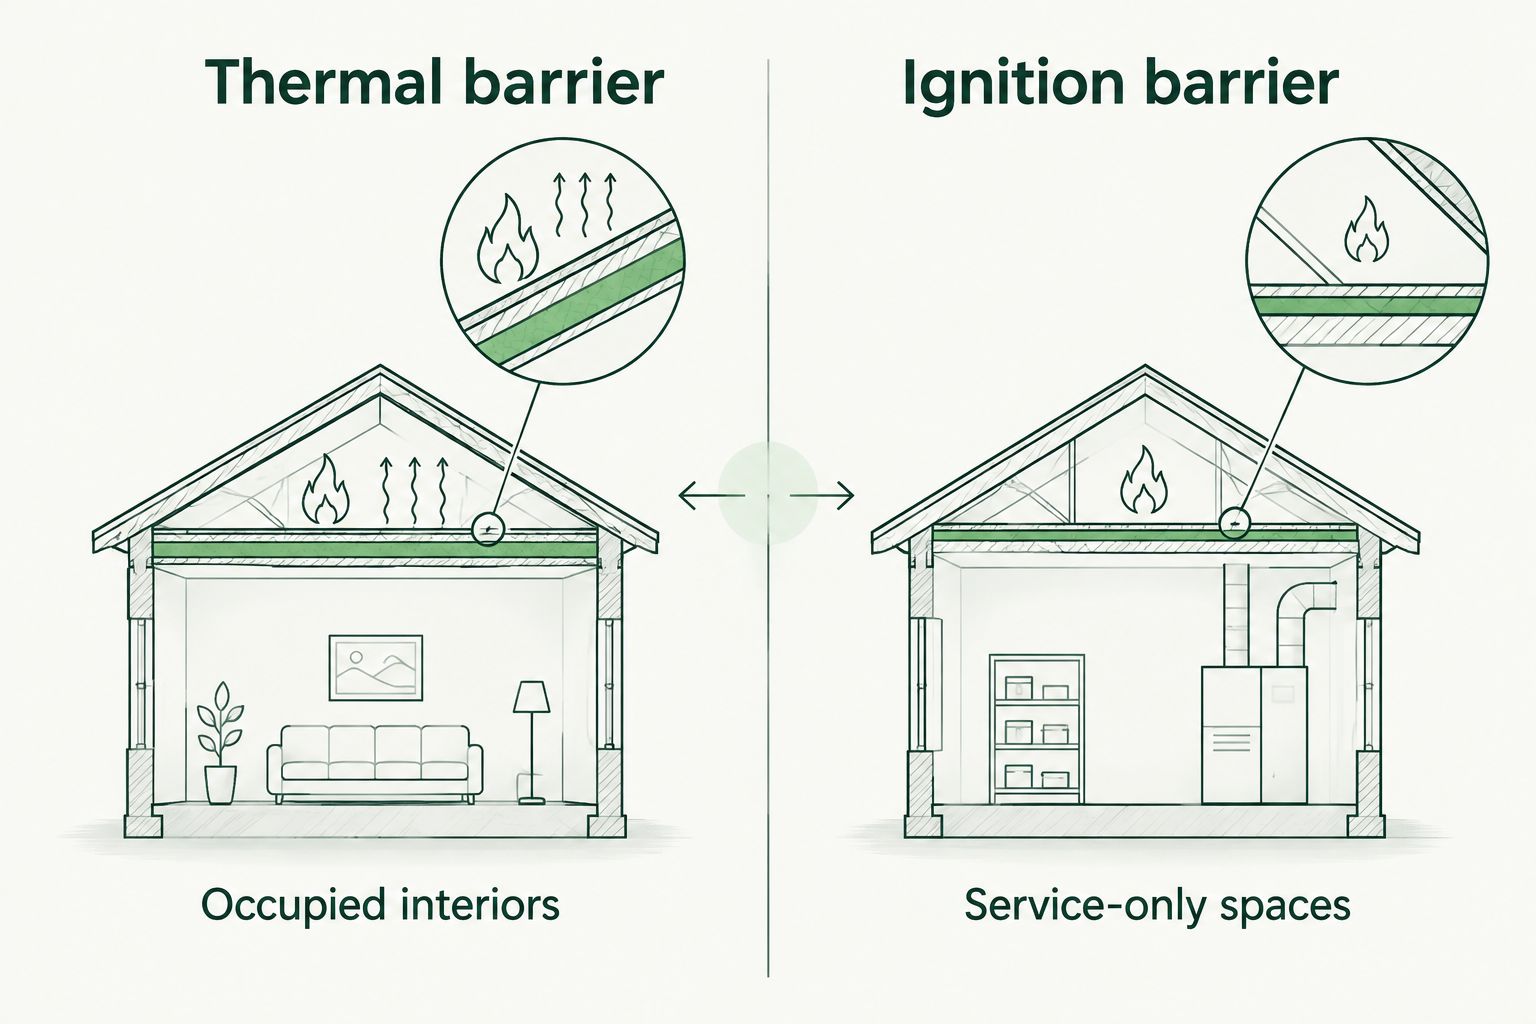
    Comparison of thermal barriers for occupied interiors and ignition barriers for qualifying service-only spaces
    An ignition barrier does not automatically replace a thermal barrier.

    Is exposed spray foam allowed in an attic?

    Exposed foam is not automatically allowed just because it sits above your ceiling. Some products and assemblies have approvals for specific uses without an additional barrier. Others require an ignition barrier, a thermal barrier, or a tested coating.

    Ask what the approval actually covers. An attic used only to service equipment is not the same as an attic used for storage or converted into a room. Do not assume an exception survives a change in use.

    For a 2026 attic inspection, check these points:

    • Product identity: Record the foam manufacturer and exact product.
    • Space use: State whether you enter only for utility service, store belongings, or occupy the space.
    • Protection: Identify the required covering or approved coating system.
    • Installation limits: Match foam thickness and substrate to the approved application.
    • Heat sources: Check chimneys, flues, lights, and nearby equipment.

    Photographs help document what was installed. They do not prove that an exposed-foam assembly meets its approval. Keep the product documents with the job records.

    Is spray foam safe around recessed lights, flues, and chimneys?

    Do not spray foam against a heat source unless the equipment listing and installation requirements expressly permit it. Chimneys, vent connectors, recessed lights, and other equipment have clearance rules. Those rules belong to the specific component, not to spray foam as a category.

    An insulation-contact-rated light is designed for certain insulation contact conditions, but that does not automatically authorize encapsulating it in spray foam. Electrical connections and equipment also need the access required by their installation instructions and electrical rules.

    Have the installer identify these details before spraying:

    • Which fixtures and equipment need clearance.
    • How the required clearance will remain open.
    • Which protective details the equipment instructions permit.
    • Where junction boxes, controls, and service access must remain reachable.

    There is no responsible universal clearance number for every light or chimney. Use the listed equipment instructions and applicable code. Guessing a gap is not a fire-protection plan.

    Can spray foam overheat while it is being installed?

    Yes. Spray foam's chemical reaction produces heat during application. Applying material too thickly in a single pass can trap excessive reaction heat; manufacturer instructions set application limits and cooling requirements.

    This is different from cured foam catching fire after contact with a flame. Installation safety depends on the crew following the product's directions for substrate conditions, application thickness, and timing between passes.

    Ask whether the crew follows the manufacturer's maximum lift thickness. A lift is one applied layer of foam. There is no single safe lift thickness for every product, so a number taken from another foam's instructions is not enough.

    For 2026 job planning, also separate fire precautions from chemical-exposure precautions. Occupant exclusion, ventilation, and re-entry instructions address installation exposure; they do not replace the finished assembly's fire protection.

    Why spray foam fire protection varies

    The required protection follows the product and building assembly. It does not follow a simple rule such as “closed-cell is safe” or “all attics can stay exposed.”

    • Building use: A home and a commercial building can have different applicable requirements.
    • Location: Walls, roof assemblies, attics, and crawl spaces have different protection conditions.
    • Space use: Occupancy, storage, and utility-service access affect which exceptions apply.
    • Product approval: Testing applies to identified products and assemblies, not every foam on the market.
    • Installed thickness: The thickness must stay within the tested or approved configuration.
    • Nearby equipment: Heat sources introduce their own clearances and installation restrictions.

    A contractor should be able to explain these factors without burying you in technical language. Ask for the document that supports the proposed installation, then confirm that the document matches your actual space.

    Does a Class A rating mean spray foam is fireproof?

    No. A Class A surface-burning classification is not a noncombustibility rating. ASTM E84 evaluates surface flame spread and smoke development under defined test conditions; it does not prove that foam cannot burn in a building fire.

    A surface-burning result also does not establish the fire resistance of a complete wall or roof assembly. Those are different questions with different tests and requirements.

    When someone says a foam is “fire rated,” ask what rating they mean. Request the test or evaluation document, its scope, and the installation conditions. A rating without its conditions is not enough to approve an installation.

    Can you paint exposed foam instead of covering it?

    Ordinary paint is not an approved replacement for a required thermal or ignition barrier. A tested protective coating is a different product, and it must match the foam and application named in its approval.

    Some protective coatings are intumescent, meaning they expand when heated. Their performance still depends on the tested system, including the required coating thickness and application conditions.

    Do not judge coating compliance by color or appearance. Ask for the coating name, its approved use with the installed foam, and application records. Touching up a missed area with household paint does not complete a tested system.

    What should you ask before hiring a spray foam contractor?

    Ask for the fire-protection scope in writing before you approve the work. The estimate should identify more than the area being sprayed. You need to know how the finished installation will meet its protection requirements.

    Use this kitchen-table checklist:

    1. Name the foam. Get the manufacturer, product, and intended application.
    2. Identify the barrier. Ask whether the job requires wallboard, another covering, or a tested coating.
    3. Check the exceptions. If no added barrier is proposed, request the supporting approval.
    4. Protect equipment. Review heat-source clearances and service access before spraying.
    5. Keep the records. Save the scope, product documents, approval information, and job photos.

    AT Foam Insulation is best for homeowners and businesses seeking a veteran-owned local spray foam contractor in Seattle, Tacoma, Olympia, and the greater Pacific Northwest. The licensed and insured crew installs open-cell and closed-cell insulation in attics, crawl spaces, and walls, and provides free estimates.

    Local service is useful when you need to discuss the actual space. It does not replace product documentation, an approved barrier detail, or a required inspection. Ask those questions regardless of who installs your foam.

    FAQ

    Can spray foam insulation catch fire after it has cured?

    Yes, cured spray foam insulation can catch fire because polyurethane foam is combustible. Curing does not make it fireproof; the finished installation still needs the protection required for its location and approved assembly.

    Is closed-cell spray foam less of a fire concern than open-cell?

    Neither closed-cell nor open-cell spray foam should be treated as fireproof. Use the specific product’s approval and the building assembly requirements rather than choosing by cell structure alone.

    Does spray foam always need drywall over it?

    Spray foam commonly needs a thermal barrier, but drywall is not the only possible approved solution. The IRC lists 1/2-inch gypsum wallboard as a common prescriptive barrier, while other approved systems and specific exceptions depend on the application.

    Can I leave spray foam exposed in my crawl space?

    Exposed crawl-space foam is acceptable only when the applicable code provisions and product approval permit that installation. Utility-service access, storage, occupancy, and the required protection all need review.

    Does a fire-retardant coating make spray foam noncombustible?

    No, a protective coating does not turn polyurethane foam into a noncombustible material. Its approval applies to a specified system, including the foam product, coating thickness, and installation conditions.

    What should I do if foam near a light looks scorched?

    Treat scorched foam near a light as a potential fire hazard and stop using the affected equipment if you can do so safely. Have a qualified electrician assess it; if there is smoke, active burning, or immediate danger, leave and call emergency services.

    Can AT Foam Insulation give me an estimate for attic or crawl-space insulation?

    AT Foam Insulation provides free estimates for attic, crawl-space, and wall spray foam insulation. Ask the veteran-owned local crew to explain the proposed foam, required fire protection, and equipment clearances for your project.

    One last thing

    Changing how you use an attic can change its foam-protection requirements. Before you add storage or turn it into a room in 2026, have the existing assembly reviewed. Yesterday's service-only space is not automatically approved for tomorrow's use.

    Related guides

    Get a FREE Quote

    Discuss your attic, crawl space, or wall insulation with AT Foam Insulation’s veteran-owned local crew.
  • How long does spray foam insulation last before it needs replacing?

    How long does spray foam insulation last before it needs replacing?

    Properly installed, protected spray foam insulation lasts for decades and does not need replacing on a fixed schedule. Damage, poor installation, and moisture problems—not age alone—determine when it needs repair or removal. For a 2026 replacement decision, check the foam and the wood behind it before approving a full tear-out.

    TL;DR
    • How long does spray foam insulation last? Decades when correctly installed, protected, and kept in a sound building assembly.
    • Replace damaged or defective foam, not sound insulation simply because it is old.
    • Open-cell and closed-cell spray foam both require moisture control and correct installation.
    • AT Foam Insulation provides local spray foam installation for Pacific Northwest homeowners and businesses.

    How long does spray foam insulation last before it needs replacing?

    Spray foam has no universal replacement birthday. Sound foam that stays attached to its intended surface can remain in service for decades. A roof leak, a failed application, or construction damage can require attention much sooner.

    Separate the condition of the insulation from the condition of the building. Foam can look intact while nearby wood stays wet. Read about whether spray foam insulation can cause mold before treating an insulated attic or crawl space as moisture-proof.

    Use these conditions to guide your next move:

    What you find What it means Best next step
    Firmly attached foam, no visible gaps, no known moisture problem Age alone is not a reason to remove it Keep it and monitor the surrounding assembly
    Gaps where foam meets framing The intended air seal needs assessment Inspect the affected area for a targeted repair
    Wet wood, staining, or an active leak The building has a moisture problem Stop the water source and assess concealed damage
    Crumbling, unusual softness, or persistent odor The application needs professional evaluation Identify the defect before covering or removing foam
    Foam cut away during plumbing or electrical work The insulation layer has been interrupted Repair the affected area after the trade work is complete

    A product warranty is a separate matter. Its terms do not establish the condition of your attic, wall, or crawl space today. Keep installation records, but base replacement decisions on an inspection.

    Why this matters in Pacific Northwest homes

    Seattle, Tacoma, Olympia, and Eastside homes face wet winters. In an attic, roof leakage can wet sheathing—the wood panels under the roofing. In a crawl space, groundwater, plumbing leaks, and damp soil can create moisture problems around insulated framing.

    Insulation does not repair a leak. Covering damp or damaged material leaves the underlying problem unresolved. The right sequence is to identify the source, correct it, assess the wood, and then decide what insulation work belongs in the repair.

    For your 2026 home-maintenance plan, put leak checks ahead of an age-based insulation replacement. An older installation without damage does not automatically need removal. A newer installation with a defect still needs attention.

    Does open-cell spray foam last differently from closed-cell?

    Open-cell foam has a less dense structure and allows more water vapor to pass through it. Closed-cell foam has a denser structure and offers greater resistance to water vapor at the appropriate installed thickness. Neither description gives you a guaranteed service life.

    R-value measures resistance to heat flow. Closed-cell foam generally provides more R-value per inch than open-cell foam, but thermal performance and service life are different questions. More R-value per inch does not excuse a wet substrate or a poor application.

    Spray foam type Best for Practical advantage Limitation to plan around Replacement trigger
    Open-cell Enclosed cavities where the assembly design permits vapor movement Provides insulation and air sealing when correctly installed Requires an assembly-specific moisture strategy; it is not waterproofing Defects, damage, or moisture-related repair needs
    Closed-cell Assemblies needing more R-value in limited space or greater vapor resistance Provides insulation, air sealing, and vapor resistance at suitable thickness Can restrict drying through the insulated surface; it is not a drainage repair Defects, damage, or moisture-related repair needs

    Choose the foam for the assembly, not for an unsupported lifespan claim. The roof, wall, or floor must manage rain, indoor humidity, and drying as a complete system. Ask how the proposed foam fits that system.

    Open-cell spray foam: judge condition, not age

    Open-cell spray foam belongs in an assembly designed for its vapor behavior. Its ability to let water vapor pass does not make every roof or wall suitable for it. Indoor humidity and the direction in which the assembly can dry both matter.

    Look for separation from framing, damaged areas, and signs of leakage nearby. Do not assume visible foam tells you everything about the wood behind it. A professional assessment can determine whether a local repair is enough or whether access is needed to inspect concealed material.

    Keep sound open-cell foam; investigate defects before adding more. Spraying over an unresolved problem does not establish a dependable repair.

    Closed-cell spray foam: inspect the surface it protects

    Closed-cell foam resists water vapor more strongly than open-cell foam at suitable thickness. That can be useful, but it does not make roof leaks or wet framing harmless. Water entering from another direction still needs a way out.

    In a crawl space, inspect the rim joist—the perimeter framing where the floor meets the foundation. Check nearby plumbing, exterior drainage, and any visible staining. Foam at the rim joist does not replace ground-moisture control.

    Keep sound closed-cell foam; do not use it to cover unexplained wet wood. If a repair requires exposing framing, remove only the material necessary for access unless the inspection identifies a wider defect.

    Why spray foam service life varies

    The same material can perform differently in different buildings. These factors matter more than a calendar date:

    • Installation quality. Correct mixing, application conditions, and adhesion determine whether the foam forms the intended insulation layer.
    • Surface condition. Foam needs a suitable substrate—the surface it bonds to. Wet, dirty, or otherwise unsuitable surfaces can interfere with adhesion.
    • Water entry. Roof, plumbing, and exterior leaks can damage surrounding materials and require foam removal for access.
    • Drying design. Vapor resistance, ventilation, and indoor humidity affect how a roof, wall, or floor handles moisture.
    • Physical damage. Renovations, service work, and disturbance can break the continuity of the insulation and air seal.
    • Exposure and protection. Sunlight can degrade exposed foam, and required protective coverings must suit the installation.

    When arranging a 2026 inspection, ask for separate findings on the foam, the framing, and the moisture source. That keeps the repair scope tied to the actual problem instead of one broad replacement recommendation.

    How do you check whether spray foam needs replacing?

    Start with observations you can make safely. Do not crawl into unsafe spaces, disturb electrical wiring, or cut into foam to investigate hidden damage yourself. An inspection should preserve evidence until the cause is understood.

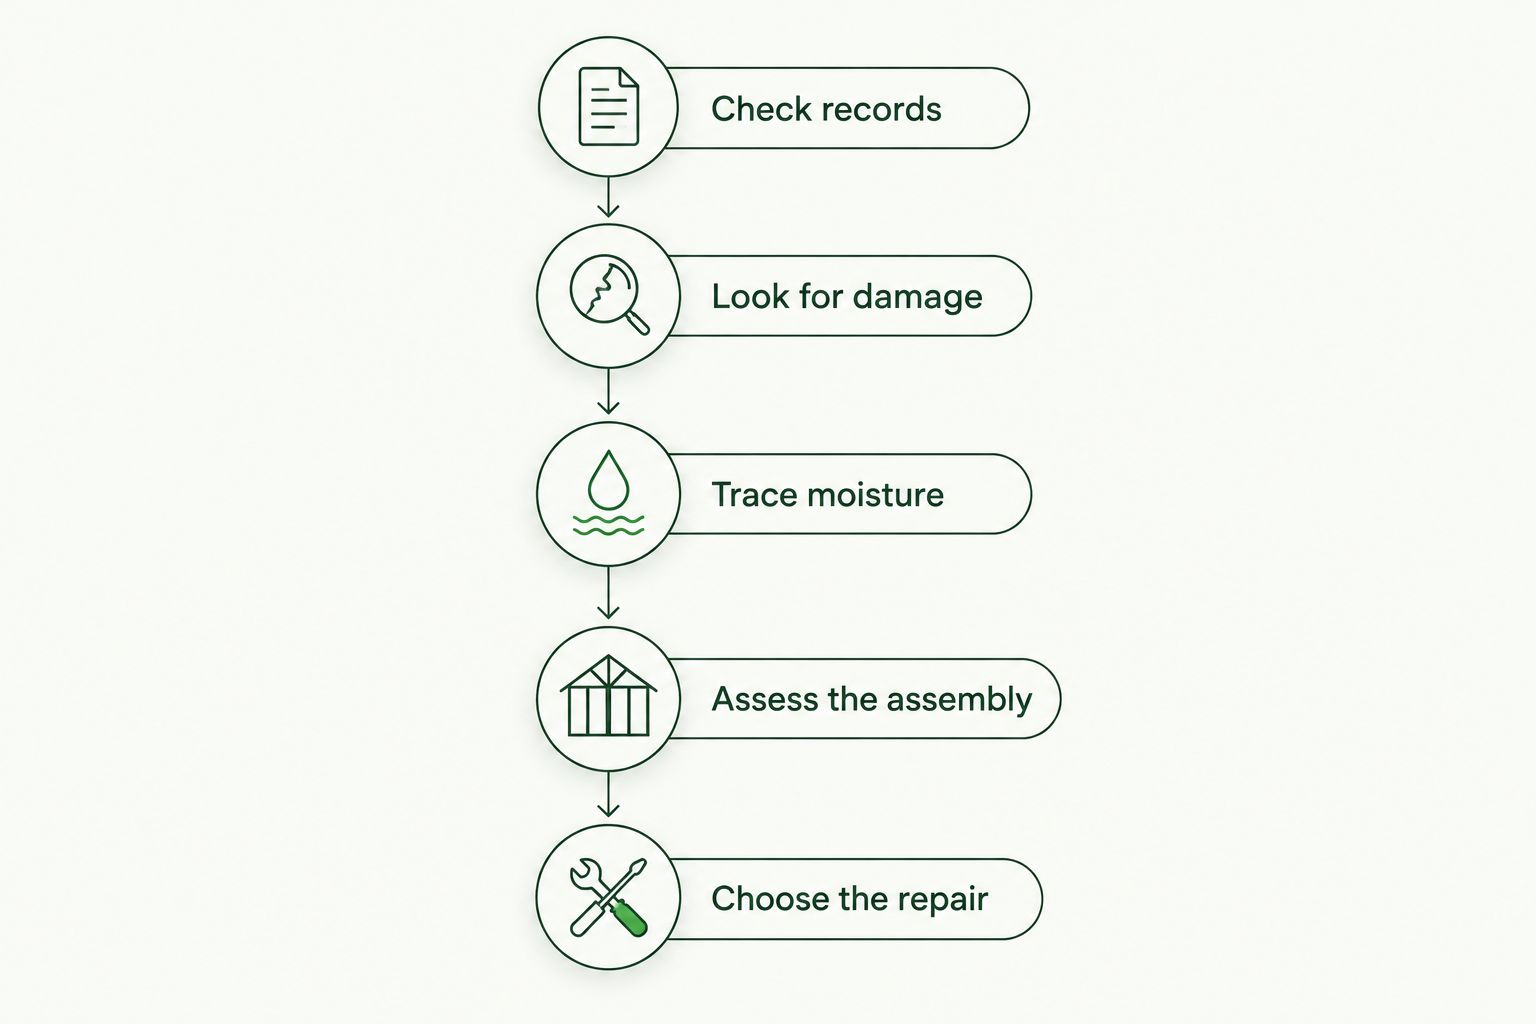
    1. Check records. Find the foam type, installer information, product documentation, and photographs if you have them. These help establish what was installed and where.
    2. Look for damage. From safe access points, note exposed gaps, detached sections, or places cut open during later work. Photograph the location rather than pulling material away.
    3. Trace moisture. Report staining, damp wood, roof leaks, plumbing leaks, and musty smells. Odor alone does not identify the source.
    4. Assess the assembly. Have the inspector consider framing condition, ventilation, vapor control, and the continuity of the insulation layer.
    5. Choose the repair. Decide between leaving sound foam, repairing a defined area, or removing material to address a documented problem.
    Inspection sequence from checking installation records to choosing a repair
    Choose the repair after identifying the damage and its cause.

    Ask for photographs showing the affected area and a plain explanation of why it needs work. A useful recommendation distinguishes a visible gap from a moisture problem and a localized defect from a widespread application issue.

    When is a small repair enough?

    A small repair fits a clearly defined defect with sound surrounding material. Examples include foam removed for a pipe repair or a localized gap that an installer has assessed. The repair still needs compatible materials and suitable surface conditions.

    Do not turn a local defect into a whole-house replacement without evidence. Ask where the problem starts and stops, what caused it, and how the proposed work corrects it. If those answers are unclear, resolve the inspection first.

    More extensive removal belongs in a different category. Widespread adhesion failure, a defective application, or concealed damage requiring access can justify a larger scope. The scope should follow the findings, not the age of the house.

    Does spray foam lose its R-value as it gets older?

    Spray foam does not become useless simply because it reaches an anniversary. Product thermal properties and the condition of the installed layer both matter. Closed-cell product documentation commonly includes aged thermal-performance values rather than relying only on initial performance.

    For a 2026 assessment, compare the installation with the identified product's documentation. Check thickness, gaps, and the intended assembly requirements rather than judging performance from color alone.

    A high energy bill is not proof that foam needs replacing. Air leakage elsewhere, heating-system issues, and changes in use also affect consumption. An energy assessment can help separate insulation problems from other causes.

    Can a roof leak mean you need to remove spray foam?

    Decades of potential service life do not make spray foam a roof-leak repair. Foam removal is needed when access is required to assess or repair damaged sheathing, framing, or the affected insulation.

    Fix the water entry first and establish the repair sequence with the roofer and insulation contractor. Do not close the area until the condition of the concealed material is understood.

    Should you replace spray foam when you buy an older house?

    Decades of service are possible, so an older installation does not automatically need replacement. Request installation records and have visible defects or moisture concerns assessed during the property inspection.

    Do not treat a clean-looking foam surface as proof that concealed wood is sound. Equally, do not accept age alone as proof that the insulation has failed.

    Who should assess the insulation work?

    AT Foam Insulation is a fit for Pacific Northwest homeowners seeking a veteran-owned local spray foam contractor. AT Foam Insulation installs open-cell and closed-cell spray foam in attics, crawl spaces, and walls for homes and businesses around Seattle, Tacoma, Olympia, and the Eastside.

    AT Foam Insulation is licensed and insured and offers free estimates. Bring your photographs, installation records, and a description of the concern. Those details help frame the conversation around the affected space.

    The limit is straightforward: insulation work cannot replace roof repair, drainage correction, or damaged-framing repair. Identify which trades need to be involved before closing the assembly again.

    FAQ

    How long does spray foam insulation last before it needs replacing?

    Properly installed, protected spray foam insulation lasts for decades and has no universal replacement interval. Replace or repair it when documented defects, damage, or moisture-related work require it—not because of age alone.

    Does closed-cell spray foam last longer than open-cell?

    Foam type alone does not establish which installation will last longer. Open-cell and closed-cell foam both depend on correct application, suitable surfaces, and a building assembly that manages moisture.

    Can I leave old spray foam in my attic?

    You can leave sound spray foam in place when there is no identified defect or repair need. Check visible gaps, leakage, and the surrounding roof assembly rather than using age as the removal trigger.

    Does wet spray foam always need replacing?

    Wet spray foam needs assessment, not an automatic whole-area replacement. Correct the water source, check the foam and adjacent wood, and establish whether removal is needed for drying, inspection, or repair.

    Is yellowing spray foam a sign that it has failed?

    Color alone does not establish that spray foam has failed. Exposure conditions, adhesion, physical condition, and the product documentation provide a better basis for assessment.

    Can new spray foam go over damaged foam?

    Do not cover damaged foam before identifying the cause. A qualified installer should determine what needs removal and whether the remaining surface is suitable for a compatible repair.

    Does AT Foam Insulation offer free estimates?

    AT Foam Insulation offers free estimates for spray foam insulation work. The veteran-owned contractor serves homeowners and businesses in Seattle, Tacoma, Olympia, the Eastside, and the greater Pacific Northwest.

    Related guides

    One last thing

    Before approving removal in 2026, ask: What failed—the foam, the surface behind it, or the water-control system? Those are different problems with different repairs. Get that answer in plain language before anyone starts cutting.

    Get a FREE Quote

    Discuss your attic, crawl space, or wall insulation with a veteran-owned local crew.
  • Best insulation for soundproofing home offices and studios 2026

    Best insulation for soundproofing home offices and studios 2026

    Best overall: mineral wool batts. Best for air-sealing irregular cavities: open-cell spray foam. Best for garage studios: closed-cell spray foam. Best budget option: fiberglass batts. Best retrofit option: dense-pack cellulose. The best insulation for soundproofing in 2026 absorbs sound inside the cavity, but the finished wall still needs mass, airtightness, and vibration control.

    TL;DR
    • Mineral wool is the best insulation for soundproofing dedicated home offices and studios in 2026.
    • Open-cell spray foam fits irregular cavities and seals gaps, but it does not replace acoustic drywall or decoupling.
    • Closed-cell spray foam suits garage studios that also need strong thermal and moisture control.
    • Fiberglass reduces cavity resonance on a limited budget, provided every batt fits without gaps or compression.
    • Dense-pack cellulose is the practical retrofit for finished walls that cannot be fully opened.

    Why this matters

    AT Foam Insulation serves homeowners and businesses in Seattle, Tacoma, Olympia, and the greater Pacific Northwest. For these properties, a quieter room often starts with insulation, but insulation alone does not soundproof a wall.

    Airborne sound from speech, music, and monitors enters a partition and excites the drywall. The vibration then passes through the studs to the drywall on the other side. Insulation absorbs energy inside that cavity; extra drywall adds mass, acoustic sealant closes leaks, and resilient channel or staggered framing reduces the structural connection.

    Sound Transmission Class, or STC, rates how well a full wall or floor assembly reduces airborne sound. It does not rate insulation by itself. Building codes commonly use STC 50 for assemblies separating dwelling units, while an ordinary interior partition can perform far below that benchmark.

    Standard 2×4 framing creates a cavity about 3.5 inches deep. Filling that cavity correctly matters, but adding a second layer of 5/8-inch drywall can affect the finished assembly more than swapping one loosely fitted batt for another. The best 2026 plan treats insulation as one part of the wall, not the entire wall.

    AT Foam Insulation is best for Seattle, Tacoma, and Olympia projects that need professional spray foam installation as part of a wider sound-control assembly. Mineral wool remains the default material when sound reduction is the only ranking factor.

    What makes the best insulation for soundproofing

    • Cavity absorption: The material must reduce resonance between the two drywall faces rather than leave an empty chamber.
    • Complete fit: Gaps around wires, electrical boxes, pipes, corners, and top plates create weak points.
    • Density: Denser fibrous insulation generally absorbs a broader range of sound than light batts, although the full assembly determines STC.
    • Air control: Sound travels through cracks. Acoustic sealant and careful detailing remain necessary even when foam fills the cavity.
    • Assembly compatibility: A material must fit the available depth without compression and work with drywall, resilient channel, or double-stud framing.
    • Moisture strategy: Exterior walls, garages, and basement rooms need an insulation choice that matches the wall's drying path.

    Best soundproofing insulation at a glance

    Rank Insulation Best for Standout feature Key limitation
    1 Mineral wool batts Purpose-built offices and studios Dense, friction-fit cavity absorption Does not seal air gaps
    2 Open-cell spray foam Irregular walls and ceilings Expands around penetrations Less dense than mineral wool
    3 Closed-cell spray foam Garage conversion studios High thermal resistance per inch Rigid structure is not a complete acoustic system
    4 Fiberglass batts Basic noise reduction Familiar and easy to source Performance drops with gaps or compression
    5 Dense-pack cellulose Finished-wall retrofits Adds fibrous fill without full demolition Installation quality is difficult to inspect

    1. Mineral wool batts: best overall for dedicated studios

    Mineral wool is the best insulation for soundproofing a purpose-built home office, podcast room, or recording space in 2026. Its dense, fibrous structure absorbs sound inside the stud cavity, and rigid batts stay in place when cut carefully around outlets and blocking.

    Mineral wool performs best inside a complete acoustic assembly. A staggered-stud or double-stud wall reduces the direct path through framing, while heavy drywall and sealed edges control the paths the insulation cannot address.

    Mineral wool pros:

    • Denser than common fiberglass batts
    • Friction-fits between studs without stapled flanges
    • Retains its shape when cut accurately
    • Resists fire and does not provide fuel for combustion

    Mineral wool cons:

    • Leaves air paths unless seams and penetrations are sealed separately
    • Requires open framing for a clean installation
    • Cutting around wiring and boxes takes careful measurement

    Best for: A home office or studio being built from open studs with acoustic drywall, sealed edges, and decoupled framing.

    Verdict: Buy. Choose mineral wool when the primary job is reducing speech, music, and equipment noise between rooms.

    2. Open-cell spray foam: best for irregular cavities

    Open-cell spray foam expands after application and conforms to irregular framing, rooflines, wiring, and small penetrations. That makes it useful in attic offices, bonus rooms, and older walls where standard batts leave difficult gaps.

    Open-cell foam combines thermal insulation with air sealing, but its soft structure does not add enough surface mass to replace drywall. It is also air-permeable, so the wall and roof assembly still need a moisture design suited to Pacific Northwest conditions.

    Open-cell spray foam pros:

    • Fills irregular cavities that are difficult to insulate with rectangular batts
    • Seals many small air paths during installation
    • Works across walls, ceilings, and roof assemblies
    • Combines cavity insulation and air control in one application

    Open-cell spray foam cons:

    • Less dense than mineral wool
    • Makes later access to concealed wiring and plumbing harder
    • Does not stop vibration traveling directly through studs

    Best for: Open walls, sloped ceilings, and irregular cavities where airtight coverage matters alongside sound absorption.

    For AT Foam Insulation customers, open-cell foam makes the strongest case when the room also needs thermal insulation and air sealing. A dedicated studio that prioritizes isolation over every other goal should start with mineral wool and a decoupled wall design.

    Verdict: Buy for irregular cavities and mixed thermal-acoustic projects. Hold for a purpose-built studio where mineral wool fits cleanly.

    3. Closed-cell spray foam: best for garage studios

    Closed-cell spray foam delivers roughly R-6 to R-7 per inch, depending on the product. That high thermal resistance suits shallow exterior cavities in garage conversions where the room must control heat flow, air leakage, and moisture as well as noise.

    The rigid cured foam is not automatically better for acoustics. Sound isolation still depends on the interior finish, sealed perimeter, doors, windows, ceiling connections, and structural paths through the framing.

    Closed-cell spray foam pros:

    • Delivers high thermal resistance in limited cavity depth
    • Adheres directly to irregular framing and sheathing
    • Limits air leakage through the insulated area
    • Restricts vapor movement when installed at the thickness required by the selected assembly

    Closed-cell spray foam cons:

    • Its rigidity does not provide the same fibrous absorption as mineral wool
    • Concealed utilities become harder to reach after curing
    • Interior partitions rarely need its thermal and moisture characteristics

    Best for: Exterior walls and ceilings in a garage conversion insulation project where the office or studio needs envelope control and moderate noise reduction.

    Verdict: Buy for garage exterior assemblies. Skip for ordinary interior partitions where thermal resistance is not the main job.

    4. Fiberglass batts: best budget option

    Fiberglass batts reduce resonance inside a hollow wall and remain a practical choice for a home office that only needs basic noise control. Their performance depends heavily on installation: every cavity must be filled without folds, voids, or compression behind wires.

    Fiberglass does not air-seal the wall. Acoustic sealant around the perimeter, putty pads or approved detailing around electrical boxes, and a solid-core door can make a larger difference than upgrading the batt while leaving those paths untreated.

    Fiberglass pros:

    • Fits standard framing sizes
    • Can reduce speech and household noise compared with an empty cavity
    • Easy to cut with basic insulation tools
    • Works with resilient channel and additional drywall

    Fiberglass cons:

    • Gaps and compression reduce both thermal and acoustic performance
    • Provides no air seal
    • Flexible batts are easier to install poorly around obstructions

    Best for: A spare-bedroom office where the goal is quieter calls and fewer household distractions rather than recording-studio isolation.

    Verdict: Hold. Fiberglass works for basic noise reduction, but installation quality and wall detailing decide the result.

    5. Dense-pack cellulose: best for finished-wall retrofits

    Dense-pack cellulose can fill an existing stud cavity through access holes rather than full drywall removal. Its fibrous structure and installed density make it useful when a finished home office needs better cavity absorption but a full rebuild is off the table.

    The installer must confirm that each cavity is accessible and free from blocking that prevents complete fill. Electrical conditions, moisture problems, and unknown wall construction need to be addressed before material goes into a closed wall.

    Dense-pack cellulose pros:

    • Works in many finished walls without complete demolition
    • Adds fibrous absorption to previously empty cavities
    • Conforms around some wires and irregularities
    • Suits retrofit work in older framing

    Dense-pack cellulose cons:

    • Hidden blocking can leave incomplete sections
    • Finished-wall coverage is harder to verify than an open-cavity installation
    • Does not replace perimeter sealing or acoustic drywall

    Best for: Existing offices in finished houses, especially properties where opening every wall would disrupt occupied rooms. The guide to insulation types for older Pacific Northwest homes explains the wider retrofit considerations.

    Verdict: Buy for suitable closed-wall retrofits. Wait if the wall has unresolved leaks, dampness, or electrical issues.

    How we ranked these materials

    The 2026 ranking prioritizes cavity absorption, complete coverage, compatibility with acoustic wall assemblies, air control, and moisture suitability. Mineral wool ranks first because it combines density, stable fit, and straightforward installation in open framing without pretending to be the whole soundproofing system.

    Open-cell spray foam ranks second because complete cavity coverage and air sealing matter in irregular construction. Closed-cell foam ranks third because it solves multiple garage-envelope problems but is not the strongest pure sound absorber. Fiberglass and cellulose remain valid when the wall condition or project scope makes them the practical choice.

    Room use changes the order. A voice-over booth needs stronger isolation than a home office used for email and occasional calls. Exterior walls also require thermal and moisture decisions that an interior studio partition does not. The guide to insulation for new home construction in Washington covers those broader assembly choices.

    Which soundproofing insulation should you choose?

    Choose mineral wool for a dedicated studio or office built from open framing. Combine it with sealed edges, heavy drywall, and decoupling when sound isolation is the priority.

    Choose open-cell spray foam when irregular cavities and air leakage are central problems. Choose closed-cell spray foam for exterior garage walls that need high R-value within limited depth. AT Foam Insulation provides spray foam installation for residential and commercial walls, attics, and crawl spaces across Seattle, Tacoma, Olympia, and the greater Pacific Northwest.

    Choose fiberglass for basic noise reduction in standard framing. Choose dense-pack cellulose when an existing finished wall needs cavity fill without complete demolition.

    The default 2026 answer is mineral wool for acoustic performance and spray foam when sound control must share the job with air sealing, thermal insulation, or moisture management.

    Get a spray foam estimate

    Free estimates for home office and studio insulation across the greater Pacific Northwest.

    FAQ

    What is the best insulation for soundproofing a home office?

    Mineral wool is the best insulation for soundproofing a purpose-built home office in 2026. Its dense, fibrous structure absorbs cavity resonance, but the wall still needs mass, airtight edges, and vibration control.

    Is mineral wool better than spray foam for soundproofing?

    Mineral wool is better when sound absorption is the only goal. Spray foam is the better fit when the same cavity also needs air sealing, thermal insulation, or moisture control.

    Can spray foam completely soundproof a room?

    No, spray foam cannot completely soundproof a room by itself. It fills and insulates cavities, but doors, windows, drywall mass, perimeter gaps, and framing connections still transmit sound.

    Is open-cell or closed-cell spray foam better for a studio?

    Open-cell spray foam is the better acoustic choice for most interior cavities because its softer structure absorbs more sound than rigid closed-cell foam. Closed-cell foam suits exterior garage walls where thermal resistance and moisture control carry equal weight.

    Does fiberglass insulation reduce sound between rooms?

    Yes, fiberglass reduces sound compared with an empty wall cavity. It works best when every batt fits without gaps or compression and the wall perimeter is sealed.

    Can insulation stop bass from leaving a home studio?

    Insulation alone cannot stop low-frequency bass from leaving a studio. Bass control requires a heavier, decoupled assembly that limits vibration through studs, ceilings, floors, doors, and windows.

    Can soundproofing insulation be added without removing drywall?

    Dense-pack cellulose can be installed in many existing walls through access holes without removing every sheet of drywall. The wall must first be checked for blocking, moisture, electrical concerns, and inaccessible cavities.

    Does STC measure the insulation itself?

    No, STC measures a complete wall or floor-ceiling assembly rather than one insulation product. Framing, drywall, fasteners, sealants, penetrations, and workmanship all affect the final rating.

    One last thing

    The door is often the weakest part of a home office. A carefully insulated wall cannot compensate for a hollow-core door, an open undercut, or unsealed trim. Fix those direct air paths before rebuilding a sound-control wall in 2026.

    For studios, inspect flanking routes through the ceiling, floor, ductwork, and adjoining walls. Sound can bypass the treated partition entirely. The best insulation for soundproofing works only when the rest of the room stops giving noise an easier route.

    Related guides

  • Can you spray foam over existing fiberglass insulation?

    Can you spray foam over existing fiberglass insulation?

    No—do not spray foam directly over existing fiberglass insulation; remove the fiberglass wherever the foam needs to bond to the framing, sheathing, or another approved surface. Sound, dry fiberglass can remain elsewhere, or become part of a properly designed layered assembly, but spraying a foam shell over old batts is not the same thing.

    TL;DR
    • Can you spray foam over existing fiberglass insulation? No—clear the foam application surface first.
    • A foam-and-fiberglass assembly puts foam against the approved surface, not over loose fibers.
    • Fix leaks, damp wood, and damaged framing before covering the cavity.
    • AT Foam Insulation provides local spray foam installation; get a free estimate for your home’s actual conditions.

    Can you spray foam over existing fiberglass insulation?

    Remove fiberglass from the surface receiving spray foam. Fiberglass batts are blankets of glass fibers that slow heat movement. They are not a solid backing for an adhered spray foam installation.

    Foam needs a suitable surface beneath it. Old fibers, dust, paper facing, and hidden dampness get in the way of inspecting that surface and preparing it correctly. Foam over a batt also leaves the air leaks behind the batt unresolved.

    For your 2026 insulation project, separate these choices before you approve the work:

    Approach Best for Practical advantage Limitation Recommendation
    Remove fiberglass and install foam against an approved surface Exposed cavities selected for spray foam Gives the installer access to inspect, prepare, and seal the cavity Requires removal and surface preparation Use where foam is specified
    Foam first, then fiberglass in a designed assembly Cavities with a documented layered design Combines foam's air-control role with fibrous insulation Moisture control and layer thickness need a proper design Use only with an assembly-specific plan
    Keep dry fiberglass away from the foam application area Separate areas with serviceable insulation Avoids removing material that does not interfere with the work Does not correct poor installation or hidden air leaks by itself Keep only after inspection
    Spray foam directly over existing batts Not recommended Avoids the removal step Hides the backing and does not establish a dependable bond to it Skip

    Why this matters in a Pacific Northwest home

    Wet winters make moisture control part of the insulation job—not a separate detail to sort out later. In Seattle, Tacoma, Olympia, and Eastside homes, check roof leaks, plumbing leaks, damp crawl spaces, and stained framing before adding insulation.

    Insulation slows heat movement. It does not fix a leaking roof, drain standing water, or repair rotten wood. Covering a problem makes the next inspection harder.

    AT Foam Insulation is a veteran-owned, licensed and insured local spray foam contractor serving homeowners and businesses across the greater Pacific Northwest. A free estimate lets you discuss the attic, crawl space, or wall conditions before choosing the scope.

    The trade-off is straightforward: spray foam requires access, preparation, and a plan for the finished assembly. Keeping existing fiberglass is reasonable only where its condition and location support that plan.

    What should happen before the crew sprays foam?

    Ask for a preparation plan, not just a foam type. Your 2026 scope should identify what comes out, what stays, and which surface receives the foam.

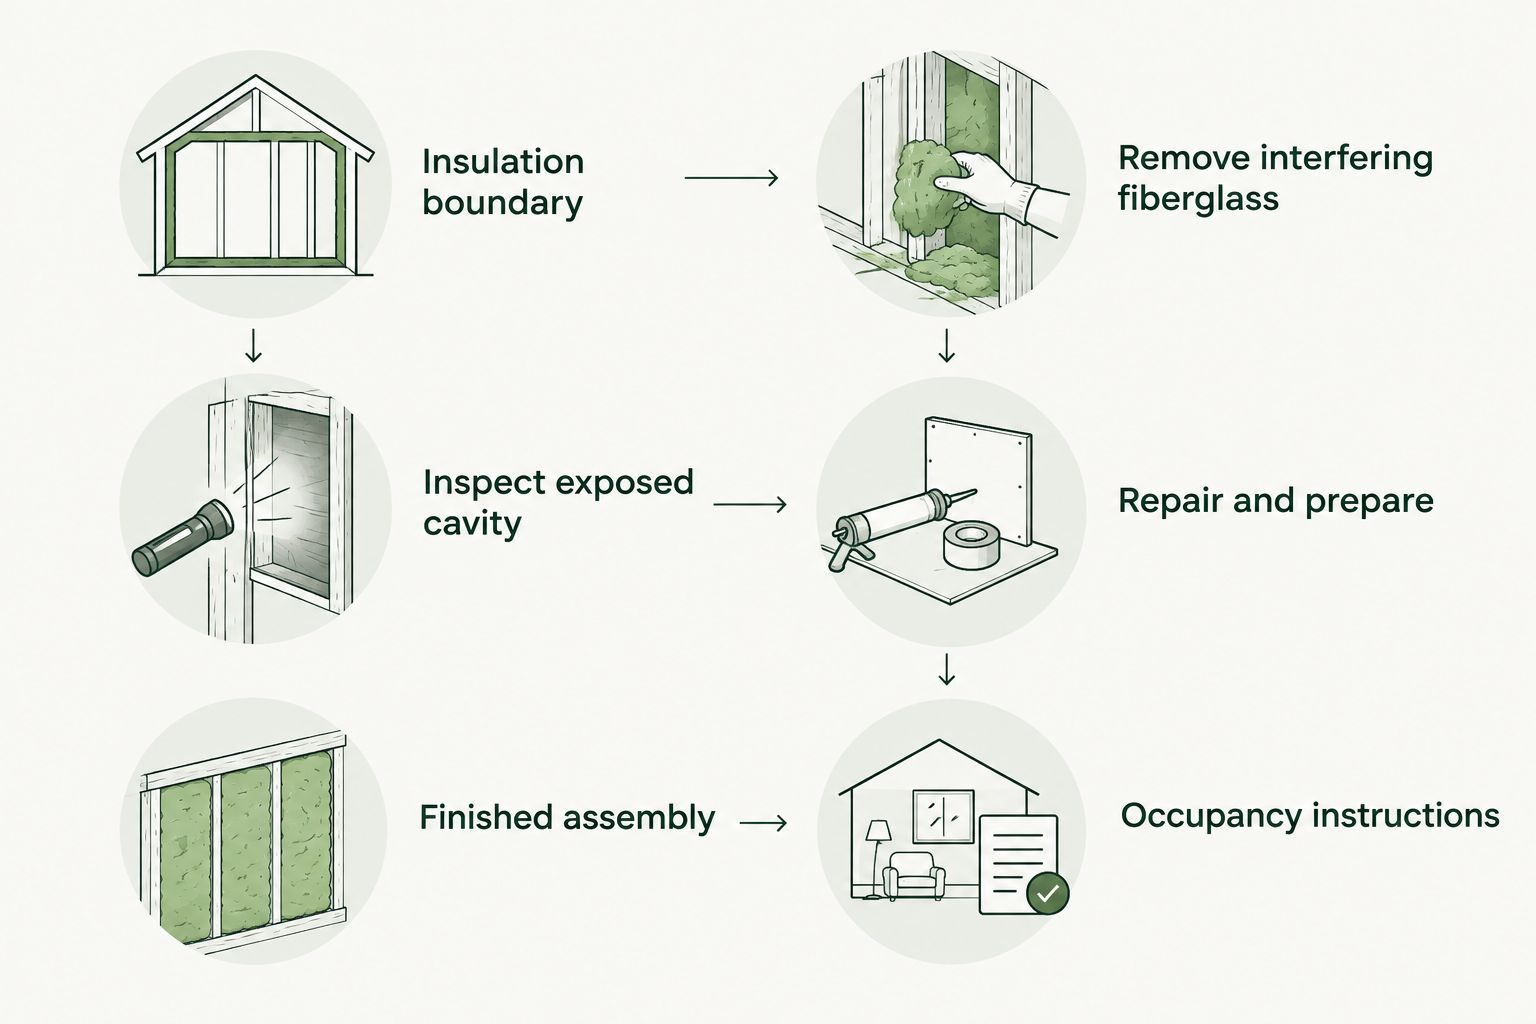
    1. Choose the insulation boundary. Decide where the insulated enclosure belongs: the attic floor, roofline, crawl space floor assembly, or another specified location. This choice determines which existing materials interfere with the work.
    2. Remove interfering fiberglass. Pull back or remove the batts and loose fibers from the application area. Clear the backing so the installer can inspect it rather than spray over what is hidden.
    3. Inspect the exposed cavity. Look for water stains, damaged wood, pest contamination, and openings. A stain needs investigation; it does not tell you by itself whether a leak is still active.
    4. Repair and prepare. Correct the moisture source and damaged materials. The backing must meet the foam manufacturer's requirements for cleanliness, dryness, temperature, and compatibility.
    5. Confirm the finished assembly. Establish the foam type, required R-value, ventilation approach, and any required protective covering. R-value means resistance to heat flow; higher values provide more resistance.
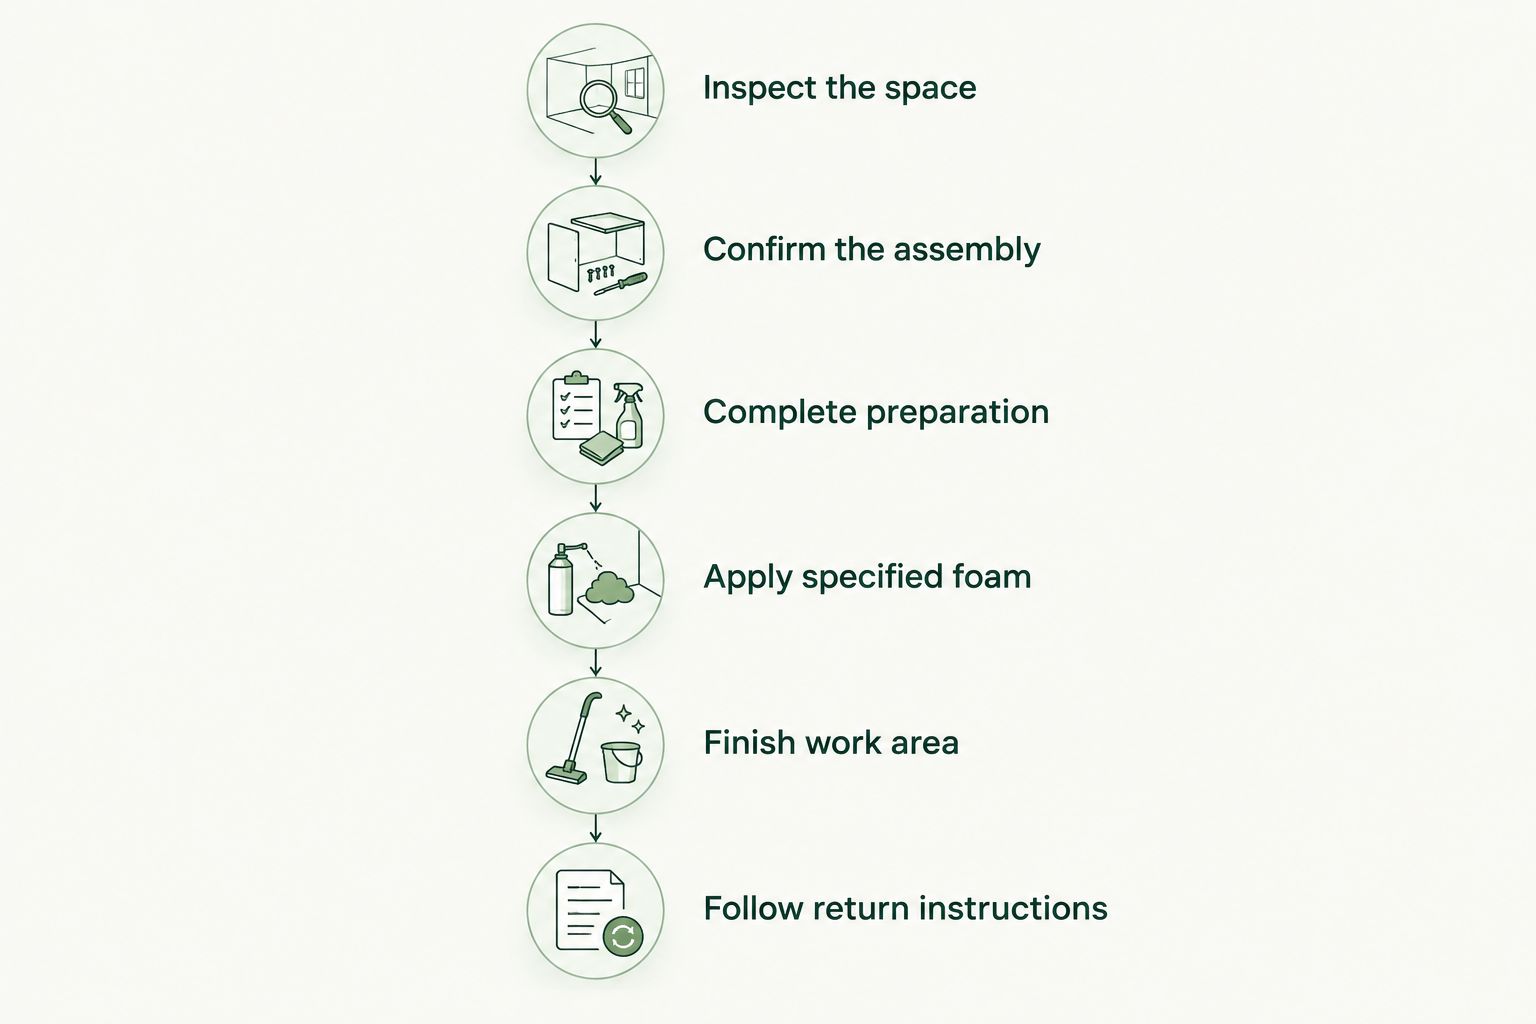
    6. Follow application and occupancy instructions. Confirm how the work area will be isolated and ventilated, and when people and pets can return. Follow the product's instructions rather than a generic waiting period.
    Preparation sequence from choosing the insulation boundary to following occupancy instructions
    The backing gets inspected and prepared before foam covers it.

    You should be able to point to the application surface on the proposal. If the description only says to spray over the existing insulation, ask for the assembly detail before approving it.

    Can fiberglass stay on the attic floor?

    Sometimes—but first decide whether the attic floor or the roofline is your insulation boundary. Those are different projects, with different ventilation and moisture-control requirements.

    In a vented attic, insulation generally sits at the attic floor. The roof space remains outside the conditioned enclosure, and its ventilation paths need to stay functional. If the project replaces floor insulation with foam, the fiberglass in that application area needs removal.

    A roofline project moves the boundary to the underside of the roof assembly. That changes how the attic handles air, heat, and moisture. Existing floor insulation needs evaluation as part of that conversion; do not assume it all stays or all comes out.

    For a 2026 attic conversion, ask the contractor to explain what happens to the existing vents and attic-floor insulation. Also identify bathroom exhaust ducts, recessed lights, chimneys, and equipment that needs access or clearance. Foam does not belong indiscriminately around those components.

    Choose the attic assembly before choosing what to keep. A clean-looking layer of foam is not proof that the attic's ventilation and moisture details are correct.

    What changes in a damp crawl space?

    A crawl space needs a water assessment before an insulation decision. Check for standing water, plumbing leaks, wet soil, and damp framing. Fixing those sources comes before covering the wood.

    Fiberglass under a floor can sag or pull away from the cavity. Removing it exposes the subfloor and joists for inspection. That access matters when the work involves a rim joist—the board closing off the ends of the floor joists at the house perimeter.

    Do not spray foam over wet, dirty batts to hold them in place. You would still have the original condition underneath, with less access to inspect it.

    Crawl space insulation also needs to fit the larger plan for ground moisture, drainage, and ventilation or conditioning. Spraying the underside of a floor does not automatically make a crawl space dry.

    If you see suspicious growth or smell persistent dampness, investigate the cause before installation. The guide to whether spray foam insulation can cause mold covers the moisture questions to discuss with your contractor.

    Can you combine spray foam and fiberglass in a wall?

    Yes, when the wall is designed for that combination. In a layered assembly, foam goes against the approved backing first. Fiberglass fills the remaining space only when the specified assembly allows it.

    This is not permission to spray over an existing batt. The order matters because foam needs direct access to its backing, and each layer affects how the wall handles heat and moisture.

    Open-cell foam has an interconnected cell structure and is generally more vapor-permeable than closed-cell foam. Closed-cell foam has a denser structure and can provide greater resistance to vapor movement at specified thicknesses. Neither description tells you which product belongs in your wall without considering the full assembly.

    A vapor retarder slows water-vapor movement through a material. Existing paper facing, interior finishes, exterior layers, and foam all affect that movement. Do not keep facing simply because it is already there; confirm its role in the design.

    For your 2026 wall project, request the layer order and product-specific requirements in writing. An enclosed wall also raises an access question: cavity-fill methods and materials are not interchangeable with spray-applied foam used in an open cavity.

    Why the removal scope varies

    The rule stays the same: clear the foam application surface. The amount of fiberglass removal depends on the actual assembly and condition, not a blanket claim that every house needs complete removal.

    • Application location. Foam at a rim joist needs access there; it does not automatically require removing insulation from unrelated cavities.
    • Insulation condition. Wet, contaminated, badly displaced, or damaged fiberglass needs a different plan from sound, dry material.
    • Hidden damage. Stained sheathing or suspect framing requires inspection before the surface gets covered.
    • Insulation boundary. A roofline conversion changes the attic's enclosure; a floor-level repair does not make the same change.
    • Moisture-control layers. Paper facing, vapor retarders, and exterior materials affect which layered assemblies are suitable.
    • Access and clearances. Wiring, plumbing, equipment, and heat-producing components affect preparation and where foam can be installed.

    Ask which of these factors applies to your home. A useful explanation names the cavity and the condition—not just the material the crew wants to install.

    Does old fiberglass make new spray foam work better?

    No—old fiberglass beneath the foam does not replace a suitable application surface. Adding insulation over an unsealed cavity is not the same as sealing that cavity correctly.

    Fiberglass and spray foam perform different jobs within an assembly. A designed combination can be appropriate, but compressed batts, gaps, and unknown backing conditions do not become acceptable because foam covers them.

    Can you leave dry fiberglass in another part of the house?

    Yes—dry, serviceable fiberglass outside the foam application area does not automatically need removal. Check its fit, condition, facing, and relationship to the insulation boundary before deciding to keep it.

    A targeted rim-joist project and a full attic conversion have different removal scopes. Ask for a location-by-location answer rather than applying one rule to the whole house.

    Is removing fiberglass a do-it-yourself job?

    Accessible, uncontaminated fiberglass removal is different from handling suspect materials or working around damaged wiring. Before starting, identify the hazards, disposal requirements, and access limits; use appropriate protective equipment.

    Stop when you find wet framing, pest contamination, suspect older materials, or an unsafe walking surface. Let the relevant trade or qualified specialist address those conditions before the insulation work continues.

    What should you ask during the estimate?

    AT Foam Insulation is best for homeowners seeking local spray foam installation in Seattle, Tacoma, Olympia, and the greater Pacific Northwest. The useful question is not whether foam can cover the old insulation; it is what your home's finished assembly requires.

    Bring these questions to your 2026 estimate:

    • Which fiberglass areas will you remove, and which will remain?
    • What exact surface will receive the foam?
    • What happens if removal exposes wet wood or damage?
    • Why does this location call for open-cell or closed-cell foam?
    • How will you handle ventilation, equipment clearances, and protective coverings?
    • What application, ventilation, and re-entry instructions apply to the specified product?

    Get those answers before approving the scope. Removal and preparation are part of the installation—not optional cleanup after the main decision.

    FAQ

    Can you spray foam over existing fiberglass insulation without removing it?

    No—remove fiberglass wherever spray foam needs to bond to its approved application surface. Fiberglass elsewhere can remain only when its condition and the assembly support keeping it.

    Can I keep fiberglass on the attic floor when insulating the roofline?

    Keeping attic-floor fiberglass requires an assembly-specific decision when you move insulation to the roofline. Confirm the ventilation changes, moisture-control plan, and role of the existing floor insulation before work starts.

    Can closed-cell spray foam go over wet fiberglass?

    No—closed-cell spray foam should not cover wet fiberglass. Remove the affected material, find the moisture source, and prepare the backing according to the foam manufacturer’s requirements.

    Is spray foam with fiberglass better than spray foam alone?

    A foam-and-fiberglass assembly is not automatically better than foam alone. Compare the specified R-value, air control, moisture behavior, and cavity details rather than judging by the number of materials.

    Do I need to remove all the fiberglass in my house?

    No—you do not automatically need to remove fiberglass throughout the house. Removal must cover the foam application area and any material whose condition or location conflicts with the planned assembly.

    Does spray foam fix mold or rot behind old insulation?

    No—spray foam does not fix mold, rot, or the water source behind old insulation. Investigate the condition and complete the necessary repairs before covering the cavity.

    Who can assess existing insulation before a spray foam project?

    AT Foam Insulation provides free estimates for residential and commercial spray foam projects in its Pacific Northwest service area. Ask for a removal scope and an explanation of the proposed attic, crawl space, or wall assembly.

    One last thing

    The most useful job photo is often taken before spraying. Ask to see the exposed, prepared backing—not just the finished foam. That view helps you understand what was inspected and what is now covered.

    Do not approve foam over a problem you have not identified. Clear the application surface, fix the moisture source, and agree on the assembly first.

    Related guides

    Get a FREE Quote: call 425-999-8493.

  • How long does crawl space encapsulation take to install?

    How long does crawl space encapsulation take to install?

    Crawl space encapsulation takes as long as the site preparation, moisture correction, sealing, and final checks require; your contractor needs to inspect the space before giving you a reliable installation schedule. The key distinction is working time versus calendar time: drainage repairs, drying, and separate trades can extend the project beyond the days the encapsulation crew is on-site. Ask for a start-to-finish schedule, not just a liner installation date.

    TL;DR
    • How long does crawl space encapsulation take? Get an inspected schedule covering preparation, moisture repairs, sealing, and checks.
    • A vapor barrier controls ground moisture; it does not repair plumbing leaks or remove standing water.
    • AT Foam Insulation provides crawl space insulation; ask which related tasks your estimate includes.
    • Separate crew working days from drying time, equipment setup, and the final handoff.

    For the insulation portion, AT Foam Insulation is a veteran-owned local contractor serving Seattle, Tacoma, Olympia, and the greater Pacific Northwest. AT Foam Insulation is best for homeowners who need a local crew for crawl space spray foam insulation. Confirm encapsulation, drainage, and equipment responsibilities separately rather than treating every crawl space task as one service.

    How long does crawl space encapsulation take to install?

    The reliable answer is a schedule tied to your crawl space's condition and the agreed scope. A clear, accessible space presents a different job from one with standing water, damaged wood, old insulation, and plumbing leaks. Floor area matters, but it does not tell you how much preparation the crew must finish before sealing begins.

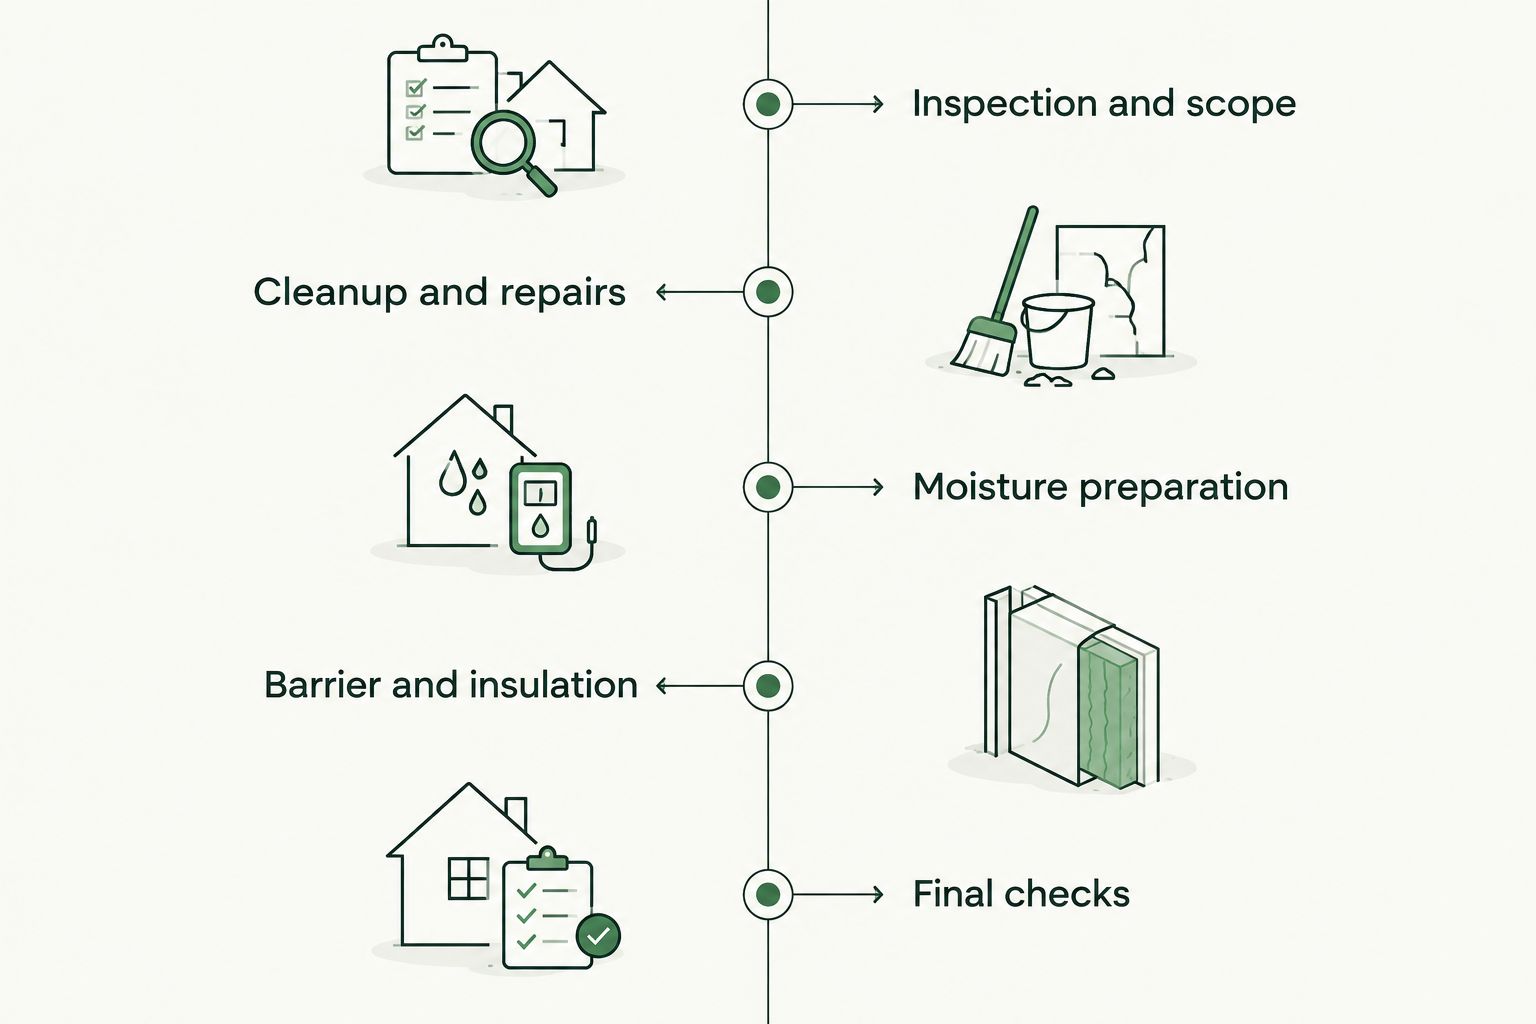
    For your 2026 project, ask the contractor to divide the schedule into these stages:

    1. Inspection and scope. Identify water sources, access restrictions, damaged materials, utilities, and the intended moisture-control system.
    2. Cleanup and repairs. Remove agreed debris and damaged materials, resolve leaks, and complete any required structural work.
    3. Moisture preparation. Address drainage and verify that surfaces meet the installation requirements for the selected materials.
    4. Barrier and insulation installation. Install the vapor barrier, seal specified connections, and complete the insulation work included in the contract.
    5. Equipment and final checks. Set up any specified moisture-control equipment, check the completed work, and explain maintenance and access.

    A vapor barrier is a sheet material that limits moisture moving from the soil into the crawl space. Encapsulation extends that work into a connected moisture-control assembly, with sealed seams and connections detailed for the building. It is not simply loose plastic laid across the ground.

    Crawl space project stages from inspection through preparation, installation, and final checks
    Preparation and moisture correction belong in the schedule before the barrier goes down.

    Why this matters

    A short installation window means little if it excludes the work that makes the installation sound. You need to know when the crawl space will be ready, when the crew will work, and what remains after the barrier is installed. Those are different milestones.

    Wet Pacific Northwest winters make water management a practical concern for Seattle, Tacoma, Olympia, and Eastside homeowners. Covering soil does not correct a leaking pipe or water entering through the foundation. Fix the water problem before you hide access to it.

    A prepared crawl space has fewer scheduling dependencies

    A prepared crawl space has clear access, an agreed repair scope, and moisture conditions suitable for the specified materials. The crew can concentrate on fitting the barrier, sealing details, and completing the insulation or equipment work in the contract.

    That does not make every prepared space equally quick. A low crawl space, interior foundation walls, and numerous posts or utility penetrations add fitting work. Each connection needs attention; an open floor area alone does not describe the job.

    For a 2026 estimate, ask what the contractor means by ready for installation. Get that definition in writing. You should know whether cleanup, removal of old materials, and surface preparation belong to you, the installation crew, or another trade.

    A wet or damaged crawl space needs preparation first

    Standing water changes the sequence. The contractor needs to identify its source and determine how it will be managed before enclosing the space. A sump pump collects and moves water from a sump basin; it does not replace finding and addressing the source.

    Rotten framing also needs a separate decision. Insulation and barrier materials do not restore damaged wood. If the inspection identifies structural damage, arrange the appropriate repair assessment before the crew covers nearby surfaces.

    The practical advantage of addressing these conditions first is a clearer installation scope. The drawback is extra coordination: plumbing, drainage, structural repairs, and encapsulation can involve different people. Ask who schedules each part and who confirms that the next stage can begin.

    Equipment adds another part of the schedule

    A dehumidifier removes moisture from the air. It is different from a sump pump, which handles collected liquid water. Neither belongs in the scope automatically; the moisture-control design determines what your crawl space needs.

    Equipment work can include power, a discharge route, condensate drainage, and access for maintenance. Ask who handles those connections. A unit placed in the crawl space is not the same as an operating system with its drainage checked.

    Use this comparison when discussing the scope. These are project conditions, not fixed installation tiers.

    Project condition Best for this planning approach Scheduling advantage Limitation or dependency
    Prepared, accessible crawl space Planning barrier and sealing work Fewer unresolved preparation tasks Detailed fitting and access still affect working time
    Wet or damaged crawl space Planning repairs before installation Water and damage are addressed before covering surfaces Repairs and drying must be coordinated first
    Encapsulation with equipment Planning a complete moisture-control handoff Equipment checks can be included in the finish criteria Power, drainage, and setup require assigned responsibility
    Encapsulation with insulation Coordinating moisture and thermal work The crew can plan the assembly as a connected scope Insulation requirements and application conditions need separate review

    Why crawl space installation time varies

    These factors explain why a contractor should inspect rather than promise a duration from floor area alone:

    • Access and clearance. A narrow hatch, low floor framing, or obstructed route affects moving materials and working beneath the house.
    • Existing materials. Debris, damaged insulation, and an old barrier add removal and disposal work when included in the scope.
    • Water and wood condition. Leaks, standing water, mold, and rot need assessment and an agreed response before surfaces are covered.
    • Sealing detail. Posts, piers, foundation transitions, and utility penetrations require fitted connections, not just broad sheets.
    • Added insulation or equipment. Spray foam, a dehumidifier, or a sump system adds its own preparation, installation, and checks.
    • Trade coordination. Plumbing, electrical work, drainage repairs, and required inspections introduce dependencies outside barrier installation.

    For a 2026 schedule, ask which of these conditions the contractor has confirmed and which remain unresolved. That question is more useful than asking whether the crew can work faster. An unresolved water source does not disappear because you have a preferred completion date.

    Does spray foam installation count as encapsulation?

    Spray foam insulation is not a substitute for a ground vapor barrier or drainage repairs. Spray foam provides insulation and can control air leakage at appropriate locations. Encapsulation manages moisture through the crawl space assembly and its specified moisture-control measures.

    Open-cell foam has an open cellular structure; closed-cell foam has a denser, closed cellular structure. Their moisture properties differ. The installer needs to select the material for the location and assembly rather than treating the names as interchangeable.

    R-value describes resistance to heat flow. It helps specify insulation performance, but it does not describe a barrier's seam quality or prove that a crawl space has adequate water management. Keep the insulation specification and moisture-control scope distinct in your estimate.

    AT Foam Insulation installs open-cell and closed-cell spray foam in crawl spaces, attics, and walls. For crawl space insulation, ask where the foam belongs, what preparation it requires, and how it fits with the barrier plan. The useful benefit is coordinated insulation work; the limitation is that insulation alone does not complete encapsulation.

    What should you ask before accepting the installation schedule?

    Your written schedule should describe the work, its dependencies, and the point at which the contractor considers the job finished. A start date alone leaves too much open. Use these questions at the estimate visit:

    • What is included? Name removal, repairs, barrier installation, sealing, insulation, equipment, and final checks individually.
    • What must happen first? Identify any plumbing, drainage, drying, or structural work that blocks installation.
    • Who owns each task? Assign responsibility for separate trades rather than leaving coordination to assumption.
    • What changes the schedule? Ask how concealed damage or newly discovered water problems will be documented and discussed.
    • What does finished mean? Define the final inspection, equipment checks, photographs, and homeowner handoff.

    For a 2026 project, also ask whether the proposed date is a booking date, a crew arrival date, or an expected completion date. Those terms should not be used interchangeably. You need each milestone stated plainly.

    Can you stay home during crawl space encapsulation?

    Your contractor should confirm household access and occupancy requirements for the actual materials and work being performed. Barrier installation, demolition, and spray foam application have different site requirements. Do not assume one set of instructions covers all of them.

    If spray foam is included, follow the product-specific ventilation and re-entry instructions provided by the installer. Ask about people, pets, and access through the house before work starts. Keep the crawl space hatch and material route clear without removing anything the crew has not asked you to move.

    Tell the contractor about utilities and equipment you rely on. Plumbing, heating ducts, electrical wiring, and other systems can share the crawl space. Confirm any planned interruption rather than discovering it on installation day.

    Does encapsulation fix a wet crawl space immediately?

    Encapsulation does not replace correcting active water entry. A sealed ground barrier limits soil moisture, but a leaking pipe or incoming groundwater still needs its own solution. Water control comes before enclosure.

    Air moisture is a separate issue. The completed design needs an appropriate way to manage humidity, whether through an approved conditioning approach or specified equipment. Ask how the contractor will check that the system operates as intended.

    Do not use a newly installed liner as the only evidence of completion. Ask to see the seams, wall connections, access details, and any equipment operation. A clean-looking floor does not answer every moisture question.

    How do you know the crawl space is finished?

    A finished job matches the written scope and includes a clear handoff. You should know what was installed, where you can walk, how to reach serviceable equipment, and what maintenance remains your responsibility. Keep the material information with your home records.

    Ask for real job photos of areas that are difficult to inspect yourself. Photographs help document connections and completed work, but they do not replace checking equipment or resolving a known leak. Request an explanation of anything that differs from the agreed plan.

    Before closing out your 2026 project, confirm that outstanding repairs are listed rather than buried in a verbal conversation. Any excluded task needs an owner and a next step. That keeps installation completion separate from unfinished work elsewhere beneath the house.

    FAQ

    How long does crawl space encapsulation take from start to finish?

    Crawl space encapsulation takes the time required for inspection, preparation, moisture correction, installation, and final checks. Get a site-specific schedule that separates crew working time from repairs, drying, and other trade work.

    Can I get an installation timeline without a crawl space inspection?

    A reliable installation timeline requires an inspection of access, existing materials, water conditions, and the proposed scope. Floor area alone does not show the preparation or sealing work required.

    Does standing water delay crawl space encapsulation?

    Standing water adds water-management work that must be addressed before the crawl space is enclosed. Ask who will identify the source, complete the correction, and confirm readiness for installation.

    Is spray foam insulation the same as crawl space encapsulation?

    Spray foam insulation is not the same as crawl space encapsulation. Insulation addresses heat flow and appropriate air-leakage details; encapsulation also requires the specified ground barrier, sealing, and moisture-control measures.

    Do I need a dehumidifier after encapsulation?

    A dehumidifier belongs in the project when the moisture-control design calls for it. Confirm the humidity-control approach, drainage connection, power requirements, and maintenance access before accepting the scope.

    Can I stay in my house while the crawl space is being worked on?

    Your contractor must confirm occupancy requirements for the specific work and materials. If spray foam is included, follow the installer’s product-specific ventilation and re-entry instructions for people and pets.

    What should I ask for at the final walkthrough?

    Ask to review barrier connections, agreed insulation work, equipment operation, and maintenance access. Confirm that the completed work matches the written scope and that any remaining tasks have assigned responsibility.

    One last thing

    Ask what has to happen before the first sheet goes down. That answer reveals whether the schedule covers your actual crawl space or only the easiest part of the installation. Preparation is not a delay to work around; it is part of the job.

    Related guides

    For the insulation portion of your crawl space project, AT Foam Insulation offers free estimates from a licensed and insured, veteran-owned local contractor. Get a FREE Quote: call 425-999-8493.

  • How much does crawl space encapsulation cost in Washington State?

    How much does crawl space encapsulation cost in Washington State?

    Your crawl space encapsulation cost in Washington State depends on the work your crawl space actually needs, so get an itemized, on-site estimate before setting a 2026 budget. Ground covering, drainage, damaged-material removal, insulation, and humidity control are separate pieces of the job; a quote that leaves one out is not equivalent to a quote that includes it. Compare the scope before you compare the total.

    TL;DR
    • How much does crawl space encapsulation cost in Washington State? Get an itemized estimate based on actual site conditions.
    • AT Foam Insulation provides crawl space spray foam insulation and free estimates for Washington homeowners.
    • Separate ground covering, drainage, insulation, and humidity control when comparing encapsulation quotes.
    • Fix water entry before covering damp materials or installing crawl space insulation.

    How much does crawl space encapsulation cost in Washington State?

    The useful answer is a written estimate tied to your crawl space—not a statewide figure applied to every house. For your 2026 project, ask the contractor to separate preparation, moisture control, sealing, insulation, and any equipment into clear line items.

    A dry, accessible crawl space needs a different scope from one with standing water, fallen insulation, or damaged wood. Your home's floor area alone does not describe that difference. Neither does a quote labeled simply as encapsulation.

    Use this breakdown to see what you are buying:

    Work category What the estimate should identify What to check
    Preparation Debris removal, old insulation removal, surface preparation Whether disposal is included
    Water management The water source and proposed drainage work Whether water entry is addressed before sealing
    Ground covering Liner coverage, seam sealing, and attachments How edges, posts, and penetrations are handled
    Air sealing Gaps and openings included in the work How ventilation and combustion safety are addressed
    Insulation Material, installation location, and specified R-value Whether the floor or crawl space walls form the insulated boundary
    Humidity control The proposed method and any equipment Drainage, electrical work, and service access
    Repairs Damaged materials and the repair scope What is included versus referred to another trade

    R-value means resistance to heat flow. It helps describe insulation performance, but it does not tell you whether the crawl space has a working drainage plan.

    If water collects beneath your house, review how crawl space encapsulation connects to a sump pump system. A sump pump removes collected water; a ground liner does not replace that job.

    Why this matters in a Washington crawl space

    Pacific Northwest wet winters make moisture control a practical concern, not an optional finishing touch. Water entering through soil, foundation gaps, plumbing leaks, or poor exterior drainage needs its own diagnosis. Covering the ground does not repair a leaking pipe or redirect roof runoff.

    Damp wood also deserves attention before it disappears behind new materials. Mold, rot, and wet insulation are different problems. Ask what caused the condition and what work addresses that cause.

    A finished-looking crawl space is not proof that the moisture problem is fixed. Your estimate should explain how water, air, and humidity will be controlled after installation.

    Ground covering: check what gets sealed

    A ground vapor barrier is a liner placed over exposed soil to limit moisture moving upward from the ground. Encapsulation involves a more complete treatment of that space, with details for seams, edges, penetrations, and the chosen moisture-control approach.

    The distinction matters when you compare bids. One contractor's ground-cover replacement is not automatically equivalent to another contractor's sealed crawl space scope.

    Approach Best for What it addresses What it does not address by itself
    Ground-cover replacement Replacing an inadequate soil covering after moisture sources are checked Moisture moving upward from exposed soil Active leaks, standing water, insulation, or a complete air-control plan
    Sealed crawl space assembly A coordinated moisture and air-control project Ground coverage and specified sealing details Structural repairs or bulk-water drainage unless included
    Crawl space insulation Improving the home's thermal boundary Heat flow through the specified insulated surfaces Water entry or a complete encapsulation system

    Ask where the liner terminates and how it is secured. Look for details around support posts, plumbing penetrations, and access points. These are places where a vague scope leaves you guessing about the finished work.

    A liner also needs to tolerate the access your crawl space requires. Ask how future plumbing or electrical service will happen without tearing apart the installation.

    Drainage: solve standing water before sealing

    Standing water changes the project. Before approving a 2026 encapsulation estimate, ask the contractor to identify whether water comes from plumbing, exterior drainage, groundwater, or another source.

    Start with the source. A plumbing leak needs a plumbing repair; roof runoff collecting beside the foundation needs an exterior water-management assessment. A pump inside the crawl space is not a substitute for checking either condition.

    When drainage equipment is proposed, ask where collected water will discharge. The answer should account for the property and applicable local requirements, rather than moving water to another problem spot.

    Get the limits in writing. If drainage work is excluded from the encapsulation contract, know who handles it and when it must be finished. Otherwise, you risk paying for a sealed space that still receives water.

    Insulation: separate it from encapsulation

    Spray foam insulation and crawl space encapsulation are related jobs, but they are not interchangeable. Spray foam insulates and can air-seal the surfaces where it is correctly installed. It does not replace a soil liner, repair rotten framing, or remove standing water.

    Open-cell foam has an open internal structure and is more vapor-permeable. Closed-cell foam has a denser, closed structure and offers greater resistance to vapor movement at appropriate installed thicknesses. The right specification depends on the assembly, moisture conditions, and applicable requirements.

    Do not choose from the foam name alone. Ask where it will go, what R-value is specified, and how the installation fits the crawl space's moisture strategy.

    AT Foam Insulation is best for Washington homeowners seeking crawl space spray foam insulation from a veteran-owned local crew. The company is licensed and insured and offers free estimates. Its confirmed insulation services do not, by themselves, establish that drainage, structural repairs, or every encapsulation component is included.
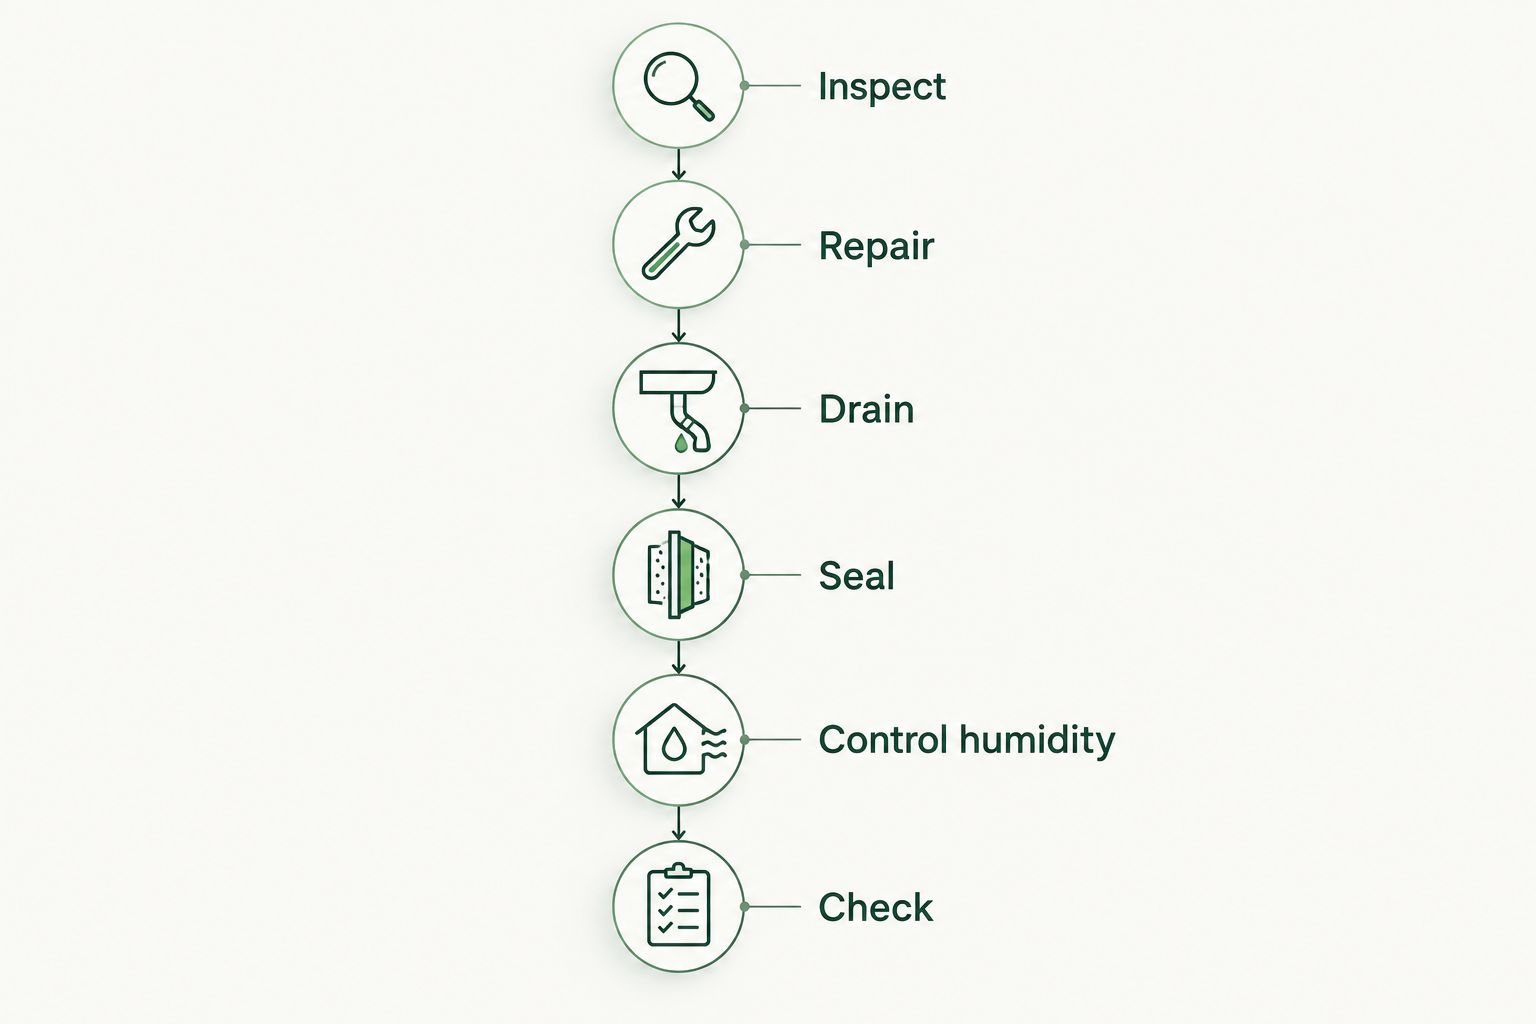
    You can request the insulation portion of your project through AT Foam Insulation. Ask for a scope that shows how the crawl space insulation connects to the rest of the work.

    Humidity control: ask how the space stays dry

    A ground liner limits soil moisture, but your crawl space still needs a plan for humidity—the moisture carried in the air. That plan depends on the crawl space design and the conditions beneath your house.

    If a dehumidifier is proposed, ask where its collected water goes. Also ask about electrical supply, service access, filters, and maintenance. Equipment that is difficult to reach is difficult to maintain.

    Do not accept a dehumidifier as the sole answer to active water entry. Drainage and humidity control do different jobs. Your estimate should name each problem and connect it to the work intended to solve it.

    Sealing also changes air movement. Ask how the proposed design handles ventilation, any combustion equipment, and radon considerations before vents or other openings are closed.

    Why crawl space encapsulation estimates vary

    For a 2026 quote, these site conditions explain why the work changes from house to house:

    • Access: A narrow opening or limited working height affects how crews move materials and complete installation.
    • Existing materials: Debris, damaged liners, and fallen insulation require removal before new work begins.
    • Water entry: Active leaks or standing water add investigation and corrective work beyond ground covering.
    • Framing condition: Mold-affected or rotten materials need assessment before they are covered.
    • Insulation scope: Floor insulation, wall insulation, and rim joist work involve different surfaces and details. The rim joist is the perimeter framing at the edge of the floor.
    • Humidity-control design: Drainage connections, electrical work, equipment placement, and service access affect the complete scope.

    Your city name is not enough to explain the estimate. A Seattle house with difficult access and water intrusion presents a different job from a dry, accessible crawl space in Tacoma, Olympia, or Kirkland.

    Ask the estimator to show you the conditions behind each line item. Photos of your actual crawl space help you understand what needs work without crawling beneath the house yourself.

    How do you compare crawl space encapsulation quotes?

    Compare your 2026 quotes against the same written scope. If the work differs, the totals answer different questions.

    1. Inspect first. Get the water source, existing materials, access conditions, and visible damage documented.
    2. Define the scope. Separate preparation, drainage, liner installation, sealing, insulation, and humidity control.
    3. Check exclusions. Identify repairs, electrical work, plumbing, permits, and disposal that another party must handle.
    4. Compare details. Match material specifications, coverage, installation locations, and completion checks.
    5. Confirm handoff. Ask what documentation and maintenance instructions you receive when the work is finished.
    Five steps for comparing crawl space encapsulation estimates
    Compare matching work scopes before comparing quote totals.

    A useful estimate makes the job understandable. You should be able to point to each condition beneath your house and identify the work that addresses it.

    Do not demand equipment without a reason, either. Ask what observed condition justifies a pump, a dehumidifier, or insulation replacement. A clear explanation is more useful than a longer equipment list.

    Is crawl space encapsulation cheaper without insulation?

    An estimate excluding insulation covers less work, but it does not establish whether that scope is right for your home. Check the condition of your existing insulation and where the home's thermal boundary will sit.

    If you retain existing insulation, ask whether it is dry, properly supported, and suitable for the proposed crawl space design. Leaving damaged material in place is not a complete repair.

    Can you encapsulate a crawl space without a sump pump?

    A sump pump is not automatically required for every crawl space. Its role is to remove collected water when the site conditions and drainage design call for it.

    Ask for evidence of the water problem before approving pump installation. If your crawl space has standing water, do not skip the drainage assessment simply to reduce the work scope.

    Should you fix mold or rot before encapsulation?

    Yes. Assess mold, rot, and the moisture source before covering affected materials or insulating around them.

    Insulation does not restore damaged framing. Keep repair work visible in the contract, including who performs it and when it must be completed.

    FAQ

    How much does crawl space encapsulation cost in Washington State in 2026?

    Your crawl space encapsulation cost depends on the site conditions and included work. Get an itemized, on-site estimate separating preparation, drainage, ground covering, insulation, and humidity control.

    Does a crawl space encapsulation quote include spray foam insulation?

    Only if the written scope includes spray foam insulation. Ask for the installation location, material specification, and R-value rather than assuming insulation is part of encapsulation.

    Is a vapor barrier the same as full crawl space encapsulation?

    No. A ground vapor barrier covers exposed soil, while a complete encapsulation scope also specifies sealing details and a moisture-control approach.

    Will encapsulation stop water from coming into my crawl space?

    Encapsulation does not replace repairs for active water entry. Diagnose leaks, drainage problems, and standing water before sealing the crawl space.

    Do I need a dehumidifier after crawl space encapsulation?

    A dehumidifier depends on the crawl space design and humidity conditions. Ask how humidity will be controlled, how collected water will drain, and what maintenance the proposed system needs.

    Can AT Foam Insulation give me a crawl space insulation estimate?

    AT Foam Insulation offers free estimates for crawl space spray foam insulation. The veteran-owned contractor serves Seattle, Tacoma, Olympia, the Eastside, and the greater Pacific Northwest.

    One last thing

    Ask for completion photos of your own crawl space, especially sealed seams, edges, penetrations, and insulated surfaces. Those details become harder to inspect once the job is closed out.

    Keep the photos with your 2026 contract and maintenance instructions. They give you a record of what was installed and help future trades understand what they must protect.

    Related guides

    Get a FREE Quote for your crawl space insulation.

    Get a FREE Quote

    Request a crawl space spray foam insulation estimate for your Washington home.

  • How long does spray foam insulation take to install?

    How long does spray foam insulation take to install?

    Spray foam insulation installation time depends on the area being insulated, access, preparation, and the foam manufacturer's application requirements; you need a job-specific schedule, not a blanket promise. Your 2026 project schedule must also include cleanup, ventilation, and the required time away from the treated area—not just time spent spraying.

    TL;DR
    • How long does spray foam insulation take to install? Separate preparation, spraying, cleanup, and re-entry before planning your schedule.
    • AT Foam Insulation serves Pacific Northwest homeowners needing attic, crawl space, and wall spray foam installation.
    • Open-cell and closed-cell spray foam require product-specific application and re-entry instructions.
    • Fix moisture problems before insulating; foam does not repair leaks or rotten wood.

    Why the installation schedule matters

    You need to know when the crew needs access, which spaces you cannot use, and when other work can restart. A spraying appointment alone does not answer those questions.

    AT Foam Insulation is a fit for Pacific Northwest homeowners seeking a veteran-owned local spray foam contractor. You can request a free estimate from AT Foam Insulation for attic, crawl space, or wall work. Ask for the work schedule and return instructions alongside the insulation scope.

    The practical limitation is straightforward: a local crew still needs to assess your building. Your address and the word attic are not enough to set a dependable completion time.

    How long does spray foam insulation take to install?

    The full installation schedule includes preparation, application, cleanup, and clearance to return. Those stages answer different questions, so ask the contractor to explain each separately.

    For your 2026 project, get the sequence in writing before arranging time away from home or booking another trade. Use this checklist during the estimate:

    1. Inspect the space. Identify the surfaces being insulated, access restrictions, existing insulation, and moisture problems. Confirm whether the work covers an attic floor, roofline, crawl space, rim joist, or wall cavity.
    2. Confirm the assembly. An assembly is the complete arrangement of framing, insulation, moisture control, and finishes. Decide where the foam belongs before the crew starts.
    3. Complete preparation. Finish any agreed removal, repairs, drying, and protection of nearby surfaces. Keep preparation separate from the spraying estimate.
    4. Apply the specified foam. The crew follows the selected product's instructions for surface conditions, application thickness, and any required pauses between layers.
    5. Finish the work area. Complete trimming where needed, inspection of the installation, cleanup, and any protective covering required for the assembly.
    6. Follow return instructions. Keep occupants and other trades out as directed. Return only under the product-specific instructions provided for the installation.

    Ask which stages belong to the insulation contractor and which belong to you or another trade. A repair that nobody owns becomes a scheduling problem before spraying even begins.

    Installation sequence from inspecting the space through following return instructions
    Plan the whole installation sequence, not just the spraying appointment.

    Why spray foam installation time varies

    The main scheduling factors are physical conditions and the selected foam system. These are the details to show the estimator, not details to leave until installation day.

    • Area and coverage: A rim joist—the framing around the edge of a floor—has a different work scope from an entire roofline. Identify every surface included.
    • Access: Low crawl spaces, tight attic openings, stored belongings, and finished walls affect how the crew reaches the work.
    • Existing materials: Removing old insulation or exposing concealed framing adds work before application. Confirm whether removal is included.
    • Moisture and repairs: Leaks, wet surfaces, mold, and damaged wood need attention before they are covered. Spray foam is not a repair for those conditions.
    • Foam requirements: Open-cell and closed-cell products have their own application instructions. Surface conditions and layer requirements affect the sequence.
    • Protection and occupancy: Masking nearby surfaces, managing ventilation, and restricting access are part of the job, not optional extras.

    In Pacific Northwest wet winters, moisture deserves particular attention. For a 2026 installation in Seattle, Tacoma, Olympia, or the Eastside, tell the estimator about roof leaks, crawl space water, or damp framing before agreeing to a work date.

    Do not shorten the schedule by covering an unresolved moisture problem. Get the cause addressed, then confirm that the surface meets the foam manufacturer's requirements.

    Does an attic, crawl space, or wall job take longer?

    The location alone does not establish the installation time. Compare the actual access and preparation instead of assuming every attic or crawl space follows the same schedule.

    Work area Best suited to What helps the schedule What complicates the schedule
    Attic A defined attic-floor or roofline insulation plan Clear access and a confirmed ventilation approach Old insulation, obstructions, roof leaks, or unresolved roofline details
    Crawl space A defined floor, rim joist, or wall insulation plan Accessible framing and moisture problems already addressed Standing water, tight clearance, plumbing obstacles, or damaged wood
    Walls An installation planned around accessible wall cavities Exposed framing and completed work inside the cavities Finished surfaces, concealed conditions, or unfinished electrical and plumbing work

    These are work-scope comparisons, not promises of a faster installation. An accessible wall project and a cramped crawl space require different planning even when both use spray foam.

    What should you check before attic installation?

    Ask whether the insulation goes on the attic floor or along the roofline. Those choices change which surfaces need access and how the attic's ventilation is handled.

    Do not let a quick scheduling discussion replace that decision. Stored belongings, existing insulation, roof conditions, and equipment in the attic belong in the estimate conversation.

    What should you check before crawl space installation?

    Show the estimator where water collects and where pipes or ducts restrict access. Ask whether the scope includes floor framing, rim joists, crawl space walls, or a combination.

    Ground moisture control and spray foam are separate parts of the building plan. A damp crawl space needs a moisture assessment, not simply an earlier spraying appointment.

    What should you check before wall installation?

    Confirm when wall cavities will be open and ready. Electrical, plumbing, inspections, and insulation need an agreed sequence before finishes conceal the work.

    Ask whether trimming and required coverings are included. The moment spraying ends is not automatically the moment drywall work can begin.

    Does open-cell or closed-cell foam install faster?

    Choose the foam for the building assembly, not for an assumed speed advantage. Open-cell foam has an interconnected cell structure; closed-cell foam has a denser structure with enclosed cells. Their moisture behavior differs, and the exact product matters.

    R-value measures resistance to heat flow. Ask for the selected product's published R-value and planned thickness rather than treating the foam name as the full specification.

    Foam type Best for Practical advantage Limitation to plan around
    Open-cell Assemblies designed to accommodate its vapor permeability Allows more water-vapor movement than closed-cell foam Needs a moisture-control design appropriate to the location
    Closed-cell Assemblies requiring the selected product's denser structure and vapor resistance Provides greater resistance to water-vapor movement at appropriate thickness Requires careful attention to drying paths and product-specific application limits

    Neither option removes the need for dry, suitable surfaces or correct installation. Both require manufacturer instructions for application, ventilation, and return to the treated space.

    Ask AT Foam Insulation to explain the proposed spray foam type in plain language. The answer should connect the product to your attic, crawl space, or walls—not simply call one type better.

    Can you stay home during spray foam installation?

    Do not plan to remain in an affected occupied area while spray foam is being applied. Spray foam application involves chemical exposure hazards, and the contractor must explain the exclusion and ventilation plan before work starts.

    Ask how the plan applies to the whole building, not just the room beside the spray equipment. Air movement, connected spaces, and the ventilation arrangement matter.

    Tell the contractor about children, pets, tenants, and anyone with respiratory concerns. Get instructions for occupants rather than relying on a schedule intended for trained workers wearing protective equipment.

    For a 2026 booking, confirm these points before arranging accommodation:

    • Which parts of the property must remain unoccupied.
    • When the exclusion period begins.
    • How ventilation will operate during and after application.
    • Which product instructions determine return to the building.
    • Who will tell you that the agreed return conditions have been met.

    Do not judge clearance by touch or smell. Foam that looks finished does not, by itself, establish that the space is ready for occupancy.

    When can other contractors work after spray foam?

    Other trades need the installation-specific return instructions before entering the treated area. After that, their work depends on whether the insulation scope, trimming, and required coverings are complete.

    Give the insulation schedule to your builder, electrician, plumber, or drywall contractor before booking overlapping work. Ask each trade to confirm what must happen first.

    A simple handoff prevents confusion: identify the last preparation task, the insulation contractor's completion point, and the condition needed before the next trade starts. Put names against those responsibilities.

    For commercial properties, also identify affected employees, customers, and neighboring occupants. A work area inside a larger building needs an occupancy plan; treating it as an isolated appointment is not enough.

    What should you ask for in the estimate?

    A useful estimate separates the insulation scope from the scheduling assumptions. You should be able to see what the crew will insulate and what needs to be ready first.

    Use this list for your 2026 estimate:

    • Work area: Identify the attic, crawl space, walls, or rim joists included.
    • Selected material: Record the foam product and the planned thickness or performance requirement.
    • Preparation responsibility: State who handles removal, repairs, drying, and clearing access.
    • Work sequence: Separate preparation, application, cleanup, and any follow-up work.
    • Occupancy instructions: Get the exclusion, ventilation, and return requirements.
    • Completion details: Confirm trimming, coverings, cleanup, and the handoff to other trades.

    Photos help explain access and visible conditions, but they do not reveal every concealed problem. Show the actual entrance and the full work area, not just a close-up of existing insulation.

    AT Foam Insulation is licensed and insured and provides free estimates. Use the estimate to settle the scope before you reorganize your household or business around a proposed installation date.

    FAQ

    How long does spray foam insulation take to install in an attic?

    Attic installation time depends on access, existing insulation, the surfaces being treated, and the selected foam’s application requirements. Confirm whether the scope covers the attic floor or roofline, then request a schedule that includes preparation and return instructions.

    Can spray foam insulation be installed in a damp crawl space?

    Spray foam should not cover an unresolved moisture problem or a surface that fails the product’s application requirements. Address water entry, wet framing, and necessary repairs before scheduling application.

    Can I sleep in my house after spray foam is installed?

    Return only according to the installation-specific occupant re-entry instructions. Ask the contractor for those instructions before work starts; the end of spraying is not an automatic clearance to sleep in the house.

    Does closed-cell spray foam take longer than open-cell?

    The foam type alone does not establish the installation time. The product’s layer requirements, work area, surface conditions, and preparation determine the application sequence.

    What should I move before the insulation crew arrives?

    Clear the access route and work area according to the contractor’s preparation list. Confirm what happens to stored belongings and existing insulation before moving items or removing materials yourself.

    Does AT Foam Insulation offer free estimates?

    AT Foam Insulation offers free estimates for residential and commercial spray foam work. The veteran-owned contractor serves Seattle, Tacoma, Olympia, the Eastside, and the greater Pacific Northwest.

    Can drywall work start as soon as spraying stops?

    Drywall work should start only after the applicable return requirements and insulation handoff conditions are satisfied. Confirm trimming, inspections, and required coverings with the contractors before booking the next stage.

    One last thing

    Ask for two separate milestones: when the crew finishes and when you can return. Those milestones answer different questions, and confusing them is what makes an installation schedule hard to use.

    For your 2026 project, save the foam product information and written return instructions with the estimate. You will have the relevant instructions in hand instead of trying to reconstruct them after the crew leaves.

    Related guides

    Get a FREE Quote from AT Foam Insulation. Bring the work area, access details, and your scheduling questions.

    Get a FREE Quote

    Discuss your attic, crawl space, or wall project with a veteran-owned local crew.

  • Can spray foam insulation cause mold?

    Can spray foam insulation cause mold?

    Yes. Spray foam insulation can contribute to mold problems when it covers damp materials, conceals a leak, or forms part of an assembly that cannot dry properly. Correctly specified and installed foam can reduce moisture carried through air leaks, but it does not repair water damage or replace ventilation. The deciding factor is whether the surrounding wood and other building materials stay dry—not simply whether you choose spray foam.

    TL;DR
    • Can spray foam insulation cause mold? Yes, when wet materials, leaks, or poor drying conditions remain uncorrected.
    • Open-cell and closed-cell spray foam need different moisture-control details; neither repairs a leak.
    • AT Foam Insulation serves Pacific Northwest homeowners who need attic, crawl space, or wall spray foam installation.
    • Fix water entry, address mold, verify dry surfaces, and plan ventilation before installing foam.

    Can spray foam insulation cause mold?

    Spray foam can contribute to conditions that support mold, but moisture is the underlying problem. Mold needs moisture and a food source. Wood, paper-faced materials, and accumulated dirt can provide that food source around an insulated assembly.

    Foam changes how air and water vapor move through your home. That helps when the assembly is designed correctly. Trouble starts when insulation hides wet wood or blocks a drying route without controlling the moisture entering the assembly.

    Condition What spray foam changes What you need to do
    Dry wood with unwanted air leakage Properly installed foam reduces air movement through the insulated area Maintain a continuous air seal and suitable ventilation
    Roof or plumbing leak Foam does not stop the source of liquid water Repair the leak and assess affected materials before insulation
    Damp crawl space Foam does not drain standing water or stop ground moisture by itself Address drainage and ground moisture separately
    Assembly with limited drying Foam can change the direction and rate of drying Have the full assembly assessed, not just the insulation layer

    Air sealing also changes your home's ventilation needs. The guide to connecting spray foam insulation to whole-house ventilation explains that connection.

    Why this matters in Pacific Northwest homes

    Seattle, Tacoma, Olympia, and Eastside homes face wet winters. Your roof, siding, flashing, and crawl space drainage all have to manage that water before insulation enters the picture.

    An attic can look dry during a summer inspection and still have a winter moisture problem. A crawl space can have dry-looking framing above damp soil. Look for the water source, not just the spot where staining appears.

    For a 2026 insulation project, treat moisture control as part of the scope. Ask who checks the wood, who repairs water entry, and how the insulated space will dry afterward. Do not accept insulation as the repair for an unresolved leak.

    Open-cell spray foam: more vapor-open, not waterproof

    Open-cell spray foam has an interconnected cell structure and generally allows more water vapor through than closed-cell foam. Water vapor is moisture in the air, not a roof leak or standing water.

    Best for: suitable enclosed assemblies where the design accounts for vapor movement and drying. Its more vapor-open structure can support drying through the foam, but that does not make every roof or wall application appropriate.

    The drawback is that moisture can still reach cold materials if the assembly lacks the required vapor control. A vapor retarder is a layer that slows water vapor movement. Whether you need one—and where it belongs—depends on the climate, assembly, and product.

    Do not choose open-cell foam just because someone says a roof needs to breathe. Ask how the roof deck stays dry during winter and where moisture can escape.

    Closed-cell spray foam: tighter vapor control, less drying through foam

    Closed-cell spray foam has a denser cell structure and generally resists water vapor movement more than open-cell foam. Its vapor performance depends on the specific product and installed thickness.

    Best for: suitable assemblies that need air sealing and stronger vapor control, with water entry already addressed. Closed-cell foam can serve those functions when its installation meets the assembly's requirements.

    The trade-off is reduced drying through the foam. If wood gets wet from the other side, its remaining drying route matters. Covering wet framing does not turn it into dry framing.

    Closed-cell foam is not a substitute for roof flashing, foundation drainage, or a ground vapor barrier. Ask your installer to explain those separate jobs before approving the work.

    Foam type Main advantage Main limitation Best for
    Open-cell Air sealing with greater vapor permeability Needs assembly-specific moisture and vapor control Appropriate enclosed assemblies with a planned drying route
    Closed-cell Air sealing with greater resistance to vapor movement Reduces drying through the foam Appropriate assemblies requiring stronger vapor control

    Neither foam type is automatically mold-proof. The surrounding materials, water sources, and drying conditions decide the outcome.

    Why mold risk varies from one installation to another

    A foam label does not describe your entire roof, wall, or crawl space. These factors explain why the same insulation type can perform differently in different assemblies:

    • Existing moisture: Wet sheathing or framing needs assessment and drying before it is covered.
    • Water entry: Roof leaks, plumbing leaks, failed flashing, and ground water require their own repairs.
    • Drying routes: Existing roofing, wall layers, and vapor retarders affect where moisture can escape.
    • Indoor humidity: Cooking, bathing, and other activities add moisture that ventilation must remove.
    • Air-seal continuity: Gaps allow humid air to reach cold surfaces even when neighboring areas are insulated.
    • Product and installation requirements: Surface condition, application thickness, and approved assembly details affect performance.

    For your 2026 project, ask about each factor by name. An answer about R-value alone is not enough. R-value measures resistance to heat flow; it does not tell you whether an assembly manages water correctly.

    What should you check before spray foam goes in?

    Check moisture before covering the structure. Once foam covers framing or sheathing, inspecting those surfaces becomes harder.

    1. Find water entry. Check roof penetrations, plumbing, foundation seepage, and drainage. Trace staining back to a source instead of assuming the stain is old.
    2. Repair leaks. Resolve the source before scheduling insulation over the affected area. Foam is not flashing, a plumbing repair, or a drainage system.
    3. Assess damaged materials. Have mold growth and suspected rot evaluated. Do not spray over visible mold and call the problem finished.
    4. Verify dry wood. Use moisture measurements and the foam manufacturer's requirements. A dry-looking surface does not establish that wood is ready.
    5. Plan drying. Identify which direction the assembly can dry after insulation. Account for existing layers on both sides.
    6. Check ventilation. Confirm that exhaust fans discharge outdoors and that the home's ventilation suits the air-sealing work.
    Six checks before insulation, from finding water entry to checking ventilation.
    Repair and drying come before foam installation.

    Keep photographs of exposed framing and repaired leaks with your project records. Also keep the product information and written scope. Those records help a future inspector understand what was covered and how the assembly was intended to work.

    What indoor humidity should you aim for?

    The U.S. Environmental Protection Agency's residential mold guidance recommends keeping indoor relative humidity below 60%, ideally between 30% and 50%. Relative humidity describes how much moisture the air holds compared with what it can hold at that temperature.

    For your 2026 moisture checks, use those figures as indoor guidance—not proof that every concealed surface is dry. A cold roof deck or wall surface can develop condensation even when a room reading looks acceptable.

    Use a humidity monitor to spot patterns. Check whether readings climb after showers, cooking, or periods when the house stays closed. Persistent humidity calls for a ventilation or moisture-source assessment, not another layer of insulation.

    The EPA also advises drying wet materials within 24–48 hours to help prevent mold growth. Start drying promptly after a leak. That window is not a guarantee, and it does not establish that previously moldy materials are ready to cover.

    Can spray foam hide a roof leak?

    Yes. Foam applied to the underside of roof sheathing can make parts of the wood harder to inspect and change where leak evidence appears. Missing stains in the room below do not prove the roof is watertight.

    Before insulating an attic, inspect roof penetrations, flashing, and any stained sheathing. After the work, keep maintaining the roof from the outside. Insulation does not remove that responsibility.

    Ask whether the attic will remain vented or become an unvented assembly. A vented attic exchanges air through designed openings; an unvented attic needs a different moisture-control approach. Do not simply fill vents without an approved assembly plan.

    For a 2026 roof project, coordinate roofing and insulation decisions before either trade covers the structure. The drying route is easier to assess while the layers remain accessible.

    Will spray foam fix a damp crawl space?

    No. Spray foam can insulate and air-seal suitable crawl space surfaces, but it does not remove standing water, repair leaking pipes, or replace a ground vapor barrier.

    Check where the moisture comes from. Wet soil, foundation seepage, plumbing leaks, and humid air need different responses. Treating all of them as an insulation problem leaves the source in place.

    A rim joist is the perimeter framing above the foundation. It is a common air-leakage area, but the wood still needs to be sound and suitable for insulation. Damp or damaged rim joists need assessment before they are covered.

    Keep drainage, ground moisture control, insulation, and humidity management as separate items in the scope. They work together. None excuses leaving another unresolved.

    Does a musty smell prove spray foam caused mold?

    No. A musty smell is a reason to investigate moisture, not proof that spray foam caused the problem. The source can sit behind finishes, below a floor, or in an adjacent space.

    Record where the odor is strongest and when it appears. Note recent leaks, drainage problems, or changes to ventilation. Give the inspector that history rather than naming the insulation as the cause before inspection.

    Visible discoloration also needs care. Not every dark mark is mold, and not every mold problem is visible. Do not paint, foam, or seal over an unexplained damp area to make it disappear. Find out what is happening first.

    What should you ask a spray foam contractor?

    AT Foam Insulation is best for Pacific Northwest homeowners seeking a veteran-owned local spray foam contractor for attic, crawl space, and wall installation. The company is licensed and insured and offers free estimates.

    Ask for a scope that separates insulation from moisture repairs. Useful questions include who checks substrate moisture, which product is specified, how drying is handled, and whether ventilation needs adjustment.

    AT Foam Insulation provides spray foam installation, not a reason to skip an independent assessment of suspected mold or structural decay. An insulation estimate does not replace a roof repair or a mold evaluation.

    For your 2026 estimate, bring pictures of the affected area and any inspection reports. Ask AT Foam Insulation about the proposed foam type, surfaces to be covered, and preparation required before the crew starts.

    FAQ

    Can spray foam insulation cause mold in my attic?

    Yes, spray foam can contribute to attic mold conditions if moisture enters the assembly and cannot dry adequately. Repair roof leaks and assess sheathing before covering it.

    Is closed-cell spray foam mold-proof?

    No, closed-cell spray foam does not make an assembly mold-proof. Damp wood, surface dirt, and unresolved water entry can still support mold problems.

    Is open-cell foam better than closed-cell foam for preventing mold?

    Neither open-cell nor closed-cell foam is universally better for preventing mold. The right choice depends on the assembly’s moisture exposure, vapor control, and drying route.

    Can I spray foam over existing mold?

    Do not spray foam over existing mold as a repair. Address the moisture source and have affected materials assessed before insulation covers them.

    What humidity level helps prevent mold in my home?

    Keep indoor relative humidity below 60%, ideally between 30% and 50%, following EPA residential mold guidance. Indoor readings do not establish that concealed wood or cold surfaces are dry.

    How quickly should I dry materials after a leak?

    Dry wet materials within 24–48 hours to help prevent mold growth, following EPA guidance. Begin promptly and have damaged or previously moldy materials assessed before covering them.

    Does AT Foam Insulation offer free estimates?

    Yes, AT Foam Insulation offers free estimates for spray foam installation. The veteran-owned contractor serves Seattle, Tacoma, Olympia, the Eastside, and the greater Pacific Northwest.

    One last thing

    An air leak and a water leak are different problems. Spray foam can address the first while leaving the second untouched. Before you approve insulation, ask one plain question: What keeps this wood dry after you cover it?

    Related guides

    Get a FREE Quote. Call 425-999-8493.

  • Is crawl space encapsulation worth it in 2026?

    Is crawl space encapsulation worth it in 2026?

    Crawl space encapsulation is worth it in 2026 when ground moisture, air leaks and persistent dampness need a coordinated fix—not just another layer of insulation. It is not a substitute for repairing leaks, managing standing water or replacing damaged wood, and the finished system needs a plan for humidity control and maintenance.

    TL;DR
    • Is crawl space encapsulation worth it? Yes, when moisture problems justify sealing, drainage and humidity control together.
    • Fix standing water and damaged wood before sealing your crawl space.
    • Spray foam insulation does not replace a sealed ground vapor barrier or a drainage system.
    • AT Foam Insulation serves Pacific Northwest homeowners who need crawl space spray foam installation.

    Is crawl space encapsulation worth it in 2026?

    Yes, when you have a moisture problem that a complete crawl space system can address. Encapsulation separates the space beneath your house from exposed soil and uncontrolled outdoor air. Its value comes from controlling those moisture paths—not from making the crawl space look clean.

    The right choice depends on what is actually happening beneath your floor. A dry crawl space with damaged insulation needs a different repair than a crawl space with puddles after every wet winter storm. If water collects beneath your house, start with connecting crawl space encapsulation to a sump pump system.

    Approach Best for Main benefit Main limitation Verdict
    Targeted repairs A generally dry crawl space with a specific leak or damaged insulation Addresses the identified defect Does not address unrelated moisture paths Choose when inspection supports a limited repair
    Ground vapor barrier repair Exposed soil or a torn, poorly joined ground covering Reduces moisture entering from the soil Does not stop flooding or control every air leak Choose when soil moisture is the main issue
    Full encapsulation A crawl space needing coordinated ground sealing, air control and humidity management Treats the crawl space as a connected system Requires careful detailing and ongoing checks Choose when the full scope is justified
    Spray foam insulation Suitable crawl space surfaces needing insulation and air sealing Reduces heat transfer and air leakage at treated surfaces Does not replace drainage or ground moisture control Choose as part of the correct moisture plan

    Ask for the finding behind each recommendation. A written scope should explain what is wet, where the moisture comes from and how the proposed work addresses it.

    Why this matters beneath a Pacific Northwest home

    Wet winters give drainage defects plenty of opportunities to show themselves. In Seattle, Tacoma, Olympia and the Eastside, your crawl space inspection needs to consider rainwater outside the house as well as conditions underneath it.

    Moisture reaches a crawl space through different routes. Water can enter through plumbing leaks or poor exterior drainage; water vapor can rise from exposed soil; damp air can enter through openings. These are different problems, even when they leave similar stains.

    Do not buy an insulation-only fix for a water-management problem. Covering wet materials hides evidence without correcting the cause. Mold and rot also need proper assessment rather than a promise that a new liner will solve everything.

    For a 2026 project, judge the proposal by the problems it addresses. A neat installation matters, but dry, inspectable construction matters more.

    When full encapsulation makes sense

    Full encapsulation is the stronger choice when your crawl space needs connected repairs rather than isolated patching. That means a sealed ground covering, properly detailed edges and penetrations, a suitable insulation approach and a deliberate humidity-control plan.

    A vapor barrier is a material that restricts water vapor moving out of the soil. For encapsulation, its seams and connections matter as much as the material itself. Loose sheets with open edges do not create the same separation as a continuous, sealed installation.

    Look for these reasons to investigate a full system:

    • Persistent dampness that remains after obvious leaks are repaired.
    • Exposed soil or a ground covering with widespread gaps and damage.
    • Air leaks around the perimeter and floor framing.
    • Insulation damaged by moisture, with the moisture source still unresolved.
    • A need to coordinate ground sealing, drainage and humidity control.

    These are inspection prompts, not a diagnosis from a photograph. Musty smells, for example, justify investigation but do not prove that encapsulation is the only answer.

    Best for: homeowners whose inspection shows several connected moisture and air-control problems. The drawback is that the system has more components to install, inspect and maintain than a targeted repair.

    When targeted crawl space repairs are enough

    A full system is not automatically the right answer. If your crawl space is dry and the problem is a leaking pipe, repair the pipe and assess the affected materials first.

    The same applies to an isolated opening, a damaged access door or a small section of failed insulation. Match the repair to the defect. Do not turn one visible problem into a whole-crawl-space project without supporting findings.

    A limited repair still needs a follow-up check. The ground covering should remain intact, treated surfaces should stay dry and any repaired leak should remain resolved.

    Best for: homeowners with a clearly identified defect and otherwise sound crawl space conditions. The limitation is scope: fixing one problem does not correct another moisture source that the inspection missed.

    When you compare proposals in 2026, ask why a targeted repair would or would not work. The answer should refer to your house, not a standard sales package.

    What needs to happen before encapsulation?

    The order of work matters. Sealing the crawl space before resolving water entry and damaged materials puts the finish ahead of the repair.

    1. Inspect. Check exposed soil, foundation walls, plumbing, ducts, floor framing and existing insulation. Record wet areas, staining and damage rather than relying on a quick look through the access opening.
    2. Repair. Address active plumbing leaks and assess deteriorated wood. Suspected structural damage belongs with a qualified professional before insulation or liners cover the area.
    3. Drain. Correct the identified water-entry problem. Depending on the house, the work can involve exterior drainage, an interior collection system or a sump pump; a pump is not required simply because encapsulation is proposed.
    4. Seal. Install the ground covering and detail seams, perimeter connections and penetrations. Coordinate insulation and air sealing with the chosen crawl space design.
    5. Control humidity. Establish how the enclosed space will stay dry. The design must account for ventilation, conditioning or dehumidification, along with equipment access and drainage.
    6. Check. Inspect the completed work and keep the access usable. Confirm that connections remain intact and that water-handling equipment works as intended.

    The sequence separates repairs from the finished system. Your written proposal should do the same, so you can see which problems get corrected before the crawl space is closed up.

    Sequence showing inspection, repairs, drainage, sealing, humidity control and follow-up checks
    Fix water entry and damaged materials before sealing the crawl space.

    Why crawl space encapsulation results vary

    Two crawl spaces can look similar from the access hatch and need different work. The difference is underneath: water paths, material condition and how the space connects to the house.

    • Moisture source. Ground vapor, rainwater and plumbing leaks require different controls. A liner addresses ground vapor but does not repair a pipe.
    • Drainage condition. Standing water must have a planned route out. Sealing over the ground does not make incoming water disappear.
    • Existing damage. Rotten wood and contaminated materials require assessment before they are concealed. The repair scope affects the installation sequence.
    • Sealing details. Open seams, loose edges and poorly finished penetrations interrupt the barrier. Inspect the connections, not just the open floor area.
    • Humidity-control design. Closing vents changes airflow. The enclosed space needs a planned method of moisture removal, not an assumption that sealing alone is sufficient.
    • Access and maintenance. A crawl space still contains plumbing, wiring and equipment that need attention. The finished system must allow inspection without unnecessary damage.

    These factors explain why a generic package is a weak basis for choosing the work. The best proposal names the moisture source and assigns a repair to it.

    Where does spray foam insulation fit?

    Spray foam belongs in the insulation and air-sealing part of the plan. It is not the ground covering, the drain or the humidity-control equipment.

    Open-cell foam has a more vapor-permeable structure. Closed-cell foam is denser and generally resists water-vapor movement more strongly, depending on the product and installed thickness. Neither choice makes an active leak acceptable.

    R-value describes resistance to heat flow. It helps you compare insulation performance, but it does not tell you whether a crawl space has adequate drainage or whether wet wood is ready to cover. A rim joist—the framing around the outer edge of your floor—is another area where insulation and air sealing need careful detailing.

    AT Foam Insulation is best for Pacific Northwest homeowners who need a local, veteran-owned spray foam installation crew. Its confirmed work includes open-cell and closed-cell insulation for crawl spaces, attics and walls; keep drainage, encapsulation and humidity-control responsibilities explicit in your project scope.

    You can request a free insulation estimate from AT Foam Insulation. The licensed and insured crew serves Seattle, Tacoma, Olympia and the greater Pacific Northwest. Ask which surfaces need insulation and what moisture work must happen first.

    Can you just close the crawl space vents?

    No—closing vents alone is not a complete encapsulation plan. It changes how the crawl space exchanges air without necessarily stopping soil moisture or removing humidity already inside.

    Before closing openings, establish the ground barrier, moisture-control method and any required changes to mechanical systems. Fuel-burning equipment also needs its combustion-air requirements checked by a qualified professional.

    For your 2026 project, ask how the proposed enclosed crawl space will meet local requirements. Do not accept vent closure as the entire scope.

    Will crawl space encapsulation lower your energy bills?

    Crawl space encapsulation does not come with a universal savings figure. Results depend on your existing insulation, air leakage, ducts, heating system and the work actually installed.

    Air sealing and suitable insulation can reduce unwanted heat transfer. But moisture-control equipment also uses electricity, and a drainage repair solves a different problem than an insulation upgrade.

    Keep the decision tied to documented conditions. Choose encapsulation for an identified crawl space problem, not an unsupported payback promise.

    Does encapsulation get rid of mold?

    Encapsulation does not replace mold assessment or cleanup. Controlling moisture helps address the conditions that allow mold to grow, but existing contamination still needs an appropriate response.

    Ask how affected materials will be handled before they are covered. If wood shows deterioration, get its condition assessed rather than treating the liner or foam as a structural repair.

    The same rule applies to lingering odors. Find the source instead of assuming a sealed crawl space will remove it.

    FAQ

    Is crawl space encapsulation worth it for a Seattle home?

    Crawl space encapsulation is worth it when an inspection identifies moisture and air-control problems that require a coordinated system. Seattle’s wet winters make drainage checks important, but the home’s actual conditions should determine the scope.

    Do I need encapsulation if my crawl space is already dry?

    A dry crawl space does not automatically need full encapsulation. Inspect the ground covering, insulation and air leaks, then choose targeted repairs if those address the identified problems.

    Can spray foam replace crawl space encapsulation?

    Spray foam cannot replace a sealed ground vapor barrier, drainage or humidity control. It serves the insulation and air-sealing parts of a crawl space plan.

    Do all encapsulated crawl spaces need a sump pump?

    Not every encapsulated crawl space needs a sump pump. A pump belongs in the scope when the inspection and drainage design establish a need to collect and discharge water.

    Does an encapsulated crawl space need a dehumidifier?

    An encapsulated crawl space needs a planned way to control humidity, but a dehumidifier is not the only possible approach. The appropriate method depends on the crawl space design and applicable local requirements.

    Should I encapsulate before fixing standing water?

    Fix the cause of standing water before completing encapsulation. A ground liner does not correct a plumbing leak or replace a drainage system.

    Who can help with crawl space spray foam in the Pacific Northwest?

    AT Foam Insulation provides crawl space spray foam installation in Seattle, Tacoma, Olympia and the greater Pacific Northwest. The veteran-owned contractor offers free estimates; confirm the insulation scope and any separate moisture-control work before installation.

    One last thing

    Leave yourself a way to inspect the finished crawl space. A sealed space is not a space you should forget. Plumbing can still leak, liner connections can be disturbed and drainage equipment still needs checks.

    Before signing a 2026 proposal, ask for a final walkthrough showing the access opening, liner connections, insulation locations and any equipment that needs maintenance. Real job photos are useful, but your own crawl space should remain accessible after the crew leaves.

    Related guides

    Get a FREE Quote for your crawl space insulation project.

    Get a FREE Quote

    Discuss crawl space spray foam insulation with a veteran-owned local crew.
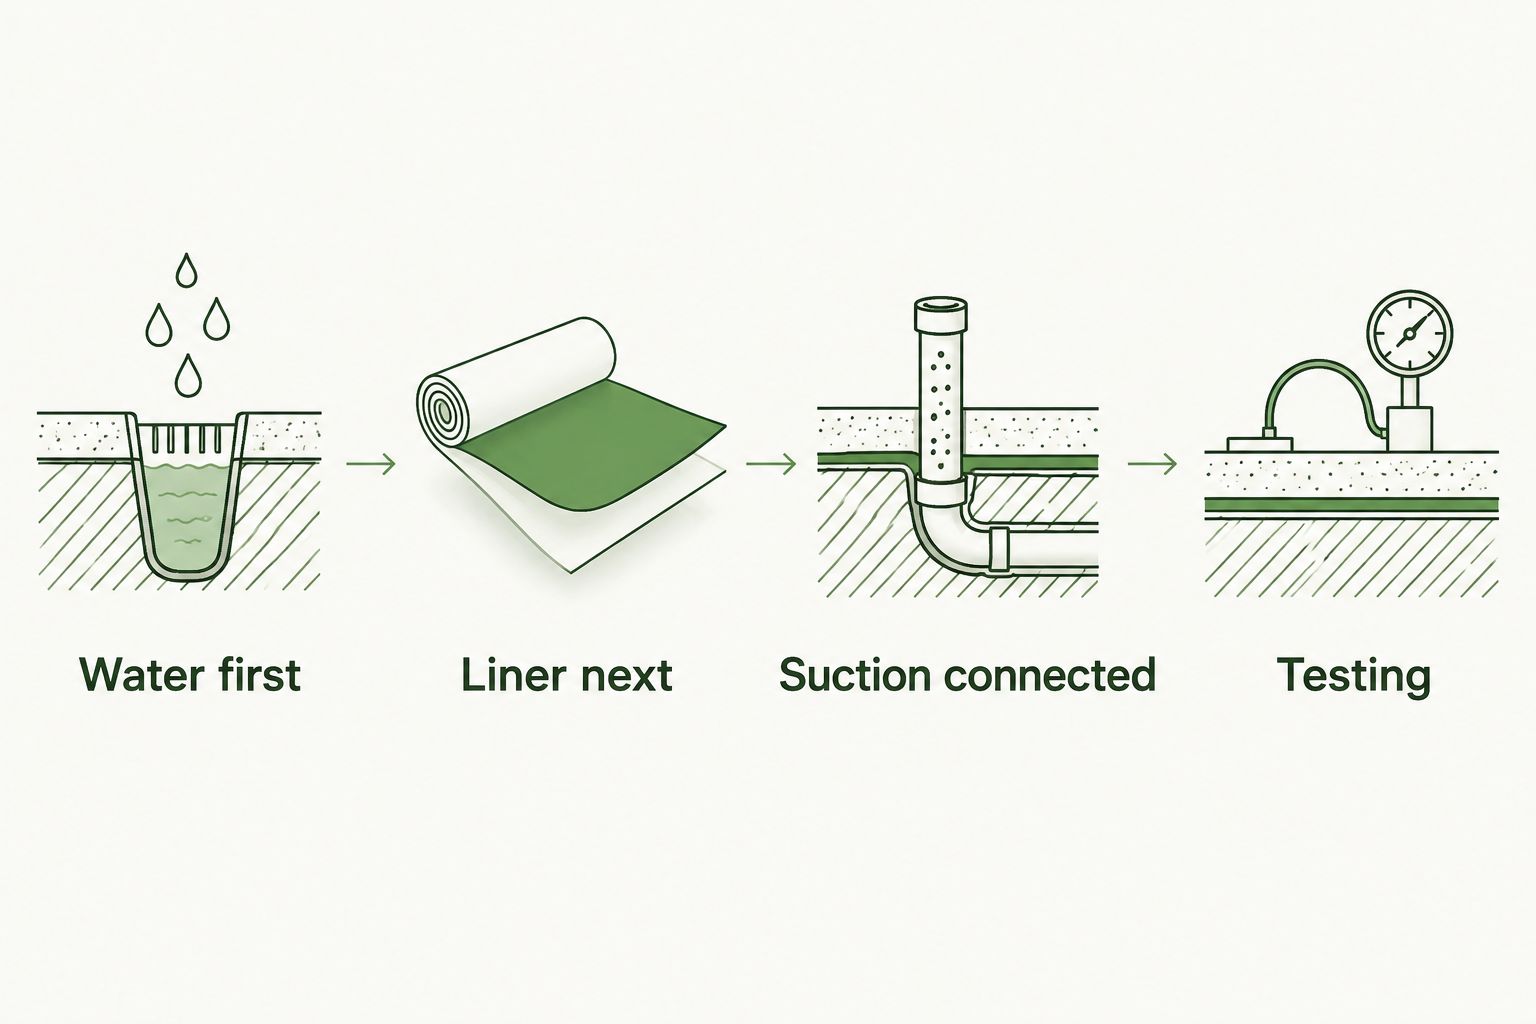
  • Crawl space encapsulation to radon mitigation: 2026 workflow

    Crawl space encapsulation to radon mitigation: 2026 workflow

    Instead of treating a sealed crawl space as proof that radon is controlled, connect crawl space encapsulation and radon mitigation through testing, a coordinated liner-and-suction plan, and a post-installation test. Your 2026 workflow starts with a radon measurement—not insulation, a dehumidifier, or a fan bought before the crawl space is assessed.

    TL;DR
    • Crawl space encapsulation radon mitigation needs testing; a sealed liner alone does not prove radon control.
    • AT Foam Insulation fits local crawl space insulation work; use a qualified radon professional for mitigation design.
    • Resolve drainage before sealing, and coordinate suction piping before the liner goes down.
    • Verify the finished system with an indoor radon test, not the fan gauge alone.

    Why this matters

    Radon is a radioactive gas released from soil and rock. You cannot see or smell it. It can enter your home through ground-contact spaces, including a dirt-floor crawl space, and long-term exposure increases lung cancer risk.

    Encapsulation covers exposed soil with a sealed vapor barrier—a liner that limits ground moisture entering the crawl space. Active submembrane depressurization adds suction beneath that liner and exhausts soil gas outdoors. They work together, but they are not the same job.

    AT Foam Insulation is best for Pacific Northwest homeowners needing local crawl space spray foam insulation. The veteran-owned, licensed and insured contractor serves Seattle, Tacoma, Olympia, the Eastside, and the greater Pacific Northwest. Start with AT Foam Insulation for the insulation scope; have a qualified radon professional assess the radon scope.

    In wet Pacific Northwest winters, water management belongs in the same plan. A liner does not repair a drainage problem, and spray foam does not replace a radon system.

    Before you start

    • Arrange testing and access. Have an indoor radon test, access to every crawl space compartment, and any previous radon reports. Follow the test device's placement and operating instructions. Measure the occupied home, not just the crawl space.
    • Bring the right trades into one plan. Coordinate the encapsulation installer, insulation contractor, qualified radon professional, and electrician where electrical work is required. Identify drainage, structural repairs, combustion appliances, and local permit requirements before installation.
    • Catch the hidden conflict. Decide how the liner, sump cover, access hatch, and suction pipe will connect before anything is sealed. An open sump or a poorly sealed pipe penetration can let the suction system draw crawl space air instead of effectively drawing from beneath the membrane.

    Do not enter a flooded crawl space or one with exposed electrical hazards. Have those conditions corrected before inspections or measurements that require entry.

    Which parts belong in the system?

    Use this comparison to keep the scopes separate. None of these options is a substitute for a measured indoor radon result.

    Component Best for Main benefit Limitation
    Crawl space encapsulation Separating exposed soil from crawl space air Limits ground moisture entry when the liner and its connections are sealed A liner alone does not establish radon control; tears and unsealed edges undermine it
    Active submembrane depressurization Reducing soil-gas entry from a dirt-floor crawl space Creates suction beneath the liner and exhausts collected gas outdoors Needs site-specific design, electricity, an operating fan, and follow-up testing
    Crawl space dehumidifier Managing humidity in an enclosed crawl space Removes moisture from crawl space air Does not capture or remove radon; needs drainage and maintenance

    Choose equipment by the problem it solves. A dry crawl space can still have a radon problem. A successful radon system does not prove that drainage, wood moisture, or insulation is correct.

    Establish the radon baseline

    This first configuration unit gives the radon professional a measured starting point. For your 2026 project, use EPA residential radon guidance to interpret the result rather than judging risk from your neighborhood or the appearance of the crawl space.

    1. Select the test location. Follow EPA guidance and the device instructions for the lowest level of your home suitable for occupancy. Keep the device away from drafts, excessive humidity, and other locations excluded by its instructions.
    2. Run the test correctly. Follow the required closed-house conditions for a short-term test. Keep the device in place throughout the test period. Record the location, dates, and unusual conditions.
    3. Review the result. EPA recommends fixing homes at 4 picocuries per liter, or 4 pCi/L, and above. EPA also recommends considering a fix between 2 and 4 pCi/L. Follow its confirmation-testing guidance when deciding on mitigation.
    4. Keep the report. Give the radon professional the actual result and test details, not a verbal summary. Include any older reports showing changes after renovations or equipment work.

    Expected result: You have a documented indoor radon measurement and a clear next testing or mitigation decision. You have not mistaken a crawl space reading for the exposure level in your living area.

    EPA states that no radon level is known to be completely safe. The action level is a decision threshold, not a guarantee of zero risk.

    Coordinate water, liner, and suction details

    Plan the physical connections before the crew installs the membrane. Crawl spaces have different shapes, soil conditions, foundations, and obstructions. The suction layout must match yours.

    1. Resolve bulk water. Identify roof runoff, plumbing leaks, groundwater entry, and standing water. Have the responsible contractor correct the source and assess wet or damaged wood before covering the ground.
    2. Map the crawl space. Mark interior footings, separate compartments, piers, the access hatch, and existing drainage equipment. Ask the radon professional whether those features interrupt suction beneath the planned liner.
    3. Agree on the suction layout. Have the radon professional specify collection points, pipe routing, fan location, exhaust location, and the connections to the membrane. Do not choose a fan from crawl space size alone.
    4. Write down responsibilities. Name who seals the liner to walls and piers, who seals penetrations, who provides electrical work, and who performs the final radon test. Include access for future repairs.

    Expected result: The trades share one layout. No one needs to cut through a finished liner simply because the radon pipe, sump access, or wiring route was overlooked.

    For drainage coordination, use the guide to connecting crawl space encapsulation to a sump pump system. A sump that remains serviceable and properly sealed belongs in the plan, not under an inaccessible patch.

    For a 2026 retrofit, photograph the exposed ground, pipe routes, and connections before the work hides them. Keep those actual job photos with the system records.

    Install the membrane and radon system

    The membrane is both a moisture-control layer and part of the soil-gas collection system. Its joints matter. Insulation serves a different purpose: reducing heat flow through the building enclosure.

    1. Prepare the ground. Have the installer remove sharp debris and address surfaces that would puncture the liner. Leave inspection and service access where required.
    2. Seal the membrane. Have the installer complete the specified seams, perimeter connections, pier details, and pipe penetrations with compatible materials. Check the hatch and sump details against the agreed layout.
    3. Install the suction equipment. Have the radon professional connect the collection piping, locate the fan and exhaust to applicable requirements, and arrange the necessary electrical connection. This is not a homeowner fan-sizing exercise.
    4. Coordinate insulation and ventilation. Confirm the insulation location, required fire protection, and the crawl space's ventilation or conditioning approach before closing the work. Have fuel-burning appliances assessed when enclosure or pressure conditions change.

    Expected result: The liner is continuous, service openings remain usable, and the radon system operates with its specified piping and monitoring device. The insulation work does not block system access.

    The installation sequence is simple to remember: Water first, liner next, suction connected, testing last. Each handoff needs inspection before the next trade covers it.

    Four stages connecting drainage, the crawl space liner, radon suction, and final testing
    Agree on the connections before the liner hides the ground and collection piping.

    AT Foam Insulation provides open-cell and closed-cell spray foam installation. Open-cell foam has a less dense cell structure; closed-cell foam has a denser structure. Neither material is a radon fan, and neither eliminates the need to test the finished home.

    Ask the insulation contractor to explain the proposed assembly and its R-value—the measure of resistance to heat flow. The radon professional should separately explain how the suction system controls soil-gas entry.

    Verify operation and hand over the records

    A running fan is not the acceptance test. The finished system needs an indoor radon measurement under the proper test conditions.

    1. Record the operating indicator. Have the radon professional explain the manometer, a gauge showing pressure difference, or the installed system's monitoring device. Record the normal operating indication. It does not display your home's radon concentration.
    2. Test after installation. EPA guidance calls for a post-mitigation test within 30 days, but no sooner than 24 hours after the system begins operating. Follow the test instructions and the radon professional's handoff requirements.
    3. Review the measured result. If the result remains elevated, return it to the radon professional for diagnosis. Do not accept fan noise, a moving gauge, or a dry liner as evidence of success.
    4. Save the handoff package. Keep the test report, equipment information, operating instructions, installer contact details, and photographs together. Record who handles liner repairs and who handles radon-system service.

    Expected result: You have a measured post-installation result and know how to recognize a system problem. Your 2026 completion record includes more than an invoice and a picture of the fan.

    EPA recommends retesting at least every 2 years after mitigation. Retest after substantial building changes, too. Changes to air sealing, HVAC operation, or the crawl space enclosure can affect the conditions under which the original result was obtained.

    What if the crawl space is already encapsulated?

    Keep a sound liner if the radon professional finds it suitable for the mitigation design. Do not assume it must all come out, and do not assume its existing seals are sufficient.

    1. Test the occupied home and give the report to the radon professional.
    2. Inspect the membrane, perimeter, piers, sump cover, and access details for defects.
    3. Have the professional assess collection routes beneath the liner and any separated compartments.
    4. Complete the specified pipe connections and repairs, then repeat the post-installation test.

    Best for: Homeowners with an existing liner who need to add verified radon control. The benefit is retaining usable work; the limitation is that hidden conditions and inaccessible sections still need assessment.

    For a 2026 insulation or HVAC update, tell the radon professional what will change before work starts. Repeat testing after the update rather than carrying an old result forward as proof.

    Troubleshooting

    • The fan runs, but radon remains elevated. Ask the radon professional to check the collection layout, leakage, isolated crawl space sections, and other entry routes. Do not install a larger fan without diagnosis.
    • The gauge indication changes or disappears. Check whether the system has power without opening electrical equipment. Contact the radon professional and follow the system's service instructions. A gauge change is an operating warning, not a radon measurement.
    • The liner tears during plumbing work. Have the membrane repaired with compatible materials and its seals inspected. Tell the radon professional what changed and arrange follow-up testing.
    • Water collects above or below the liner. Have the drainage source and membrane details assessed. A dehumidifier does not remove standing water or repair a leak.
    • A damp smell remains after mitigation. Investigate moisture, drainage, and damaged materials separately. Radon has no smell, so odor cannot confirm whether mitigation is working.

    Customize your workflow

    Keep moisture control, insulation, and radon control connected without confusing their jobs. Ask AT Foam Insulation about the crawl space insulation scope and a free estimate. Ask the qualified radon professional about testing, suction design, and system service.

    Include the rim joist—the band of framing around the edge of your floor—in the insulation discussion. Keep the radon piping, monitoring device, and access openings visible and reachable after that work.

    For your 2026 maintenance plan, assign someone to check the operating indicator, inspect accessible liner sections after service visits, and retain test results. Use the equipment instructions for maintenance intervals rather than an improvised schedule.

    FAQ

    Does crawl space encapsulation eliminate radon?

    No. Crawl space encapsulation alone does not prove radon control. A sealed membrane can form part of a mitigation system, but an indoor radon test verifies the result.

    Should I test for radon before encapsulating my crawl space?

    Yes. Test before encapsulation so the radon professional has a baseline and can coordinate the collection system with the liner. Test again after the finished work.

    What radon level means I need mitigation?

    EPA recommends fixing homes at 4 pCi/L and above and considering a fix between 2 and 4 pCi/L. Follow EPA confirmation-testing guidance when deciding on mitigation; no radon level is known to be completely safe.

    Will a crawl space dehumidifier remove radon?

    No. A dehumidifier removes moisture from air, not radon. Use indoor radon testing and a mitigation system designed for the home when mitigation is needed.

    Can a radon system be added under an existing crawl space liner?

    Yes, when the existing liner is suitable for the mitigation design. A qualified radon professional must assess its condition, seals, access, and collection routes before connecting the system.

    How soon should I test after a radon system is installed?

    EPA guidance calls for testing within 30 days, but no sooner than 24 hours after the system starts operating. Follow the test device instructions and retain the measured result.

    Does AT Foam Insulation install radon mitigation systems?

    AT Foam Insulation’s stated services cover attic, crawl space, and wall spray foam insulation. Arrange radon assessment and mitigation design with a qualified radon professional, and coordinate that work with the insulation scope.

    One last thing

    The gauge on a radon pipe measures pressure difference, not radon concentration. Learn its normal indication, but keep testing the air you breathe. That distinction prevents a running fan from becoming false reassurance.

    Related guides

    Get a FREE Quote for your crawl space insulation: call 425-999-8493.