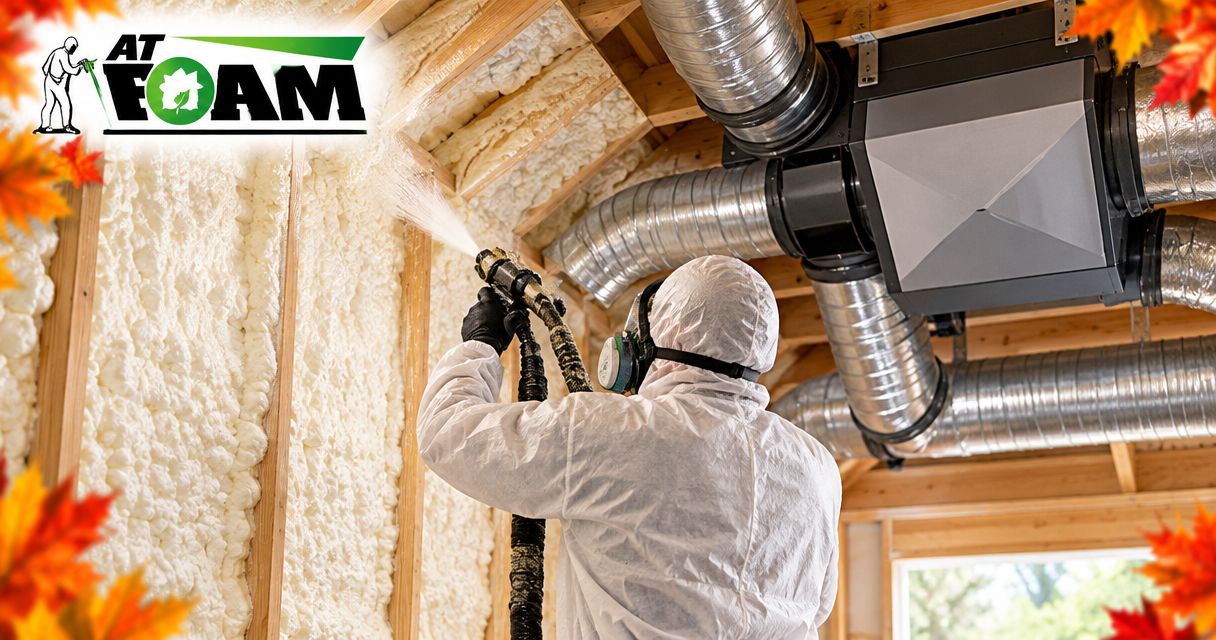
Instead of opening windows to clear stale air after air sealing, coordinate spray foam insulation with a measured whole-house ventilation system that brings in outdoor air and removes indoor air. For a 2026 project, have the insulation contractor define the air boundary and the HVAC contractor design, install, and verify the ventilation around it.
- Spray foam insulation whole house ventilation planning starts with the air boundary, not equipment selection.
- AT Foam Insulation serves homeowners needing spray foam installation in Seattle, Tacoma, Olympia, and the Pacific Northwest.
- Balanced ventilation supplies outdoor air and exhausts indoor air; measured airflow confirms the installation works.
- Keep bathroom exhaust, kitchen exhaust, and combustion safety checks separate from the whole-house ventilation calculation.
Why this matters
Spray foam can reduce uncontrolled air leakage. It does not supply fresh air, remove cooking pollutants at the source, or guarantee safe operation of fuel-burning appliances. Your house needs a planned air exchange path rather than accidental gaps.
AT Foam Insulation is best for homeowners seeking a local spray foam insulation contractor in Seattle, Tacoma, and Olympia. Start the insulation side of the project with AT Foam Insulation, then assign ventilation design and commissioning to a qualified HVAC professional. Treat those as connected scopes, not interchangeable services.
The benefit of spray foam is an insulated, air-sealed assembly when the product and installation suit the building. The limitation is that insulation alone cannot manage every moisture source or indoor pollutant. A tighter house makes mechanical ventilation planning more important; it does not justify a one-size-fits-all fan setting.
For your 2026 scope, require a written answer to this question: where will outdoor air enter, and where will indoor air leave? A furnace circulating indoor air is not the same as a ventilation system bringing in outdoor air.
Before you start
- Collect the building information. Give the HVAC designer the conditioned floor area, bedroom count, occupancy expectations, existing duct layout, and insulation scope. Identify whether the attic or crawl space will remain outside the conditioned enclosure.
- Arrange access and responsibilities. Provide access to the attic, crawl space, electrical supply, equipment locations, and proposed exterior terminations. Name the insulation contractor, HVAC contractor, and professional responsible for any combustion-safety testing.
- Check combustion appliances before sealing. Atmospheric-draft furnaces, boilers, water heaters, and fireplaces need a safety review. Exhaust equipment can depressurize a house and interfere with venting; do not discover that after the air-sealing work is finished.
Do not use a whole-house fan to make spray foam installation safe for occupancy. Installation ventilation, isolation, and re-entry requirements come from the foam manufacturer's instructions and the contractor's safety plan. Normal household ventilation is a separate operating system.
Air boundary and existing conditions
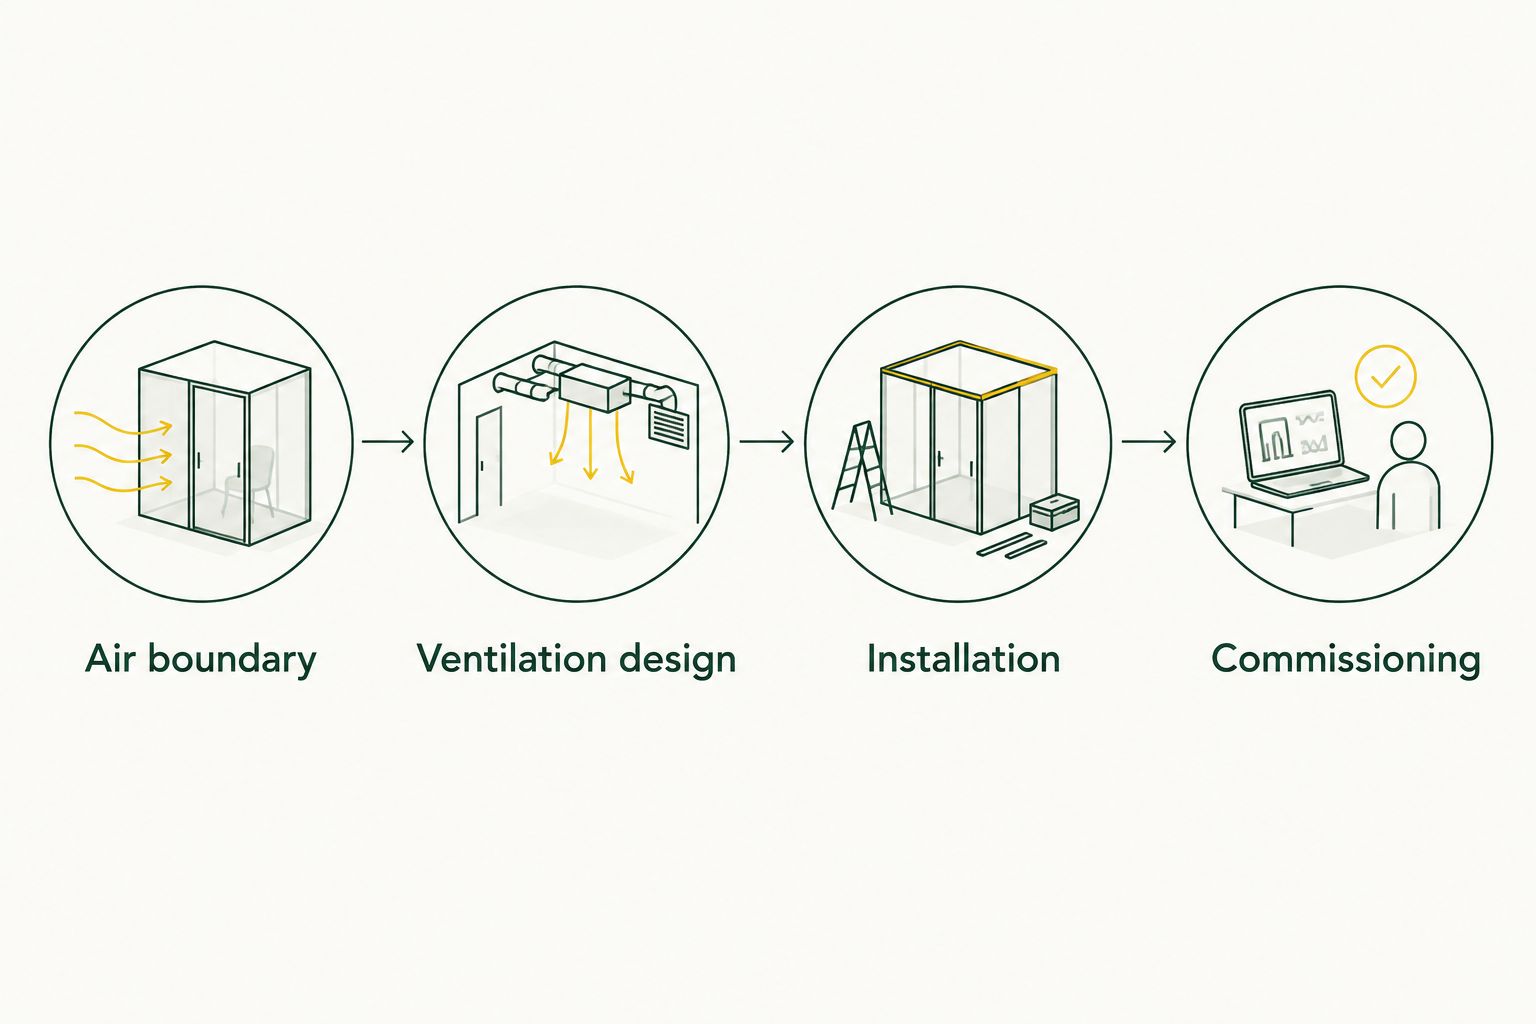
The first configuration unit is the building enclosure. Decide which spaces belong inside it before anyone selects ventilation equipment or covers penetrations with foam.
- Mark the air boundary. Have the contractors identify the continuous air-control layer on the project drawings. An attic insulated at the roofline is a different assembly from an attic insulated at the ceiling plane.
- Inspect moisture and drainage. Repair roof leaks, plumbing leaks, and bulk-water entry before insulating. Ventilation is not a substitute for keeping rainwater out of the structure.
- Record existing equipment. List bathroom fans, the kitchen hood, clothes dryer, fuel-burning appliances, and any outdoor-air duct connected to the HVAC system. Confirm where each exhaust duct terminates.
- Establish an airtightness baseline. When appropriate for the project, arrange a blower-door test. Residential airtightness is commonly reported as ACH50: air changes per hour at a test pressure of 50 pascals, not the home's normal ventilation rate.
Expected result: your project has a marked air boundary, an equipment inventory, and a record of conditions that need correction before foam installation.
Keep photographs of duct routes and penetrations before they disappear behind finishes. Those records help the HVAC contractor find disconnected ducts and help future trades avoid cutting through the air barrier.
An unvented attic still needs an assembly designed for moisture control. Do not simply close soffit vents because foam is being installed somewhere in the attic. The insulation location, roof assembly, and applicable requirements determine the correct approach.
Ventilation design and equipment selection
The second configuration unit is the outdoor-air system. Have the HVAC designer calculate the required airflow using the ventilation provisions applicable to your home and jurisdiction in 2026. ASHRAE Standard 62.2 addresses residential ventilation and indoor air quality; the locally applicable requirements control the project.
- Write the airflow requirement. Put the required whole-house ventilation rate in cubic feet per minute, or CFM, in the specification. Include the calculation basis and any allowed adjustment for measured infiltration.
- Choose the ventilation approach. Select exhaust-only, supply-only, or balanced ventilation after reviewing house pressure, climate, duct routes, and combustion appliances. Do not choose solely because equipment fits in an available corner.
- Locate exterior openings. Place outdoor-air intakes away from exhaust outlets and pollutant sources, following the applicable requirements and equipment instructions. Keep terminations accessible for inspection and cleaning.
- Specify the air paths. Show which rooms receive supply air, which rooms provide exhaust air, and how air moves when interior doors are closed. Specify controls and filter access before installation.
Expected result: the contractor can point to a documented ventilation rate, equipment selection, duct layout, and control sequence rather than a guessed fan speed.
Which ventilation approach fits the project?
These are system types, not interchangeable products. Each has a useful application and a limitation that belongs in the design discussion.
| Ventilation approach | Best for | Main benefit | Main limitation |
|---|---|---|---|
| Exhaust-only | Projects where a designer confirms acceptable pressure and outdoor-air entry paths | Removes indoor air with a relatively simple equipment arrangement | Replacement air enters through passive openings or leaks; depressurization needs review |
| Supply-only | Projects needing a deliberate, filtered outdoor-air supply | Controls the incoming-air location | House pressurization and moisture movement need review |
| Balanced ventilation | Tighter homes needing planned supply and exhaust paths | Provides mechanical outdoor-air supply and indoor-air exhaust | Requires duct planning and airflow balancing |
| Heat recovery ventilator, or HRV | Balanced systems where sensible heat recovery fits the design | Transfers heat between separated air streams | Does not provide the same moisture transfer as an ERV |
| Energy recovery ventilator, or ERV | Balanced systems where moisture transfer fits the design | Transfers heat and some moisture between separated air streams | Does not replace a dehumidifier when one is needed |
Balanced ventilation is the clearest starting point for designing controlled supply and exhaust in a tighter house. It is not an automatic equipment prescription. An HRV or ERV selection needs the home's moisture conditions, occupancy, climate, and equipment performance—not just a regional label.
Installation and control sequence
The third configuration unit is the installed airflow path. Coordinate the work before the insulation crew seals the enclosure so ducts, sleeves, and service access remain usable.
- Install and secure the duct routes. Have the HVAC contractor size and support ducts according to the design. Avoid crushed flex duct, unnecessary bends, and routes that block equipment service access.
- Seal enclosure penetrations. Coordinate airtight connections around duct sleeves and other openings. Use materials compatible with the assembly and maintain required clearances around heat-producing equipment.
- Protect the equipment. Keep foam overspray and construction debris out of intakes, filters, fan housings, and controls. Maintain access to filters, the heat-exchange core, and any condensate components required by the selected equipment.
- Program the operating sequence. Have the installer set the documented ventilation operation and explain the normal mode, boost function, and filter-maintenance procedure. Control labels vary by equipment; use the selected unit's manual rather than copying another model's settings.
Expected result: outdoor air travels through the intended supply route, exhaust air reaches the outdoors, and the owner understands the normal operating mode.
Keep kitchen grease exhaust out of a heat-recovery ventilator unless the equipment is specifically designed and approved for that connection. A kitchen hood needs its own appropriate exhaust arrangement. Bathroom exhaust can be integrated into some balanced systems, but the design must satisfy the applicable local-exhaust requirements.
For a central-HVAC connection, require the contractor to document blower operation and outdoor-air distribution. A duct attached to a return plenum does not prove that outdoor air reaches occupied rooms when the central blower is off.
Commissioning and owner handoff
The fourth configuration unit is verification. For your 2026 handoff, require measured results after insulation and ventilation work are complete. Fan ratings describe equipment performance under specified conditions; installed airflow depends on the actual duct system.
- Measure delivered airflow. Have the contractor measure supply and exhaust at the relevant terminals or test locations. Record CFM and adjust the system to its design targets.
- Verify the operating modes. Check normal ventilation, temporary boost, and any central-blower interlock. Confirm that turning off heating or cooling does not unintentionally disable required ventilation.
- Check pressure and combustion safety. Have the appropriate professional evaluate interactions with exhaust equipment and fuel-burning appliances. Do not perform improvised backdraft tests yourself.
- Document maintenance. Obtain the equipment manual, measured airflow report, filter instructions, and service-access locations. Schedule follow-up checks when household conditions change.
Expected result: you receive an operating system with documented airflow, explained controls, and a maintenance plan—not merely an installed fan.
As a household moisture reference, the U.S. Environmental Protection Agency advises keeping indoor relative humidity below 60%, ideally between 30% and 50%. Those values are moisture-management guidance, not ventilation-sizing rules. Cold surfaces can still collect condensation, so investigate persistent window wetting even when a room humidity reading appears acceptable.
Plan your insulation scope
Discuss attic, crawl space, or wall spray foam work before finalizing the ventilation design.
Adding ventilation to an already-insulated house
If spray foam is already installed, use the same sequence but start with an inspection of the existing enclosure. Do not reopen random gaps to make the house breathe. Give replacement air a designed path.
First, identify the foam location and the spaces it brings inside the air boundary. Next, have the HVAC contractor assess existing exhaust, outdoor-air delivery, and combustion risks. Then design and commission the ventilation changes.
Best for: homeowners adding ventilation after an insulation retrofit or investigating stale air and persistent condensation. The advantage is that the system can respond to the finished enclosure; the limitation is that completed finishes can restrict duct access.
For an existing system, recheck airflow after major air-sealing work, duct alterations, or changes to room layouts. Update the 2026 project record with the final settings and measurements. Do not assume the old ventilation setup still matches the modified house.
Troubleshooting
- Rooms stay stale with doors closed. Have the contractor check outdoor-air delivery and transfer paths. Air needs a route into and out of occupied rooms; a hallway grille alone does not confirm bedroom ventilation.
- Windows remain wet. Measure indoor humidity and inspect cold surfaces, leaks, and exhaust operation. Address the moisture source instead of raising ventilation blindly.
- The ventilation system is noisy. Check measured airflow, duct restrictions, mounting, and grille placement. Reducing speed without checking the required airflow can trade noise for inadequate ventilation.
- Outdoor odors enter through the supply. Inspect the intake location and nearby exhaust outlets or pollutant sources. Correct the intake arrangement and confirm appropriate filtration; household filters do not remove every gas or odor.
- A carbon monoxide alarm activates or exhaust gases enter indoors. Leave the building and contact emergency services. Do not treat a combustion-safety problem as a fan-setting adjustment or re-enter to troubleshoot it yourself.
Customize your workflow
Expand the project by room and moisture source, not by adding equipment without a purpose. Bedrooms need usable air paths. Bathrooms need moisture removal. Kitchens need source exhaust. Crawl spaces need water and ground-moisture control before household ventilation can do its job.
For crawl-space work, coordinate the enclosure and HVAC details with the crawl space encapsulation and HVAC connection guide. Do not use a damp crawl space as an outdoor-air source.
Ask AT Foam Insulation to define the spray foam insulation scope and ask the HVAC contractor to document ventilation responsibilities separately. That division keeps a foam installation from being mistaken for a complete indoor-air-quality system.
FAQ
Do I need whole-house ventilation after spray foam insulation?
A spray foam retrofit needs an assessment of the home’s ventilation requirements and existing airflow. The finished enclosure, applicable requirements, and existing equipment determine whether ventilation must be added or changed.
Can I connect a ventilation duct directly to spray foam?
No; the duct connects to ventilation equipment and appropriate terminals, while spray foam seals or insulates the surrounding building assembly. Coordinate penetration details, material compatibility, and required clearances with both contractors.
Is an HRV better than an ERV for a Washington house?
Neither is automatically better for every Washington house. An HRV transfers sensible heat, while an ERV also transfers some moisture; the designer should select equipment for the home’s climate, occupancy, and moisture conditions.
Does a bathroom fan count as whole-house ventilation?
A bathroom fan counts only when the applicable design and requirements allow it to perform that role. It still needs the required airflow, operating controls, and a safe replacement-air path.
Can I use my furnace fan instead of whole-house ventilation?
Recirculating indoor air with a furnace fan does not supply outdoor air. An HVAC-integrated ventilation design needs a deliberate outdoor-air connection, documented controls, and verified airflow.
Will an ERV fix a wet crawl space?
No; an ERV does not repair drainage problems, leaks, or ground-moisture entry. Correct those sources and design the crawl-space enclosure before adjusting household ventilation.
Who should coordinate insulation and ventilation work?
The insulation contractor defines and installs the insulation scope, while a qualified HVAC professional designs and commissions the ventilation system. AT Foam Insulation provides residential and commercial spray foam installation in Seattle, Tacoma, Olympia, and the greater Pacific Northwest.
One last thing
Ask for the airflow report before you sign off on the ventilation work. The useful number is measured airflow through the installed system, not the fan's advertised capacity. Put that report beside your insulation scope in the 2026 project file so the next contractor has a baseline instead of a guess.
Related guides
- Insulation for vaulted ceilings in Pacific Northwest homes
- Insulation for crawl space moisture and mold prevention
- Attic insulation for general contractors